Upload Images from IoT Devices Using Block Upload
Ever wondered how to upload big chunks of data from IoT devices? Images are a great example, even a relatively small (and well compressed) photo is pretty large when speaking in terms of low-power, remote devices. The solution is to have the device break up the data into blocks that the server will reassemble into a file. The good news is that Golioth has already taken care of this! Today, we’ll walk through how to upload images from IoT devices using block upload.
Overview
There’s nothing particularly special about images, but they are usually fairly large; on the order of tens or hundreds of kilobytes. Golioth’s block upload works for whatever data you want to send, as we’re simply streaming bytes back to the server. Here’s what’s involved:
- Set up a Golioth Pipeline to configure how your data upload will be routed on the cloud
- Capture an image (or other large hunk of data)
- Write a callback function to supply the blocks of data
- Call
golioth_stream_set_blockwise_sync(), supplying your callback
This really is all it takes to push lots of data up to the cloud from a constrained device.
As part of our AI Summer, I put together an example application that captures images from a camera module and uploads them to Golioth. It uses Zephyr and runs on an Espressif ESP32, Nordic nRF9160dk, or NXP mimxrt1024-evk.
1. Set up a pipeline
We’ll be sending data to Golioth’s Stream service so we need to add a pipeline to tell Golioth what to do with that data. For this example, we’re taking the received image and routing it to an Amazon S3 bucket. There is already a pipeline included in the example:
filter:
  path: "/file_upload*"
  content_type: application/octet-stream
steps:
  - name: step0
    destination:
      type: aws-s3
      version: v1
      parameters:
        name: golioth-pipelines-test
        access_key: $AWS_S3_ACCESS_KEY
        access_secret: $AWS_S3_ACCESS_SECRET
        region: us-east-1
Add this to your project by navigating to the Golioth web console, using the left sidebar to select Pipelines, and clicking the Create button. Don’t forget to enable your pipeline after pasting and saving it. You’ll need to add an access_key and access_secret for your S3 bucket to the Credentials→Secrets in your Golioth console.
Of course S3 is just one of many destinations. Check out the Destinations page of the Golioth Docs for more.
2. Capture an Image
The particulars of capturing an image with an embedded device are beyond the scope of this post. If you want to follow along exactly with the example, there’s information for purchasing and connecting a camera in the README file.
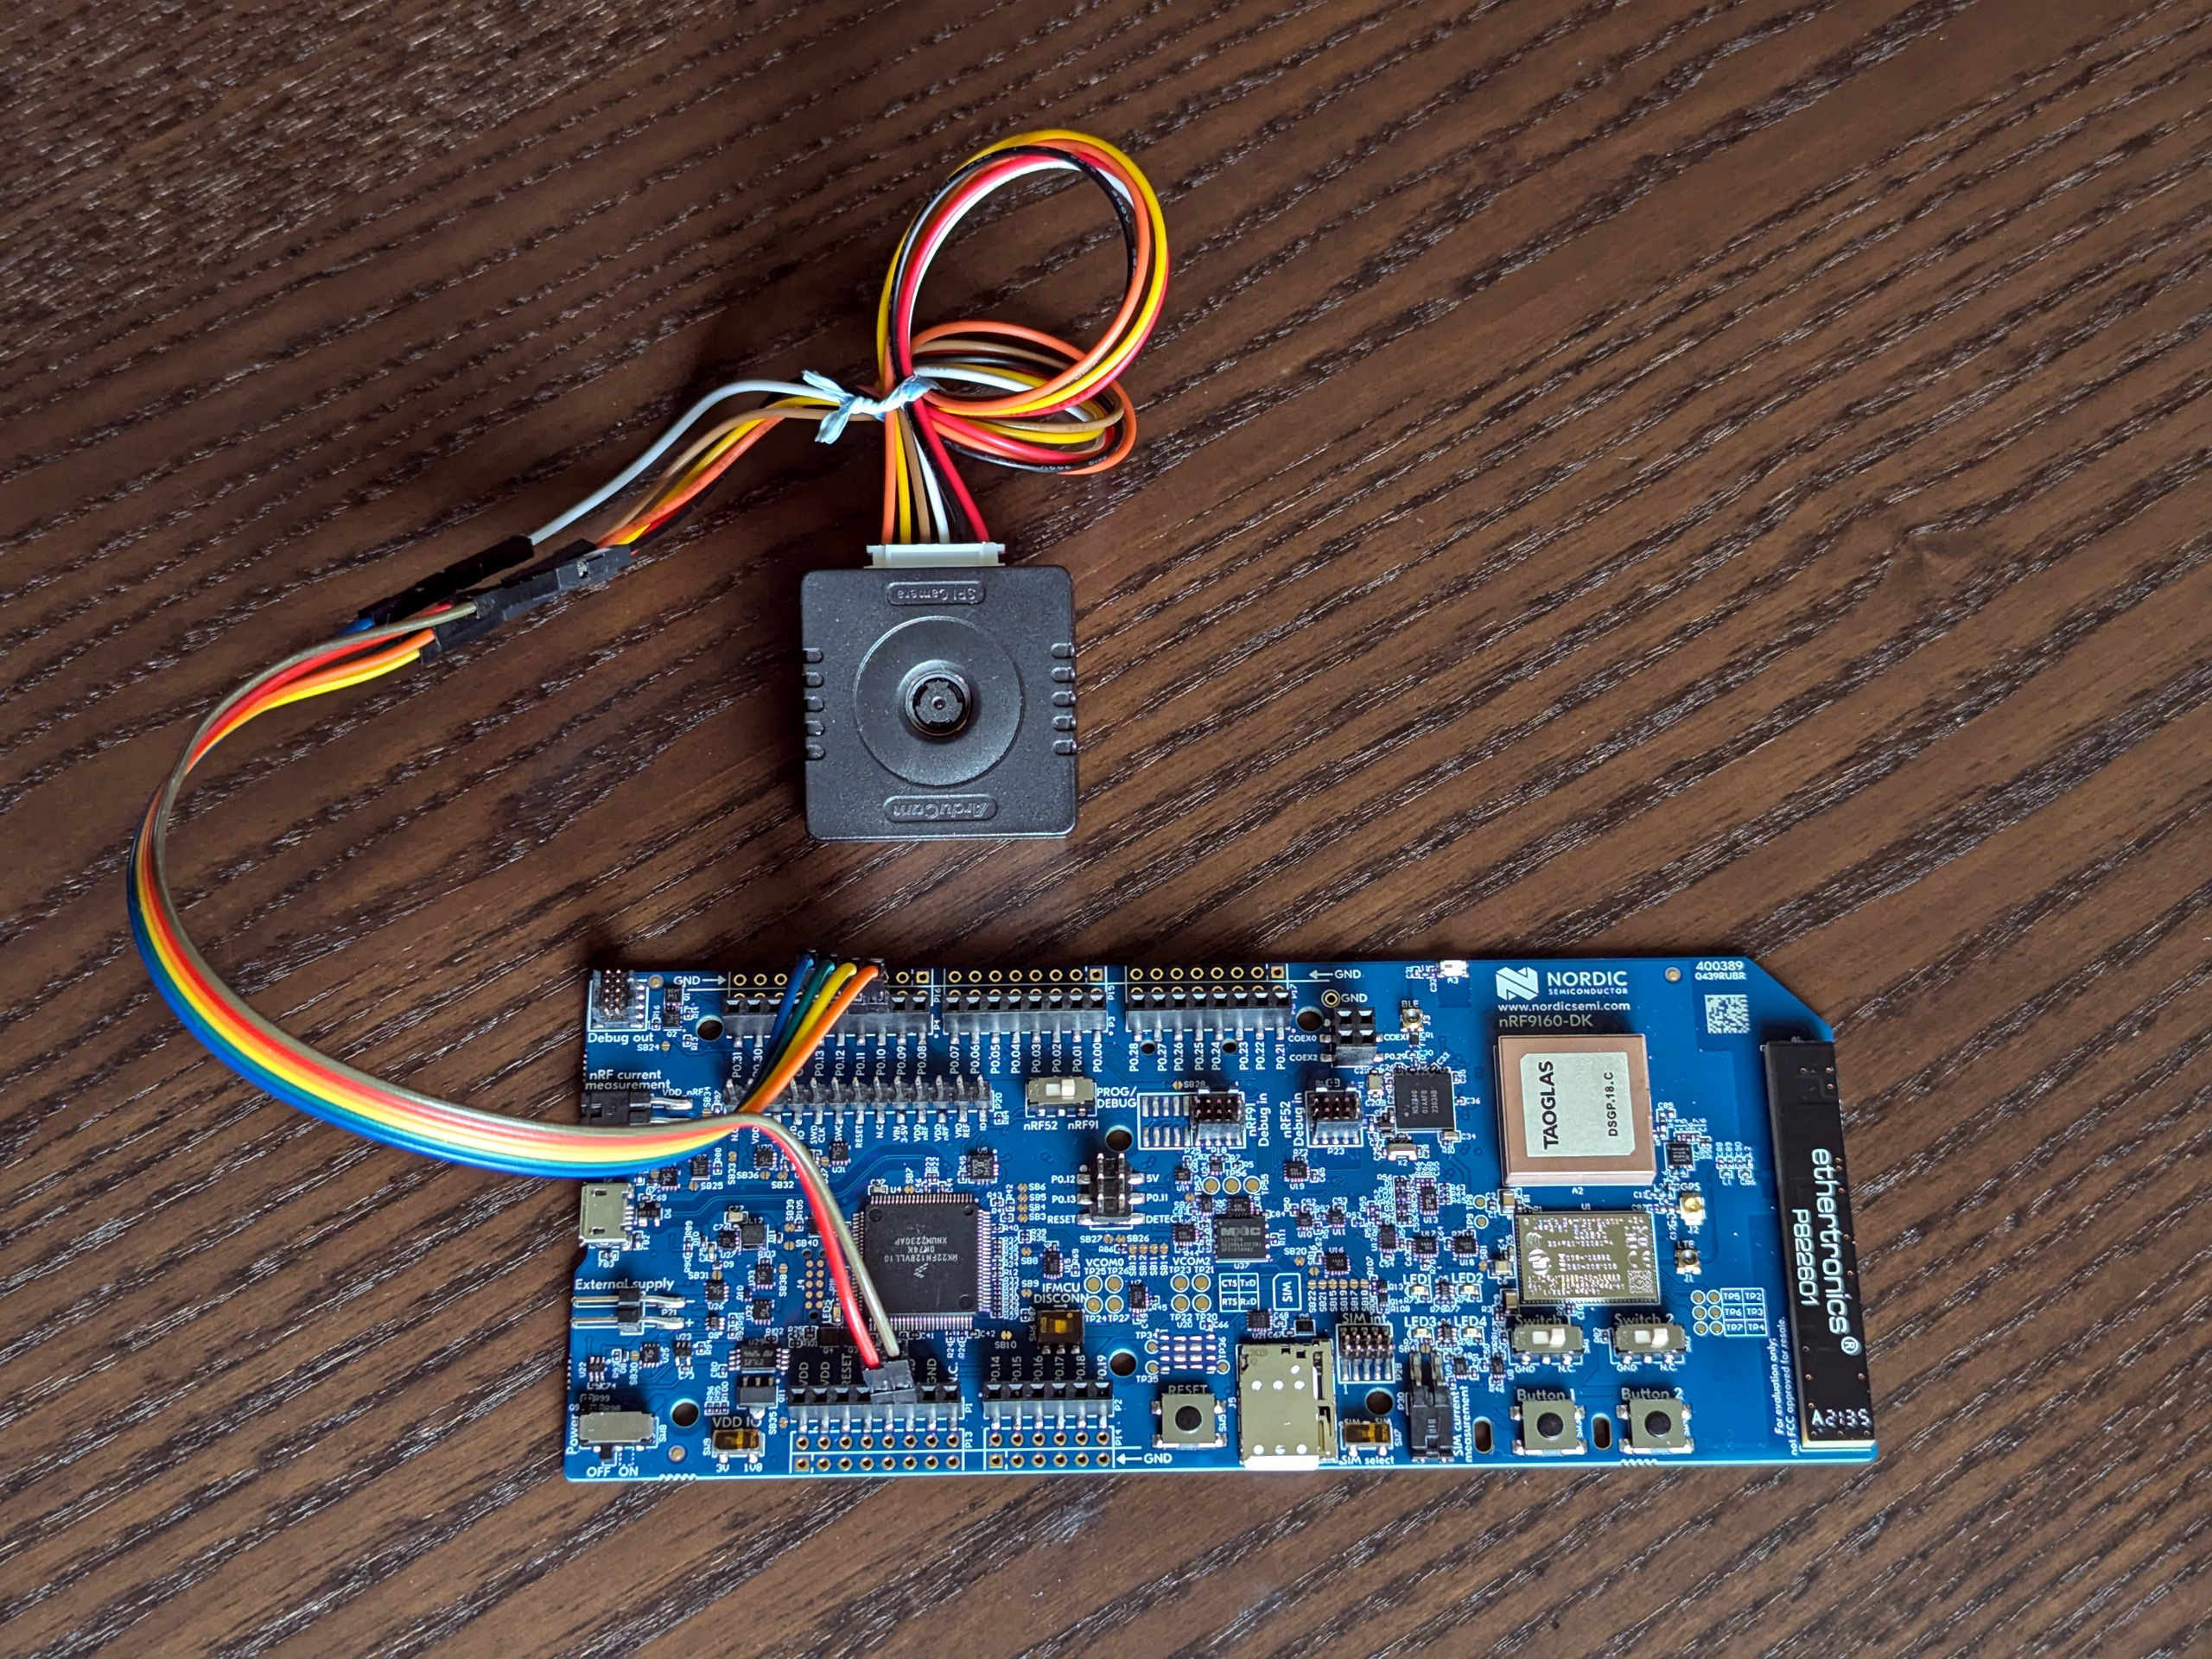
nRF9160dk connected to an Arducam Mega 5MP-AF
However, this example also demonstrates block upload of a large text file stored as a C header file. You can simply comment out the camera initialization code and use button 2 on your dev board to send the text file instead.
3. Write a Callback Function for Block Upload
This is where most of the work happens. The Golioth Firmware SDK will call this function each time it needs a block of data. You need to write your own function to fill a buffer with the correct block. Here’s what the function prototype looks like:
enum golioth_status block_upload_camera_image_cb(uint32_t block_idx,
                                                 uint8_t *block_buffer,
                                                 size_t *block_size,
                                                 bool *is_last,
                                                 void *arg)
Callback Arguments
Let’s do a quick explainer on what each of these functions represents:
block_idx: the block number to be sent to the server, starting at 0block_buffer: a pointer to memory where you should copy your datablock_size: the size of the block–this dictates how many bytes you should copy into the buffer and should be reset to a smaller number if your last block is not this largeis_last: set this to true if you are sending the last blockarg: pointer to custom data you supply when beginning the block upload
Working example
The callback for uploading text files is a good place to learn about how this system works. I’ve simplified the function, removed all of the error checking and logging, and will use line numbers to walk through the code.
static enum golioth_status block_upload_read_chunk(uint32_t block_idx,
                                                   uint8_t *block_buffer,
                                                   size_t *block_size,
                                                   bool *is_last,
                                                   void *arg)
{
    size_t bu_offset = block_idx * bu_max_block_size;
    size_t bu_size = fables_len - bu_offset;

    if (bu_size <= block_size)
    {
        /* We run out of data to send after this block; mark as last block */
        *block_size = bu_size;
        *is_last = true;
    }

    /* Copy data to the block buffer */
    memcpy(block_buffer, fables + bu_offset, *block_size);
    return GOLIOTH_OK;
}
- Line 7: calculate the offset to read source data by multiplying the block size by the block index number.
- Line 8: calculate how many bytes of source data remain by subtracting the offset from the data source length.
- Line 10-15: Check if the remaining data is smaller than the block size. If so we need to update
block_sizeandis_lastto indicate this is the final block. - Line 18: Copy the data into the
block_buffer. - Line 19: Return a status code indicating block data is ready to send.
In reality there is more error checking to be done, and if a problem is encountered the block should be marked as last and an error code returned. View the entire function from the example.
Special cases for using an arg and reading from the camera
Two things are worth calling out in this step: user args and special camera memory.
The text upload in the example uses a struct to pass in the source data buffer and its length. This way, different files/data structures can use the same block upload callback. The struct indicating the data is passed in as a user argument and accessed inside the callback.
Uploading images from this particular camera is also a special case. The camera itself has RAM where a captured image is stored. In the example, that memory is read each time the block upload callback runs.
4. Call golioth_stream_set_blockwise_sync()
This is the easy part, we just need to trigger the block upload.
camera_capture_image(cam_mod);
err = golioth_stream_set_blockwise_sync(client,
                                        "file_upload",
                                        GOLIOTH_CONTENT_TYPE_OCTET_STREAM,
                                        block_upload_camera_image_cb,
                                        (void *) cam_mod);
Above is the code used by the example to capture an image and upload it. The cam_mod variable is a pointer to the camera module. Notice that it is passed as the user argument (the final parameter) when beginning the upload. This way, the block_upload_camera_image_cb() callback will have a pointer to the camera it can use to read image data and copy to the block_buffer for upload.
Once this runs, the image will be uploaded to Golioth and the pipeline will route it to an S3 bucket. Remember, devices connect to Golioth with CoAP, so you get the benefit of an efficient protocol and the ease of using the Firmware SDK to handle transmission to the cloud.
Make IoT Data Easy to Work With
Getting data to and from a large fleet of IoT devices has long been a tricky process. We don’t think that every company should have to reinvent the wheel. Golioth has built the universal connector for your IoT fleet, take it for a spin today!


Start the discussion at forum.golioth.io