Zephyr has a lot of tricks up its sleeve and most recently I used it to enable power regulators on a custom Golioth board. Perhaps the most interesting part of this is that it can be done entirely with the configuration code, without needing to dive in to any of the C files. And as the icing on the cake, Zephyr even includes interactive shell for working with regulators!
If you’ve been following our blog for a while, or you’ve checked out our growing library of reference designs, you’ll know that we’ve been using an internal hardware platform codenamed “Aludel” for rapid prototyping. Chris Gammell has been busy working on a new version of the Aludel main board with the ability to shut off power to the mikroBUS Click board sockets for low-power operation.
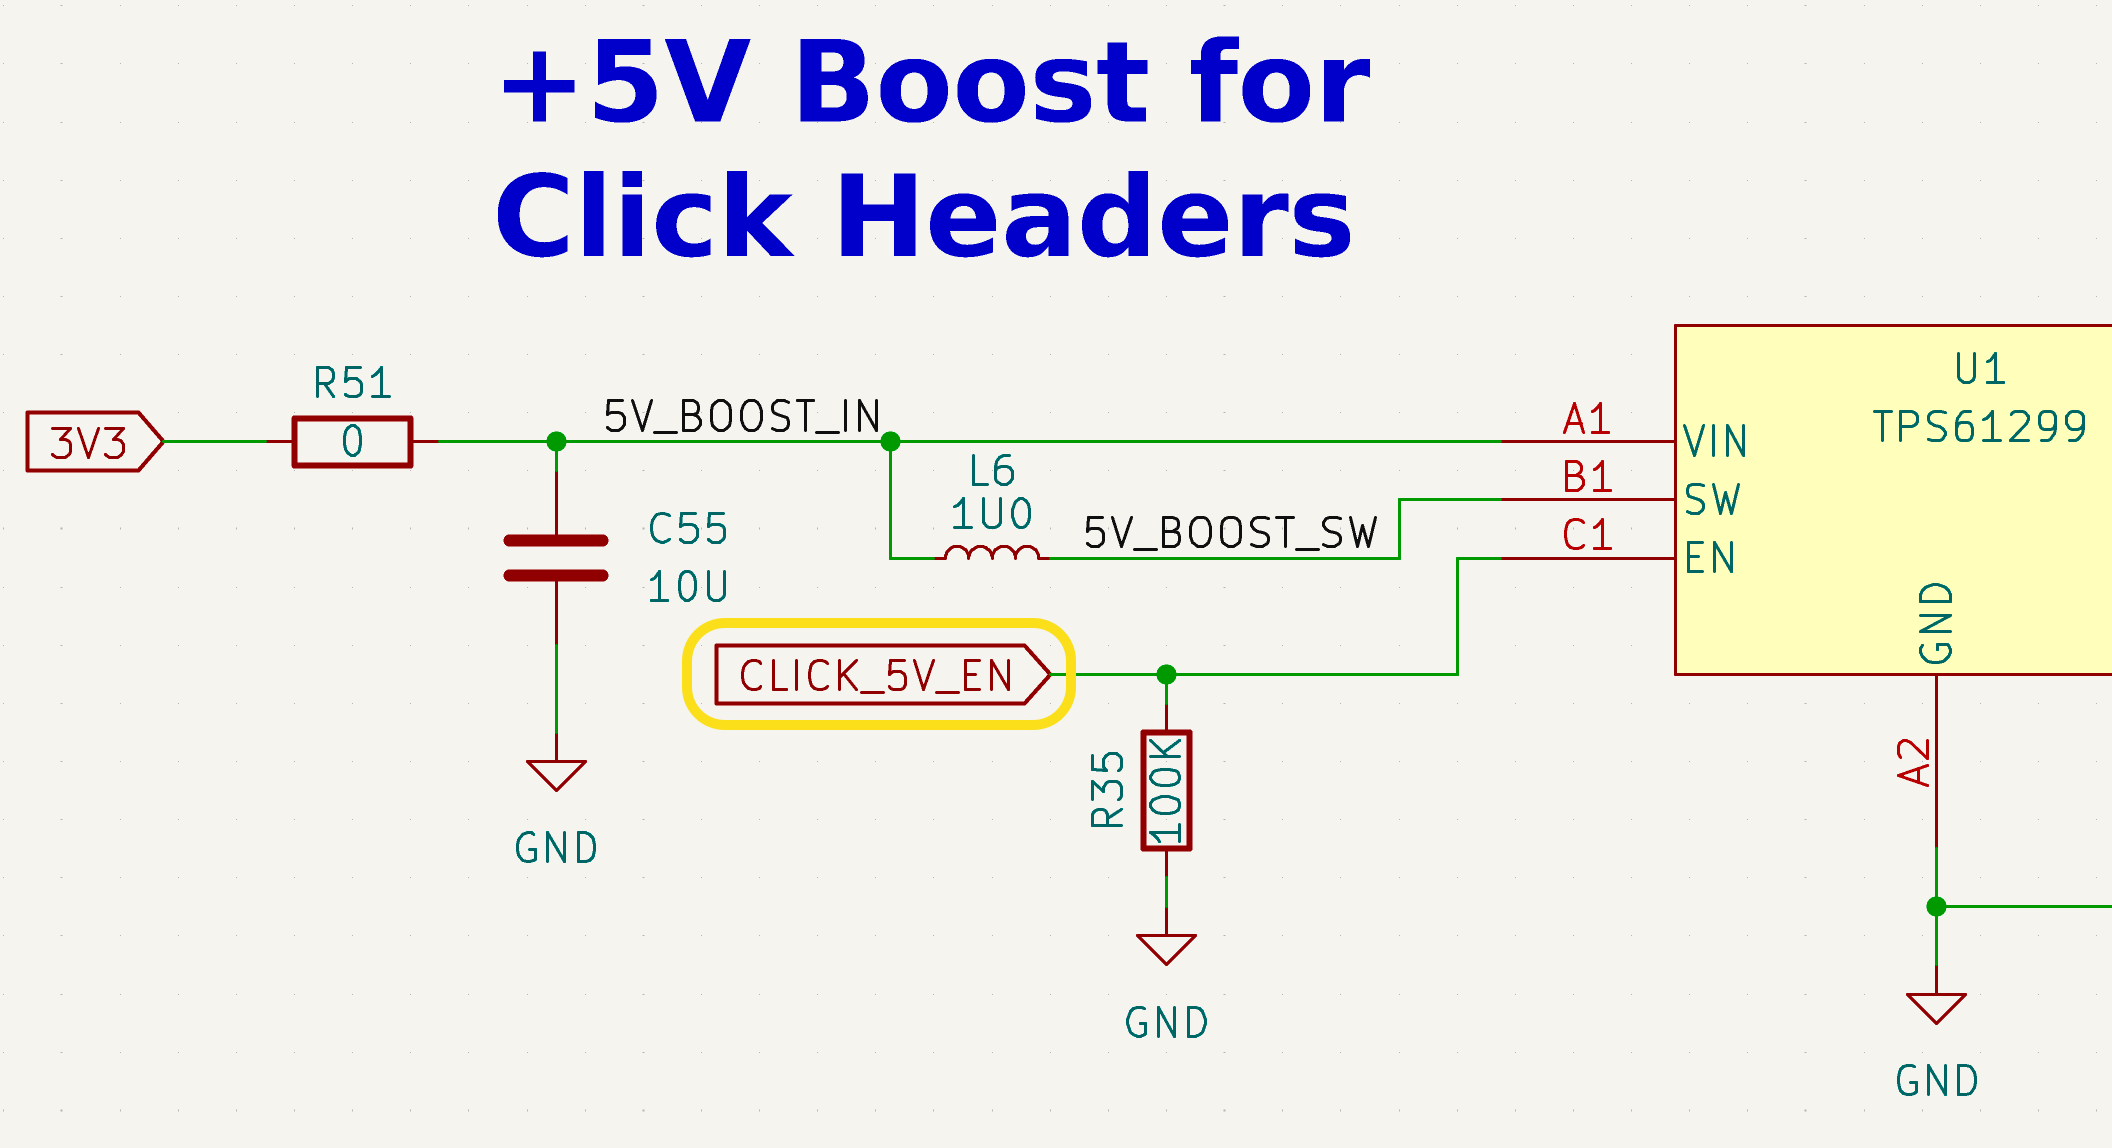
For example, a GPIO from the onboard nRF9160 SIP is connected to the EN pin on the +5V boost regulator. This grants Zephyr firmware the power (ha!) to enable or disable the regulator:
When the first prototype boards arrived from the manufacturer, we needed to enable these power regulators as part of the hardware bring-up process. I was pleasantly surprised to discover that this is actually possible to do entirely with Devicetree & Kconfig without writing any C code!
Zephyr’s regulator bindings
Out of the box, Zephyr provides regulator-gpio and regulator-fixed devicetree bindings for variable and fixed-voltage regulators respectively. These bindings are used to define GPIO-controlled power regulators that can be enabled automatically when the OS boots.
Here’s the devicetree node we’re using for the +5V boost regulator on the Aludel board:
reg_mikrobus_5v: reg-mikrobus-5v {
    compatible = "regulator-fixed";
    regulator-name = "reg-mikrobus-5v";
    enable-gpios = <&gpio0 4 GPIO_ACTIVE_HIGH>;
    regulator-boot-on;
};
The compatible property matches this node to Zephyr’s regulator-fixed device tree binding, and the regulator-name property is just a descriptive name for the regulator output.
Next, the enable-gpios property is a phandle-array devicetree property which defines the GPIO connected to the regulator’s EN pin:
&gpio0is the phandle for the GPIO0 controller node that controls the pin4is the pin number on the controller- the pin is configured with the
GPIO_ACTIVE_HIGHflag because the regulatorENpin is an active-high input
The regulator-boot-on property tells the regulator driver that the OS should turn on the regulator at boot (but shouldn’t prevent it from being turned off later). We just needed to set the following Kconfig symbol to enable the regulator drivers:
CONFIG_REGULATOR=y
Regulator shell
When you’re bringing up a new board, it’s really helpful to have full control over the power regulators from a diagnostic shell. Zephyr provides a regulator shell that allows you to interact with regulators on your board via the shell interface!
Set the following Kconfig symbols to enable the regulator shell:
CONFIG_SHELL=y
CONFIG_REGULATOR=y
CONFIG_REGULATOR_SHELL=y
With the regulator shell enabled, you can enable/disable the regulator. You can also get/set parameters like voltage, current limit, and operating modes.
Regulator shell example
First, we need to get the device node for the regulator. You can list the available devices and their states using the device list shell command:
uart:~$ device list
devices:
- nrf91_socket (READY)
- clock@5000 (READY)
- gpio@842500 (READY)
- psa-rng (READY)
- uart@9000 (READY)
- uart@8000 (READY)
- flash-controller@39000 (READY)
- i2c@a000 (READY)
- reg-mikrobus-5v (READY)
- reg-mikrobus-3v3 (READY)
To disable the reg-mikrobus-5v regulator, we can run the following shell command:
uart:~$ regulator disable reg-mikrobus-5v
To enable the reg-mikrobus-5v regulator again, we can run a similar shell command:
uart:~$ regulator enable reg-mikrobus-5v
Time to hit that play button on some Warren G!
🎵 “Regulators, mount up!” 🎵
Learn more about the Zephyr shell
Controlling power regulators is just one of the neat things you can do with the Zephyr shell. At Golioth we think the Zephyr shell is fantastic and we’ve written extensively about it on our blog. We also use it in the Golioth SDK for things like setting device credentials.
If you’d like to learn more about Zephyr in general, join us for a free Zephyr training. Our next session is coming up in February. Sign up now!

No comments yet! Start the discussion at forum.golioth.io