In a previous post on Debugging nRF9160 Zephyr apps with Ozone, I showed how to use the New Project Wizard to create a new Ozone project for debugging a Zephyr app.
However, the project files generated by the New Project Wizard contain hard-coded paths. This makes them unsuitable for sharing with colleagues or checking them into a git repository.
In this post, I’ll demonstrate how to create a portable Ozone project file that you can check into your Zephyr application’s git repository.
Build the example app
To make this example concrete, we’ll be debugging the zephyr/samples/basic/blinky/ app from the nRF Connect SDK Zephyr repo. The firmware image will be built for the nrf9160dk_nrf9160_ns target running on the Nordic nRF9160 DK board. However, the concepts in the examples below should apply to any Zephyr app or board.
I’ve manually added an additional debug KConfig fragment file that we’ll be merging in to this app during the build process. This debug.conf file enables thread-aware debugging in Ozone:
CONFIG_DEBUG_THREAD_INFO=y

# CONFIG_DEBUG_THREAD_INFO needs the heap memory pool to
# be defined for this app
CONFIG_HEAP_MEM_POOL_SIZE=256
To build the firmware for the example blinky app:
cd <your ncs workspace>/
west build -p -b nrf9160dk_nrf9160_ns zephyr/samples/basic/blinky/ -- -DEXTRA_CONF_FILE="debug.conf"
If the build completed successfully, you’ll see the build/zephyr/zephyr.elf & build/zephyr/merged.hex files we need to start a debugging session in Ozone.
Create a portable Ozone project file
Next, we’ll create a portable Ozone project file.
I’ll show the entire file first so you can see what it looks like all put together, and then I’ll walk through what each line in the file does in more detail.
I named my project file nRF9160.jdebug and located it in the root of my NCS workspace, but you can name this file anything you want (the file extension should be .jdebug):
void OnProjectLoad(void)
{
	Project.SetDevice("nRF9160_xxAA");
	Project.SetTargetIF("SWD");
	Project.SetTIFSpeed("4 MHz");
	Project.AddSvdFile("$(InstallDir)/Config/CPU/Cortex-M33F.svd");
	File.Open("$(ProjectDir)/build/zephyr/zephyr.elf");
	Project.SetOSPlugin("ZephyrPlugin.js");
}

void TargetDownload(void)
{
	Exec.Download("$(ProjectDir)/build/zephyr/merged.hex");
}
Ozone scripts
Project files in Ozone are scripts written in a simplified C-style language. Ozone defines a set of event handler functions that are called when specific debug events happen in the debugger.
The OnProjectLoad() event handler is executed when the project file is opened, so this is where we’ll do most of the setup for our project.
Project action functions
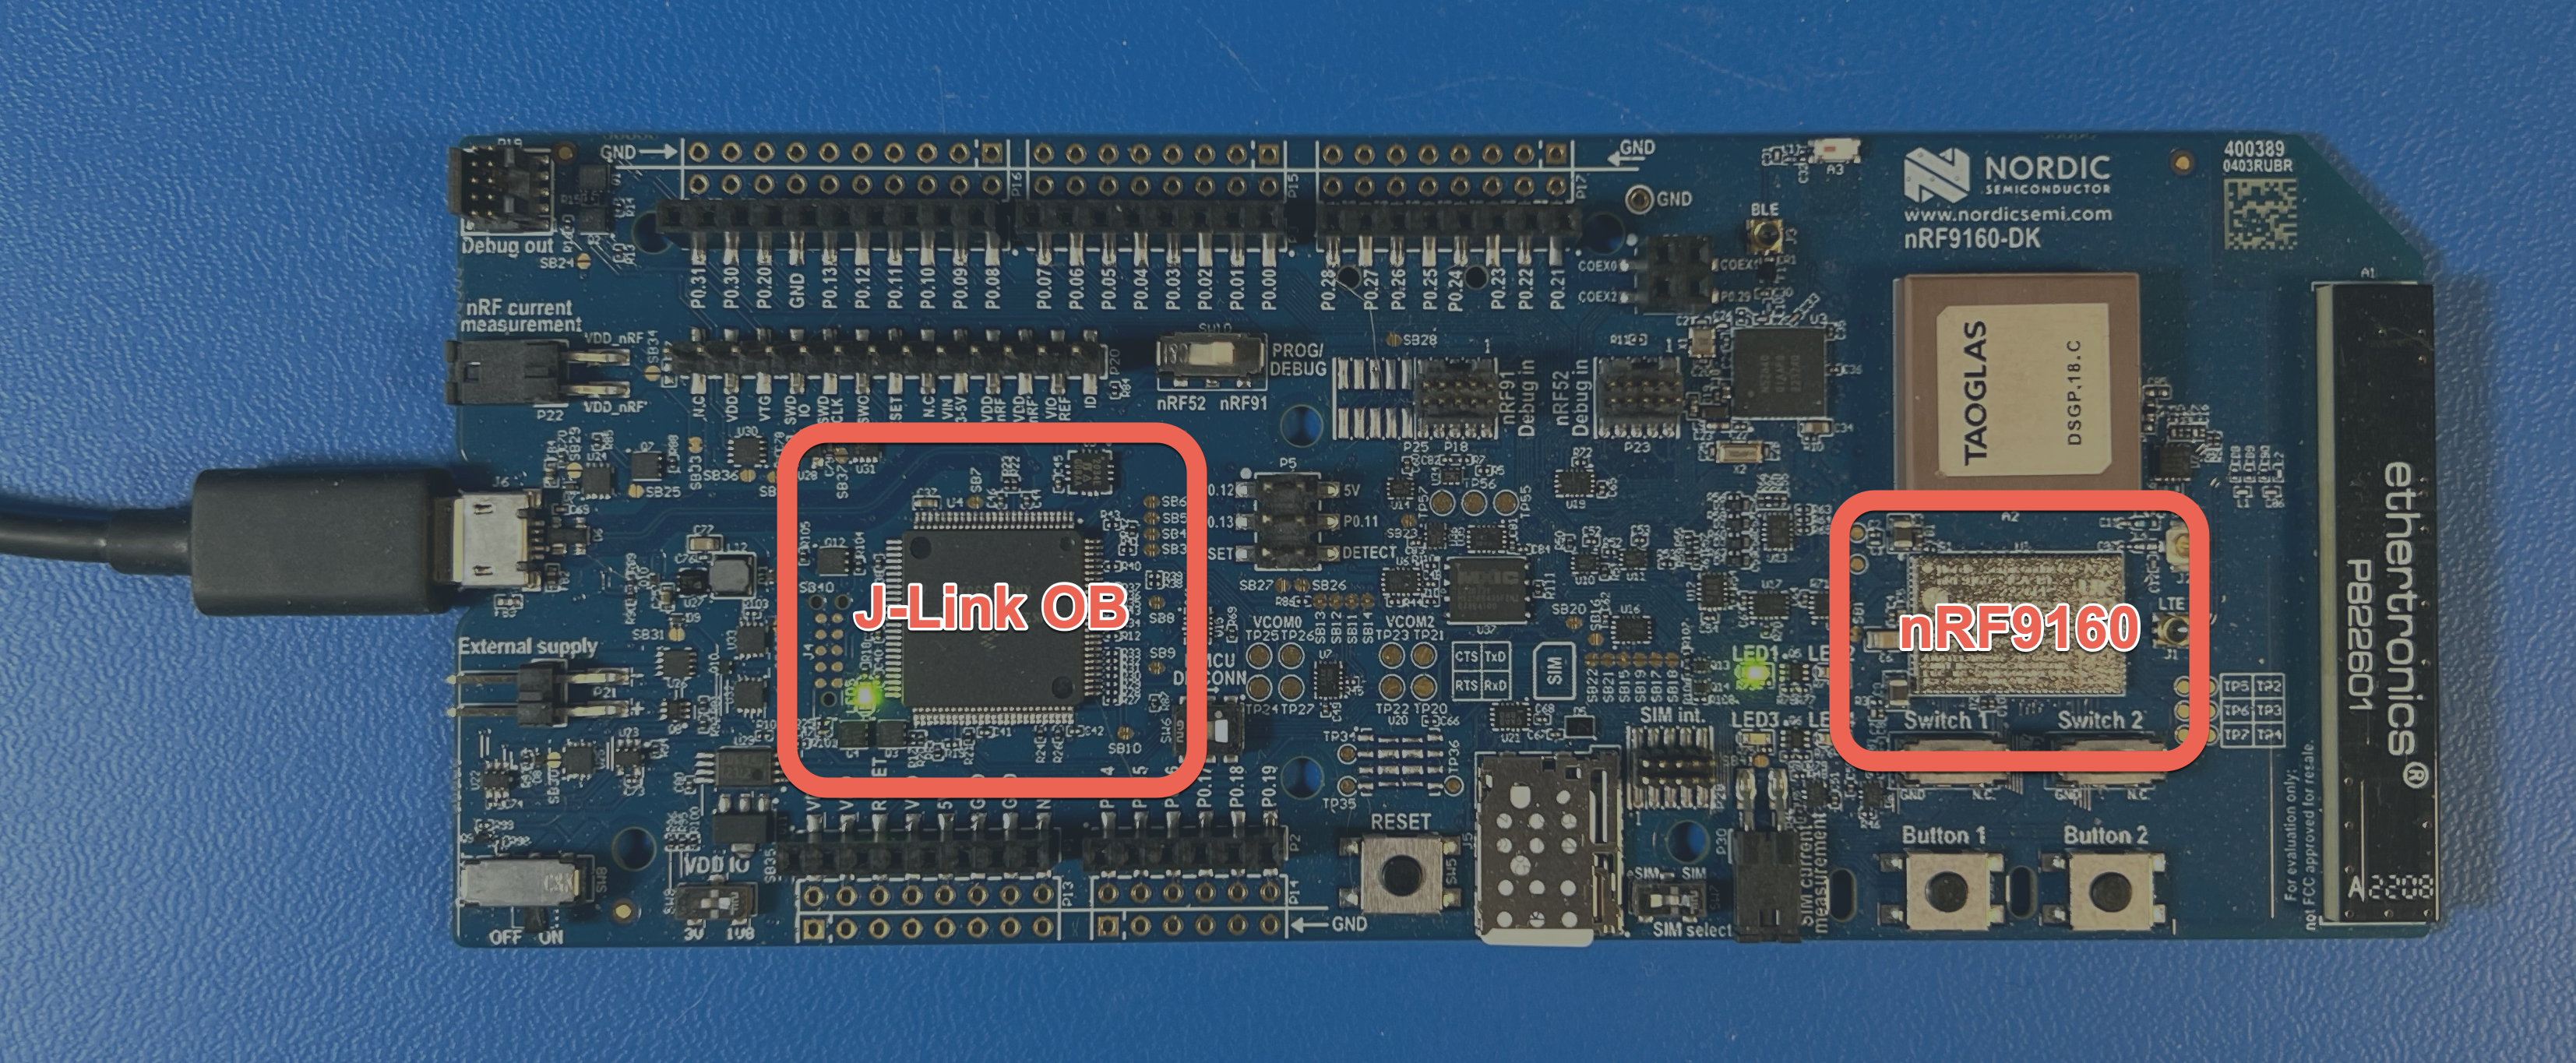
The nRF9160 DK board has an onboard SEGGER J-Link OB debugger which is connected to the nRF9160 SIP via SWD.
Ozone defines a set of project actions that can be used to configure the debugger settings:
Project.SetDevice("nRF9160_xxAA");configures the debugger for the nRF9160 SIPProject.SetTargetIF("SWD");configures the debugger to use the Serial Wire Debug (SWD) protocolProject.SetTIFSpeed("4 MHz");sets the SWD signaling speed to 4 MHz
Next, we need to provide the debugger with a link to the System View Description (SVD) files for the ARM Cortex-M33F applications MCU in the nRF9160 SIP. Ozone comes bundled with a bunch of SVD files for different ARM cores, so we can provide a portable path to the file’s location by using the $(InstallDir) directory macro:
Project.AddSvdFile("$(InstallDir)/Config/CPU/Cortex-M33F.svd");
Since we’re debugging a Zephyr app, we can load the Zephyr RTOS awareness plugin automatically:
Project.SetOSPlugin("ZephyrPlugin.js");
File action functions
In addition, we need to provide Ozone with the path to the ELF file for the Zephyr app we’re trying to debug. We can use the $(ProjectDir) directory macro to provide a portable path to the ELF file relative to the directory containing the project file:
-
File.Open("$(ProjectDir)/build/zephyr/zephyr.elf");
Process replacement functions
In this example, we have a multi-image build for the nRF9160. We need to instruct the debugger to download the full merged image (not just the ELF). Ozone provides a set of process replacement functions that replace the default implementations of built-in debug operations. We can use the TargetDownload(); function to replace the default program download routine with one that loads the merged.hex file instead. Note that this also uses the $(ProjectDir) directory macro to provide a portable portable path to the merged image:
Exec.Download("$(ProjectDir)/build/zephyr/merged.hex");
Start the debug session
Now, click “File” → “Open…” and open the nRF9160.jdebug project file in Ozone.
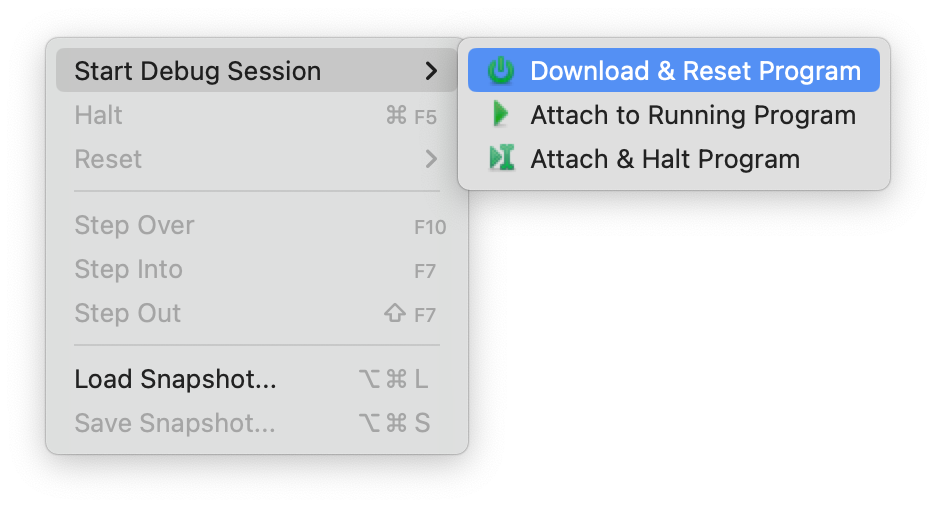
Click on “Debug” → “Start Debug Session” → “Download & Reset Program” to start the debug session:
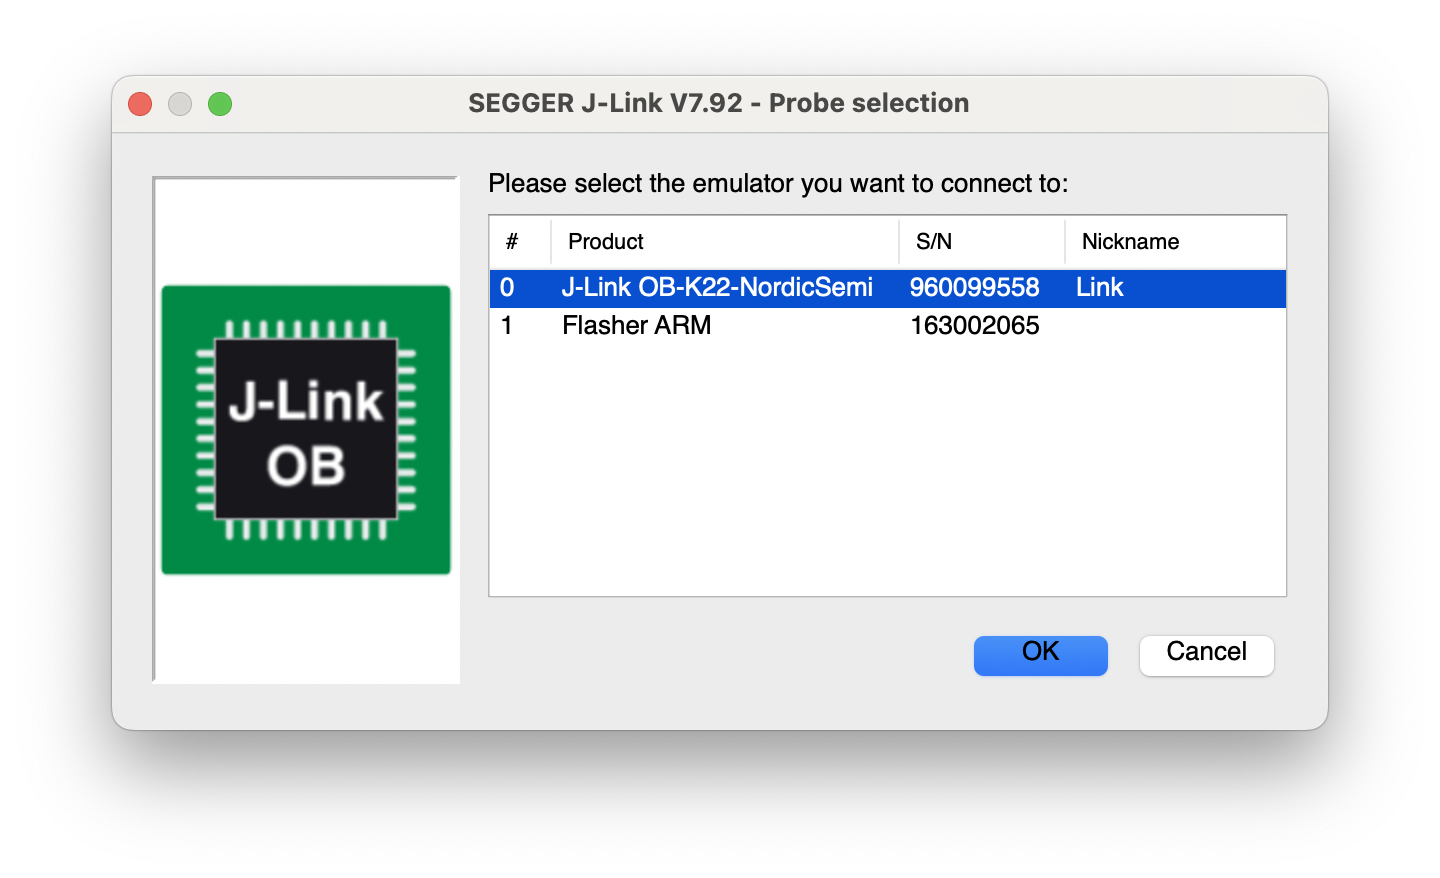
If you have multiple SEGGER devices plugged into your USB port, you’ll get a pop-up window asking which device should be used to flash the target:
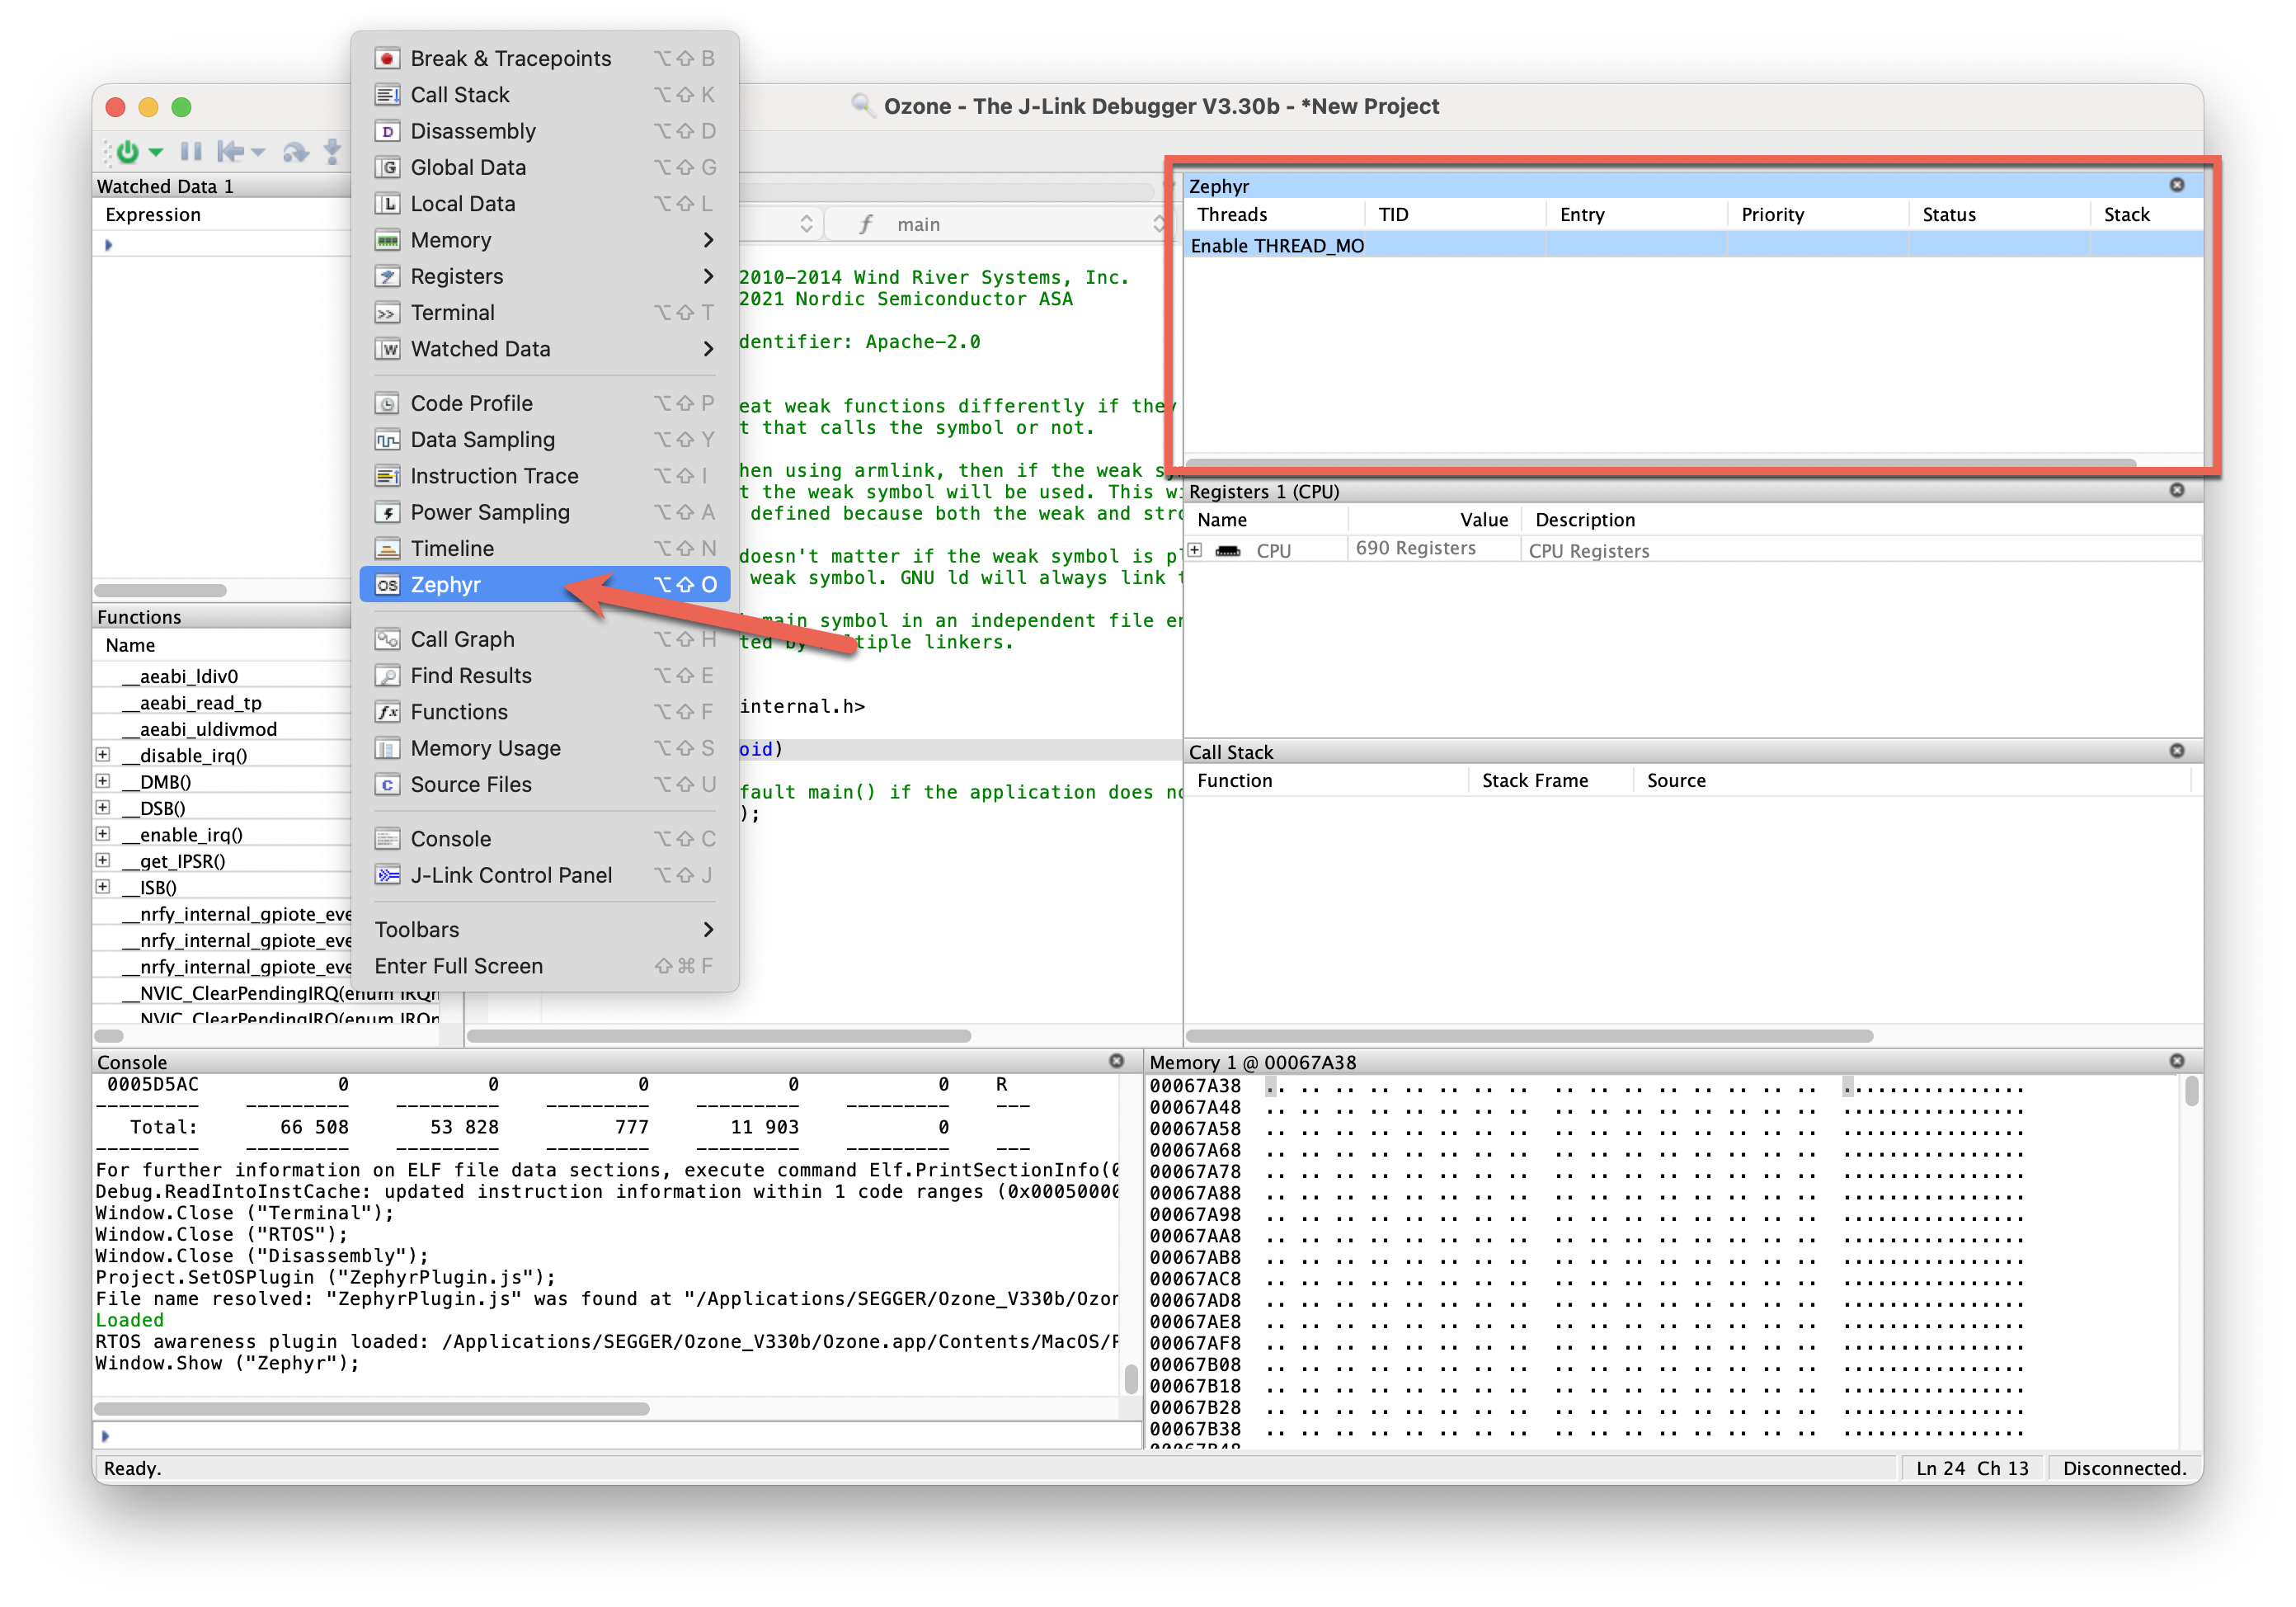
If you don’t see the “Zephyr” window in the Ozone project, click on “View” → “Zephyr” to show the window:
That’s it!
You can relocate this file into any directory, including the git repository for your Zephyr app. Just make sure to update the relative paths in the file. Anyone who checks out the repo can quickly start a debug session without having to configure their own Ozone project.
Conclusion
Golioth can help you connect and secure your IoT devices, send sensor data to the web, update firmware over-the-air, and scale your fleet with an instant IoT cloud.
Try it today! You can make a small connected fleet and start sending data to and from the cloud immediately. Device management is free for individual users!

No comments yet! Start the discussion at forum.golioth.io