Visual Studio Code, colloquially known as VS Code, has become the de-facto Swiss Army Knife of Integrated Development Environments (IDEs). It is already configured for a lot of different languages and ecosystems when first installed. It’s also great for developing Zephyr RTOS projects, but not out of the box. Jonathan Beri presented at talk at the 2023 Embedded Open Source Summit detailing how to configure VS Code for Zephyr development.
To follow along, check out Jonathan’s example repository for us Zephyr in Visual Studio Code.
VS Code for Embedded Development
Most of the pre-configuration rolled into the stock installation of VS Code centers around languages used in web development. But increasingly we see the IDE called upon for embedded system development–moving beyond merely working with source code to include native debugging and flashing. These more specialized features tend to be the areas requiring custom configuration. Notably, Nordic and NXP are both actively developing VS Code environments for Zephyr.
For those who prefer to maintain their own workspace configuration, selecting the right extensions is a good place to start. The Microsoft’s extensions for C/C++ and Cmake are table stakes for embedded development. Jonathan also recommends the Cortex Debug plugin and suggests that Microsoft’s Embedded Tools is a newer plugin you may find useful.
Diving into Configuration Files
The meat of the talk comes about sixteen minutes in as Jonathan walks through the settings files he’s using to configure his workspace: settings.json, tasks.json, launch.json, and extensions.json. You can view these files in the example code repository.
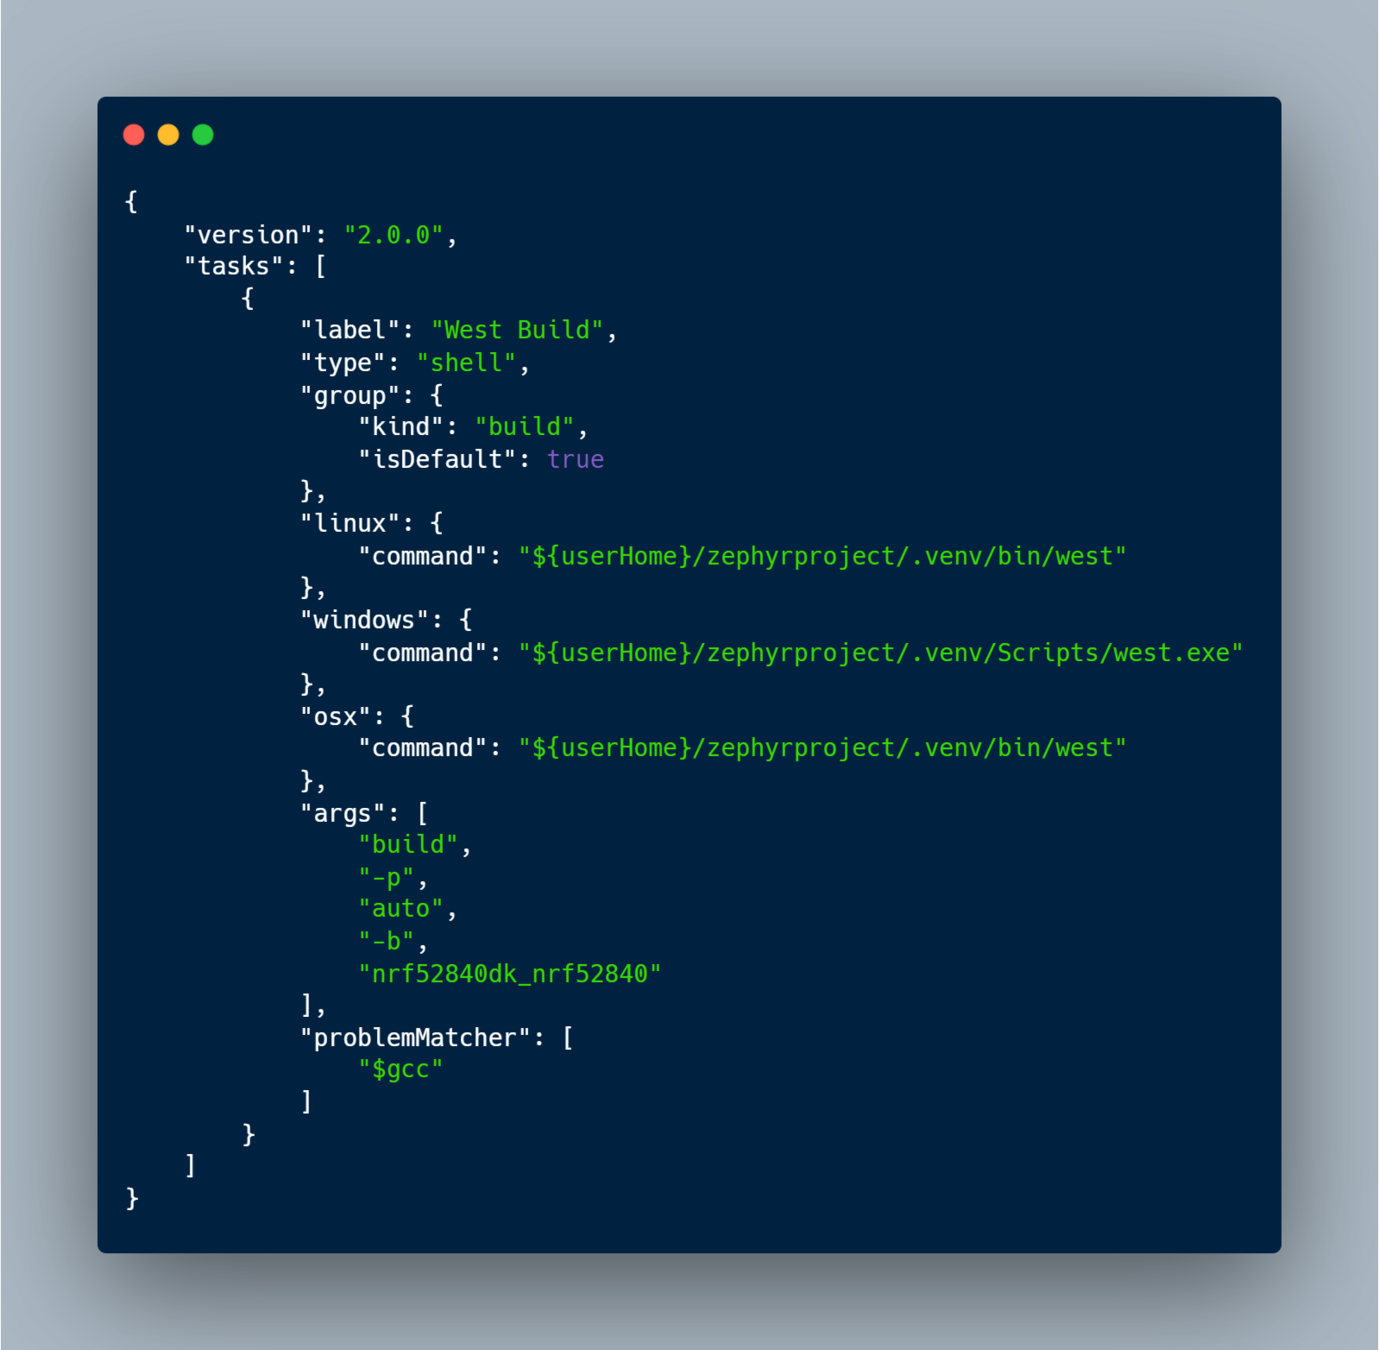
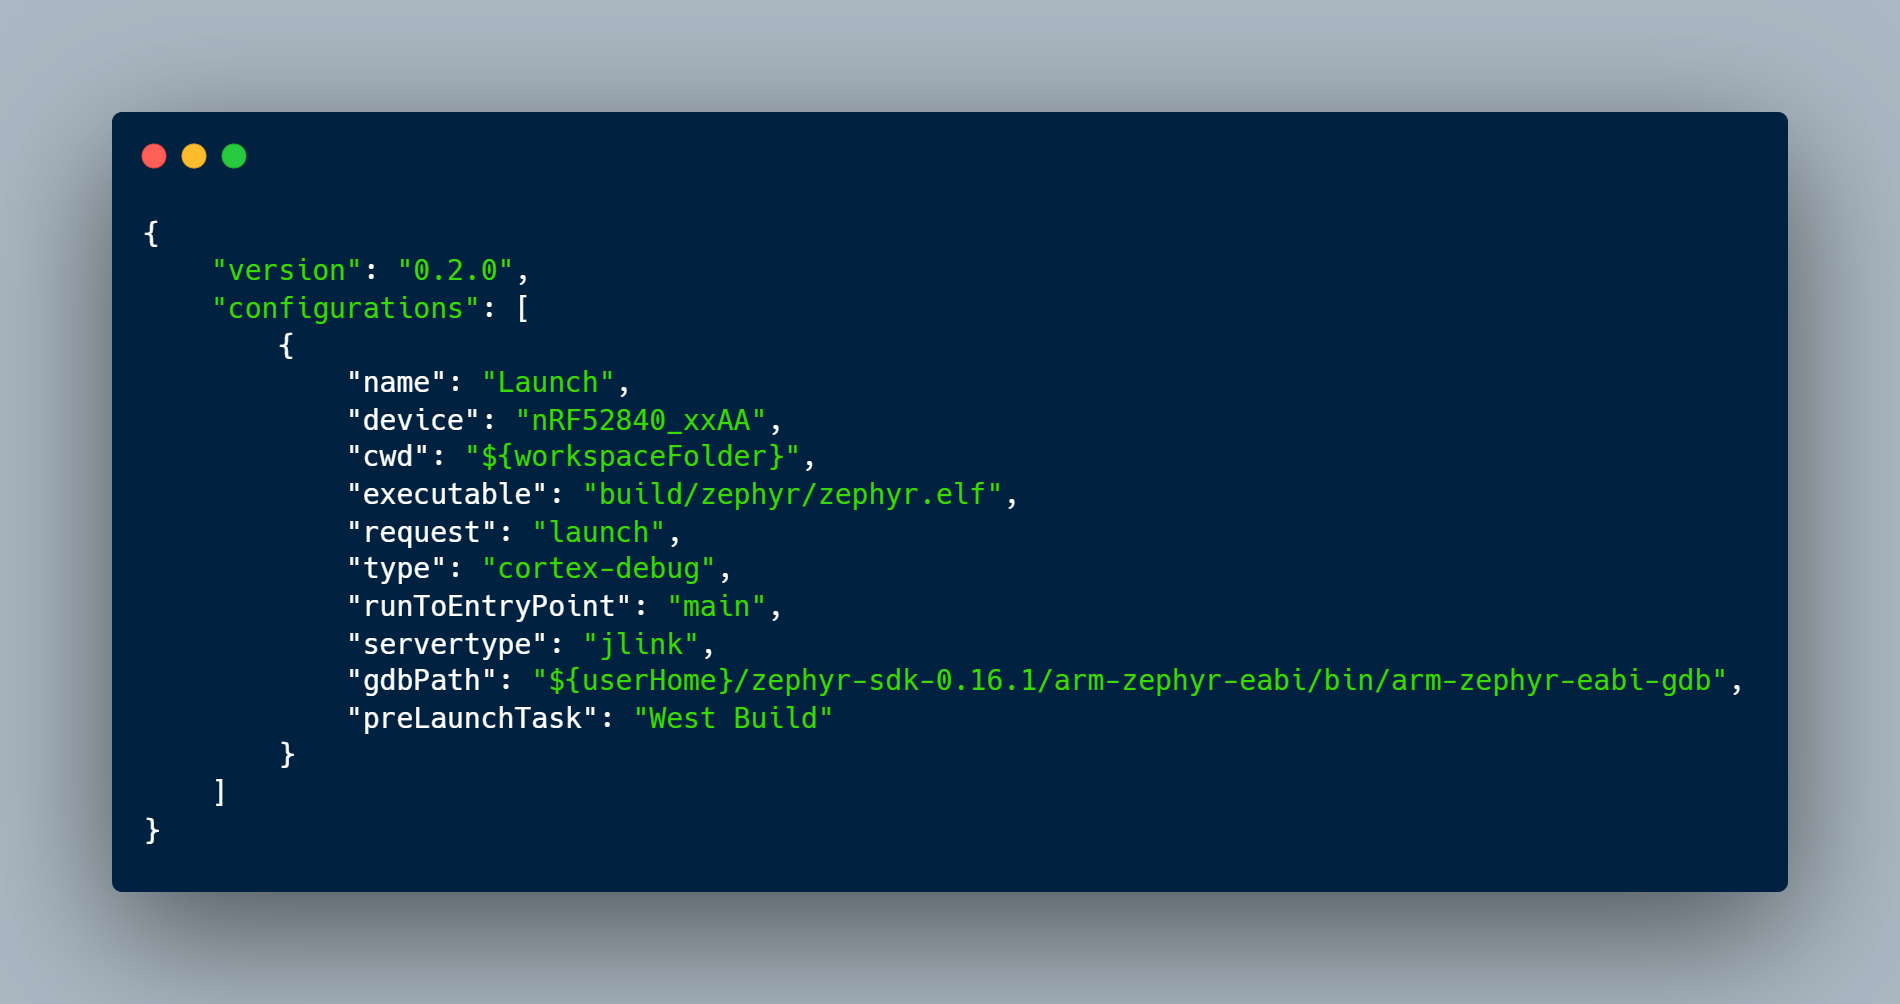
Telling VS Code where to find GCC will get syntax highlighting and linting working well. Preventing CMake from trying to auto-configure Zephyr projects will silence a lot of the popup window noise when opening a new VS Code window. And setting up the task runner is akin to configuring aliases for your oft-used commands, accessible from the VS Code command palette. Finally, debugging configuration and recommended extensions round out the workspace-specific configurations using the built-in “profile” features.
All the Things You’ve Been Missing from VS Code
If you’ve already tried developing for Zephyr in VS Code it’s easy to forget what you’ve been missing. The live demo begins at about 20:30 and immediately shows the most basic annoyances have been solved. There are no longer random red squigglies sprinkled throughout your code, because VS Code now knows where to find all of the header files. You can jump to OS-specific function declarations as expected and access the function syntax hinting because the entire Zephyr tree is accessible for the extensions. These features are not novel, they’re just not fully configured out-of-the-box.
Building and flashing works as expected, because your target board and programmer have now been specified in the configuration. They’re triggered via simple to remember commands like west build that Jonathan added to the command palette via those JSON files. The serial terminal connection to the device is available in the IDE without having to juggle external console windows. The general noise floor of the IDE is almost non-existent at this point, all thanks to a comprehensive configuration that makes the developer experience worlds better.
Modern Tools for Modern IoT
Zephyr RTOS is paving the way for the next generation of embedded devices. As the Founder and CEO of Golioth, Jonathan Beri recognized the power of Zephyr to support cross-vendor hardware in the IoT space, which makes it possible for Golioth to support the hardware that you the choose (and not a narrow set of hardware required by your IoT Cloud). As this talk shows, he spends a lot of hands-on time with the RTOS and is sharing the workflow he has developed over the last several years.
Set aside an afternoon to prototype your IoT Fleet. Your first 50 devices are free with Golioth’s Dev Tier. Follow Jonathan’s examples for using VS Code, and you’ll be sending sensor data to the cloud in a matter of hours!

No comments yet! Start the discussion at forum.golioth.io