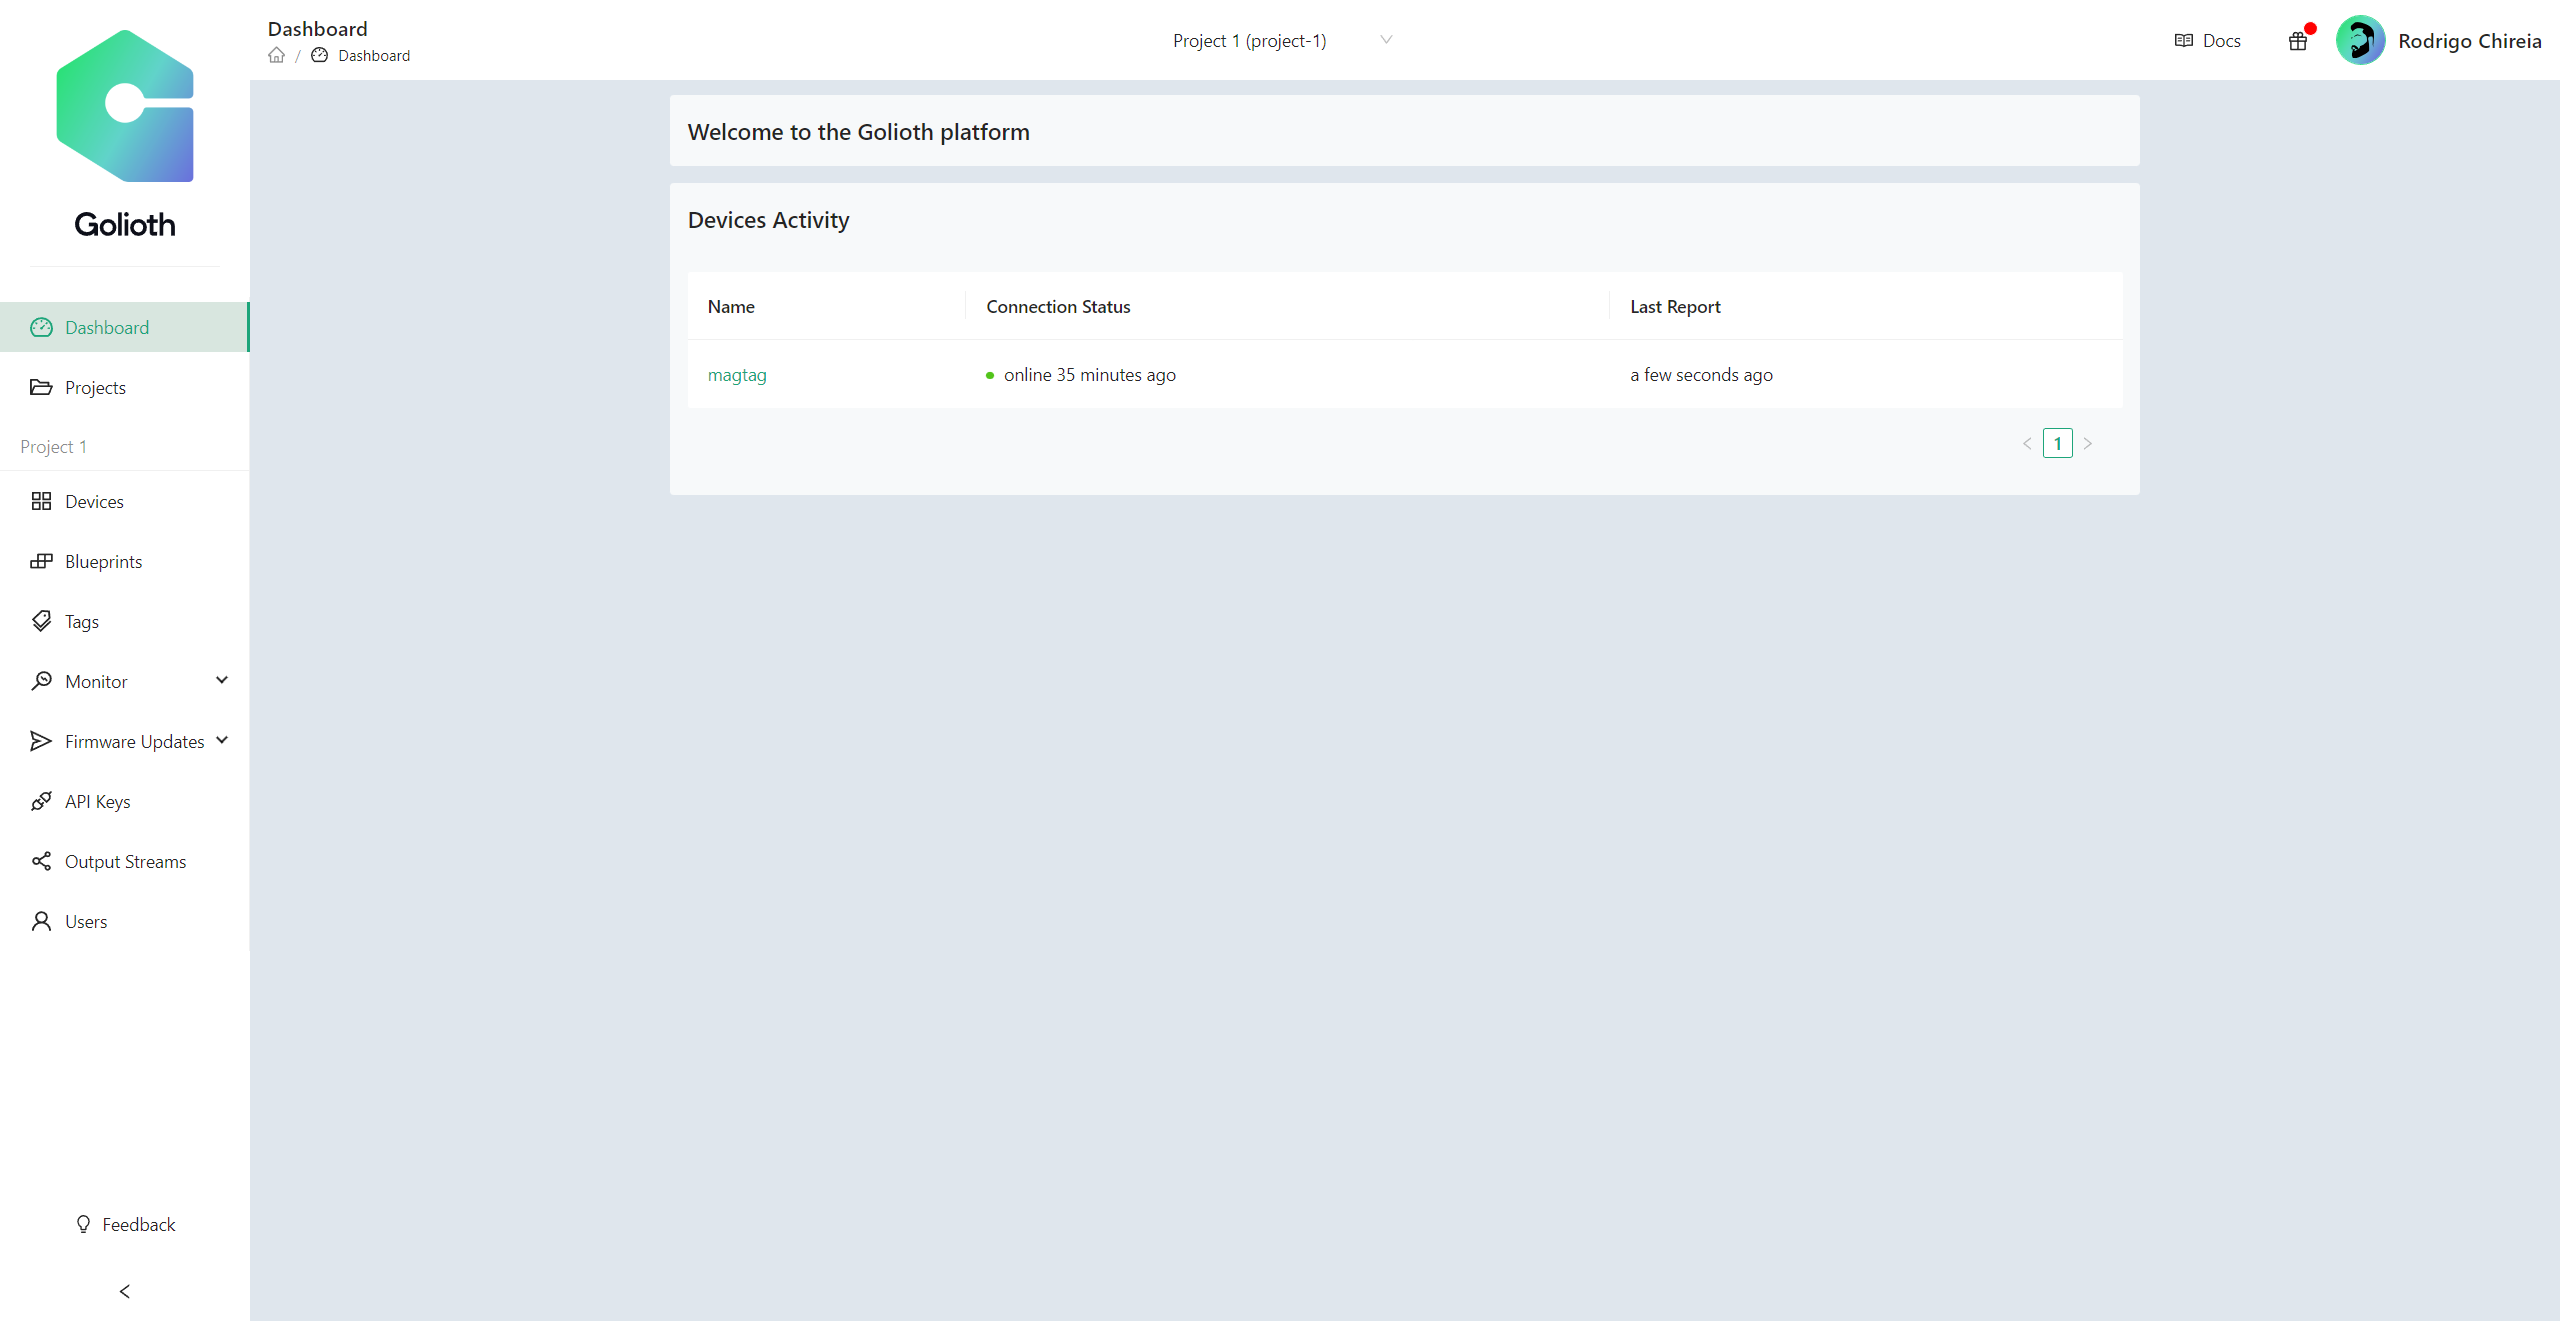
Have you tried to use the Golioth Web Console yet? The interface delivers access and control for your entire IoT fleet. This means sending and receiving data in real-time, checking on the state of each device (including current firmware revision), reading logs from the hardware, and more.
Did you know that you can create your own User Interface (UI) like this using any stack you want? That’s because we used REST and WebSocket APIs to build the Golioth Console, and those same APIs are available for you to build any application to fit for our needs.
In this blog, post I will show how simple it is to set up a custom UI project using the Golioth APIs.
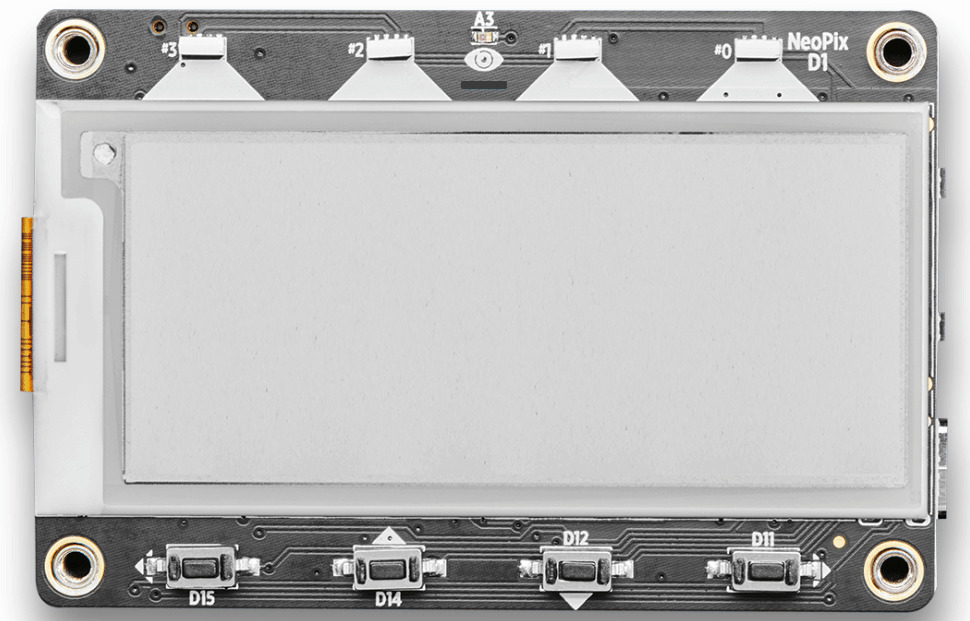
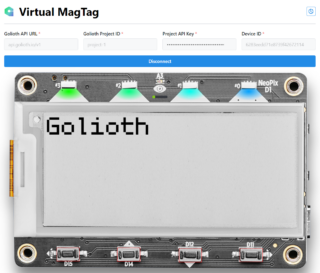
To demonstrate, we built a web interface around the image of an Adafruit MagTag, a development board we use for our developer training program. It’s pretty cool to click a button on the the image above and see the device in your hand react. Let’s dive in as I cover the necessary steps to pull it all together.
Golioth Cloud
We begin by using the Golioth Web Console to setup a project and create API Keys. You can also follow the authentication docs where it has a guide for you to do the same but using Golioth Command Line Interface (CLI).
- Sign-up/Sign-in on the Golioth Web Console
- If you created a brand new account, you will see a QuickStart Wizard that guides you through the process of creating a new project and adding a new device
- Choose your project using the project selector at the middle-top (I’m calling mine
Project 1) - Create an API Key to authenticate on the API’s:
- Clicking on
Create, select API Key and hitCreateat the pop-up;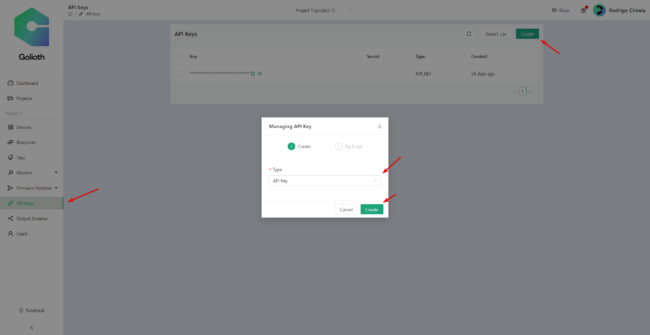
- Clicking on
- Create a Device
- Go to Devices at the sidebar and hit
Create - I’m calling mine
magtag, and generating credentials automatically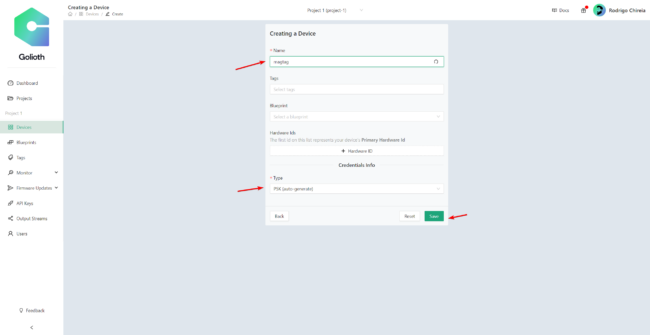
- Go to Devices at the sidebar and hit


Firmware
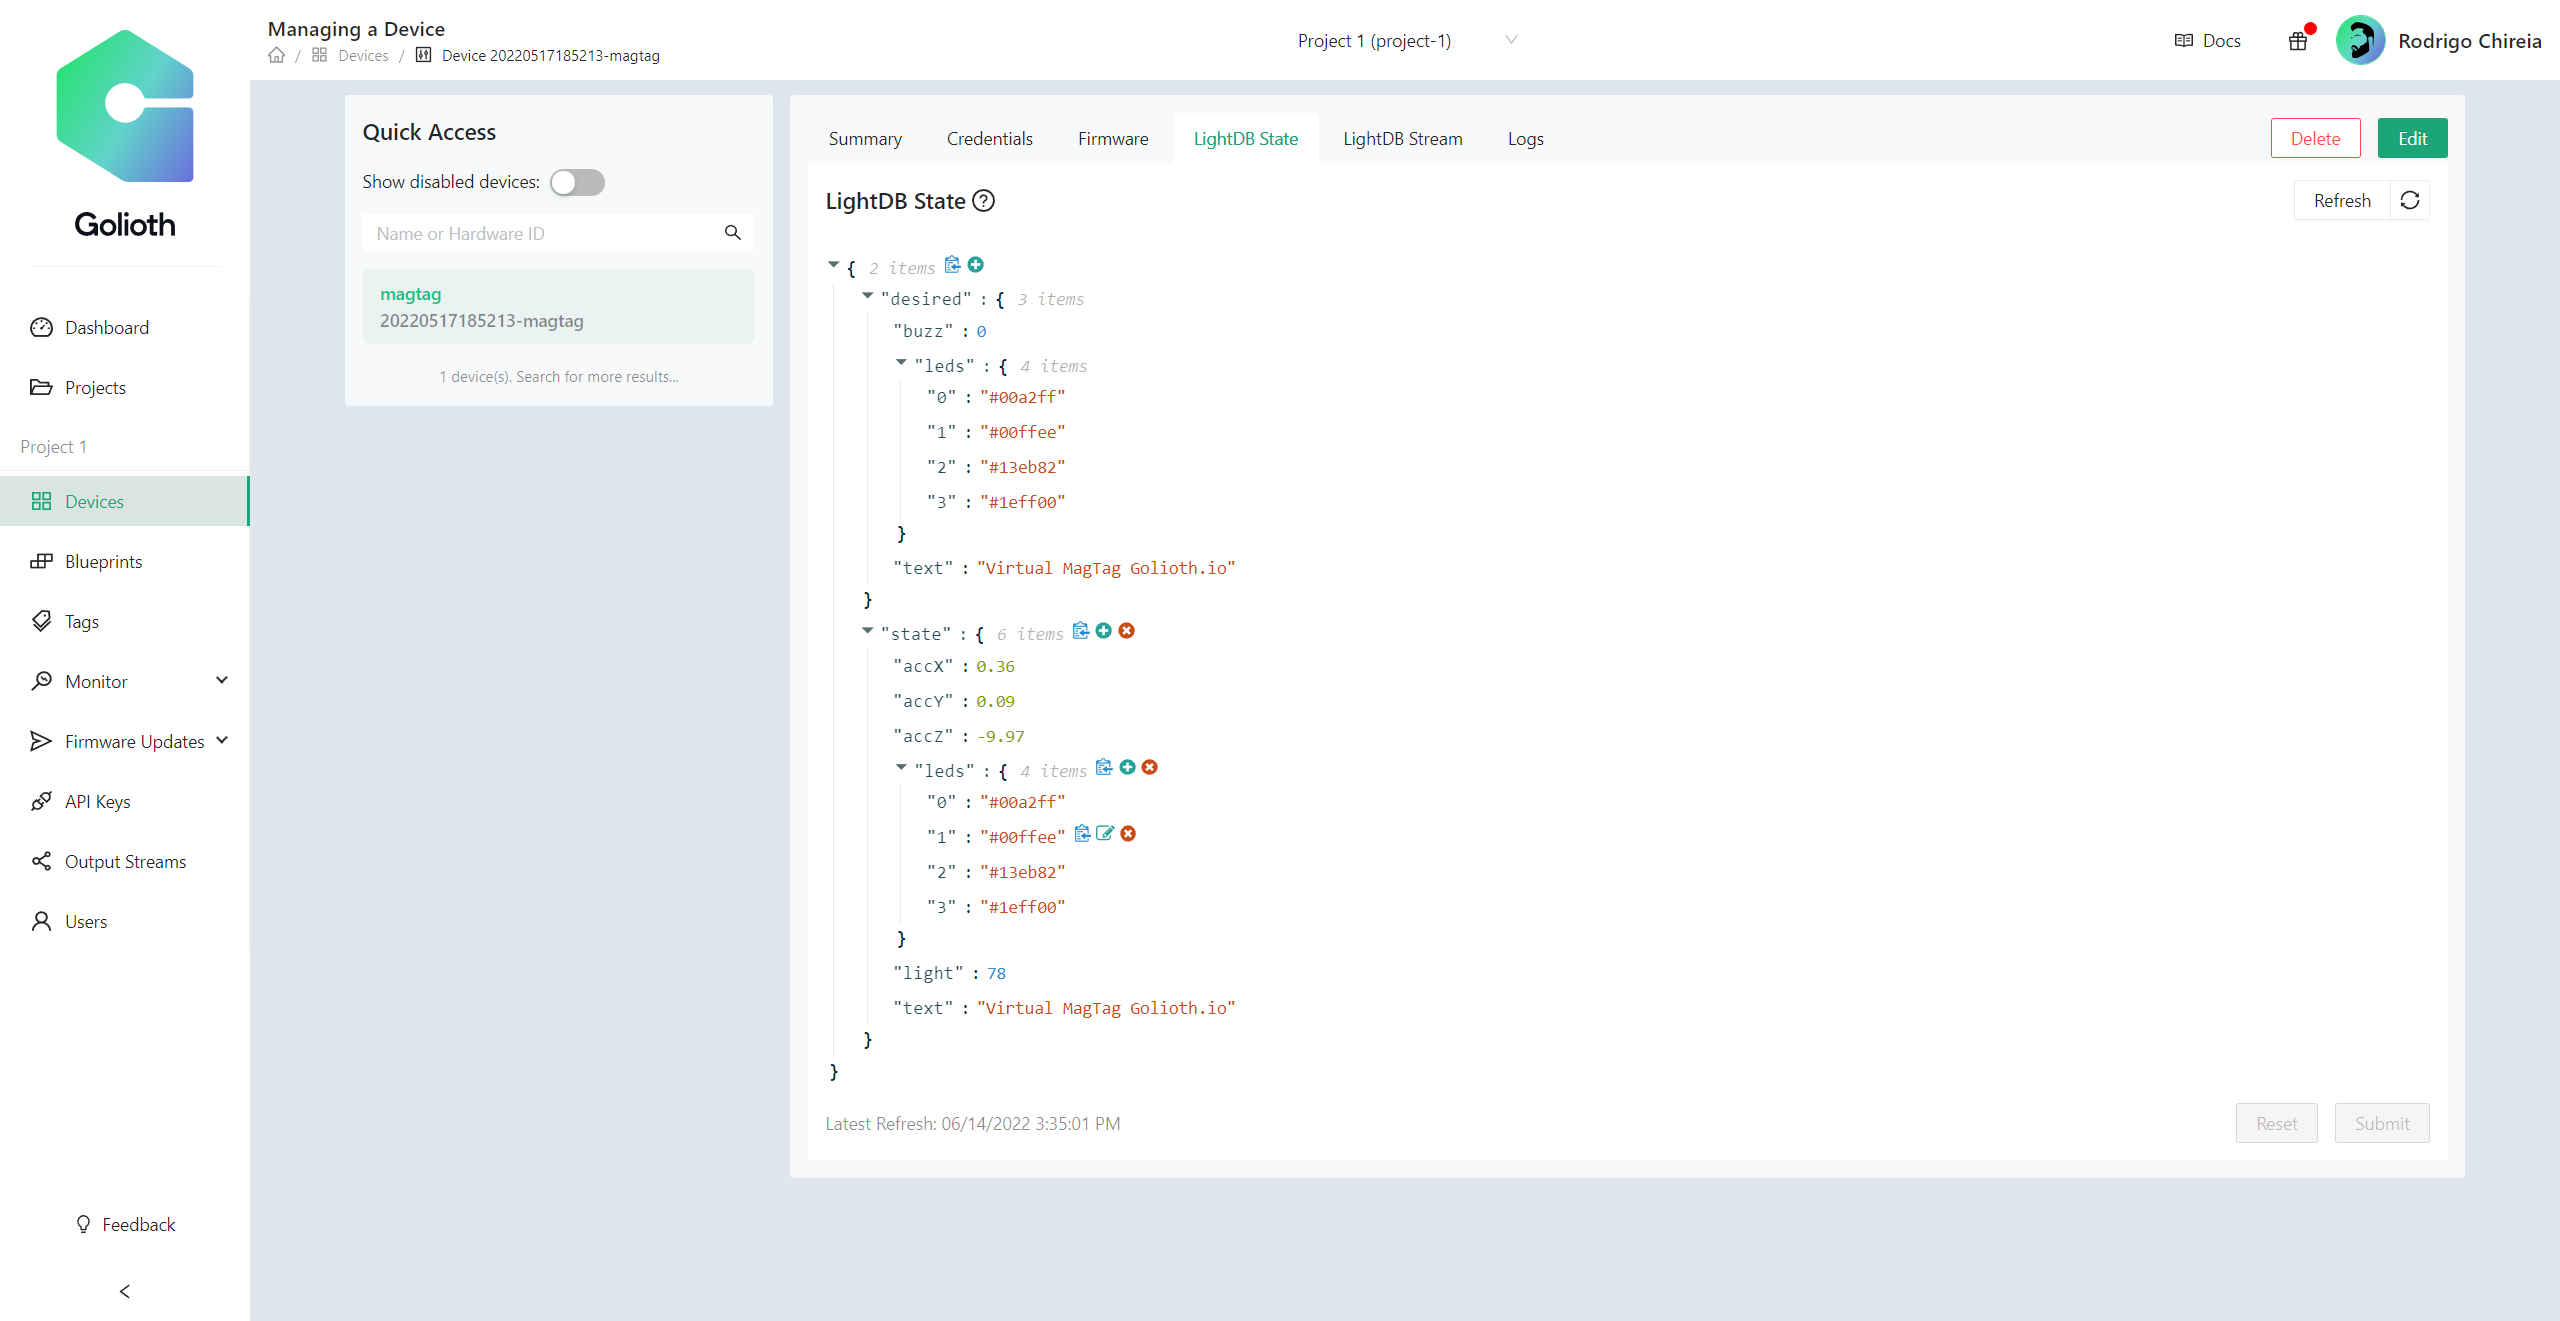
My physical MagTag is running the latest version of the MagTag Sample using Golioth’s Arduino SDK. With that firmware, my device is set up to use LightDB State to read and set data. That means it will listen for changes on the desired endpoint and update it’s status both physically and on the cloud’s state endpoint to match.
Note: The arduino-sdk repository showcased in this post is deprecated. GoliothLabs has two experimental repositories that may work as replacements:
This state pattern is related to the concept of Digital Twin, which you can read more on our desired state vs. actual state blog post.
Front-end
The front-end was bootstrapped using Vite’s react-ts template. I’m also using Mantine as a component library for this application.
To set up our connection to both the REST and WebSocket APIs, we first need to understand how it should be built. For that, you can easily go to Golioth REST API Docs and Golioth WebSocket API Docs and follow through those steps.
The gist of it is that we need a few pieces of information to authenticate. This includes the Golioth API URL, the project ID we are targeting, and an API key from that project. Since we’re going to target a specific device as well, I also added the Device ID.
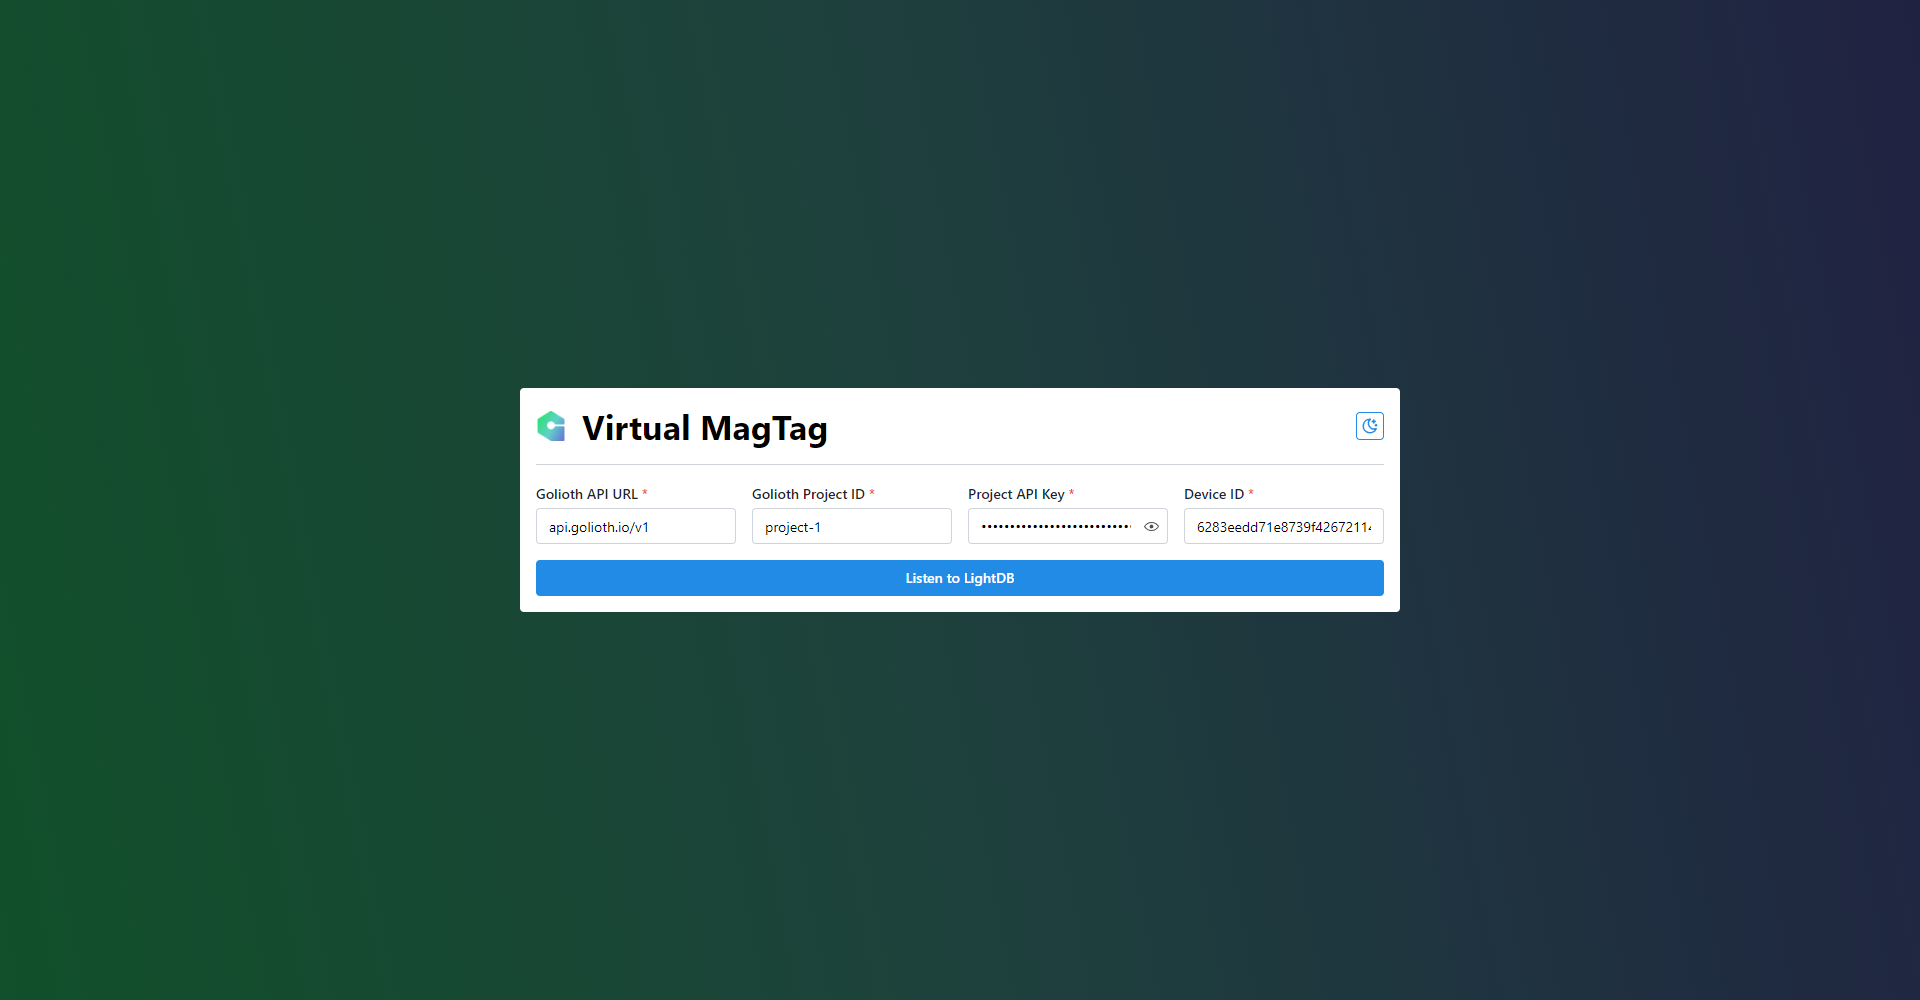
With those fields, we’re able to connect and listen to state changes using the WebSocket API. But we also want to display the current state, and be able to update the desired state from here.
Displaying Current State
The data coming from the current state allows us to build a virtual replica of the MagTag on the UI. With some CSS magic we can display its text, leds and light.
[sourcecode lang=”js”]
{
“accX”: 0.32,
“accY”: 0.11,
“accZ”: -9.89,
“leds”: {
“0”: “#00a2ff”,
“1”: “#00ffee”,
“2”: “#00ff84”,
“3”: “#04ff00”
},
“light”: 34,
“text”: “Golioth”
}
[/sourcecode]
The theme is also reacting to the light sensor readings from the device. The UI changes to dark mode if the light level is low.
Setting Desired State
To set the desired state, we’re going to send some POST requests using our REST API, using the same API Keys that we input on the form.
LEDs:
Using a modal and a color picker, we can select the colors and press Save.
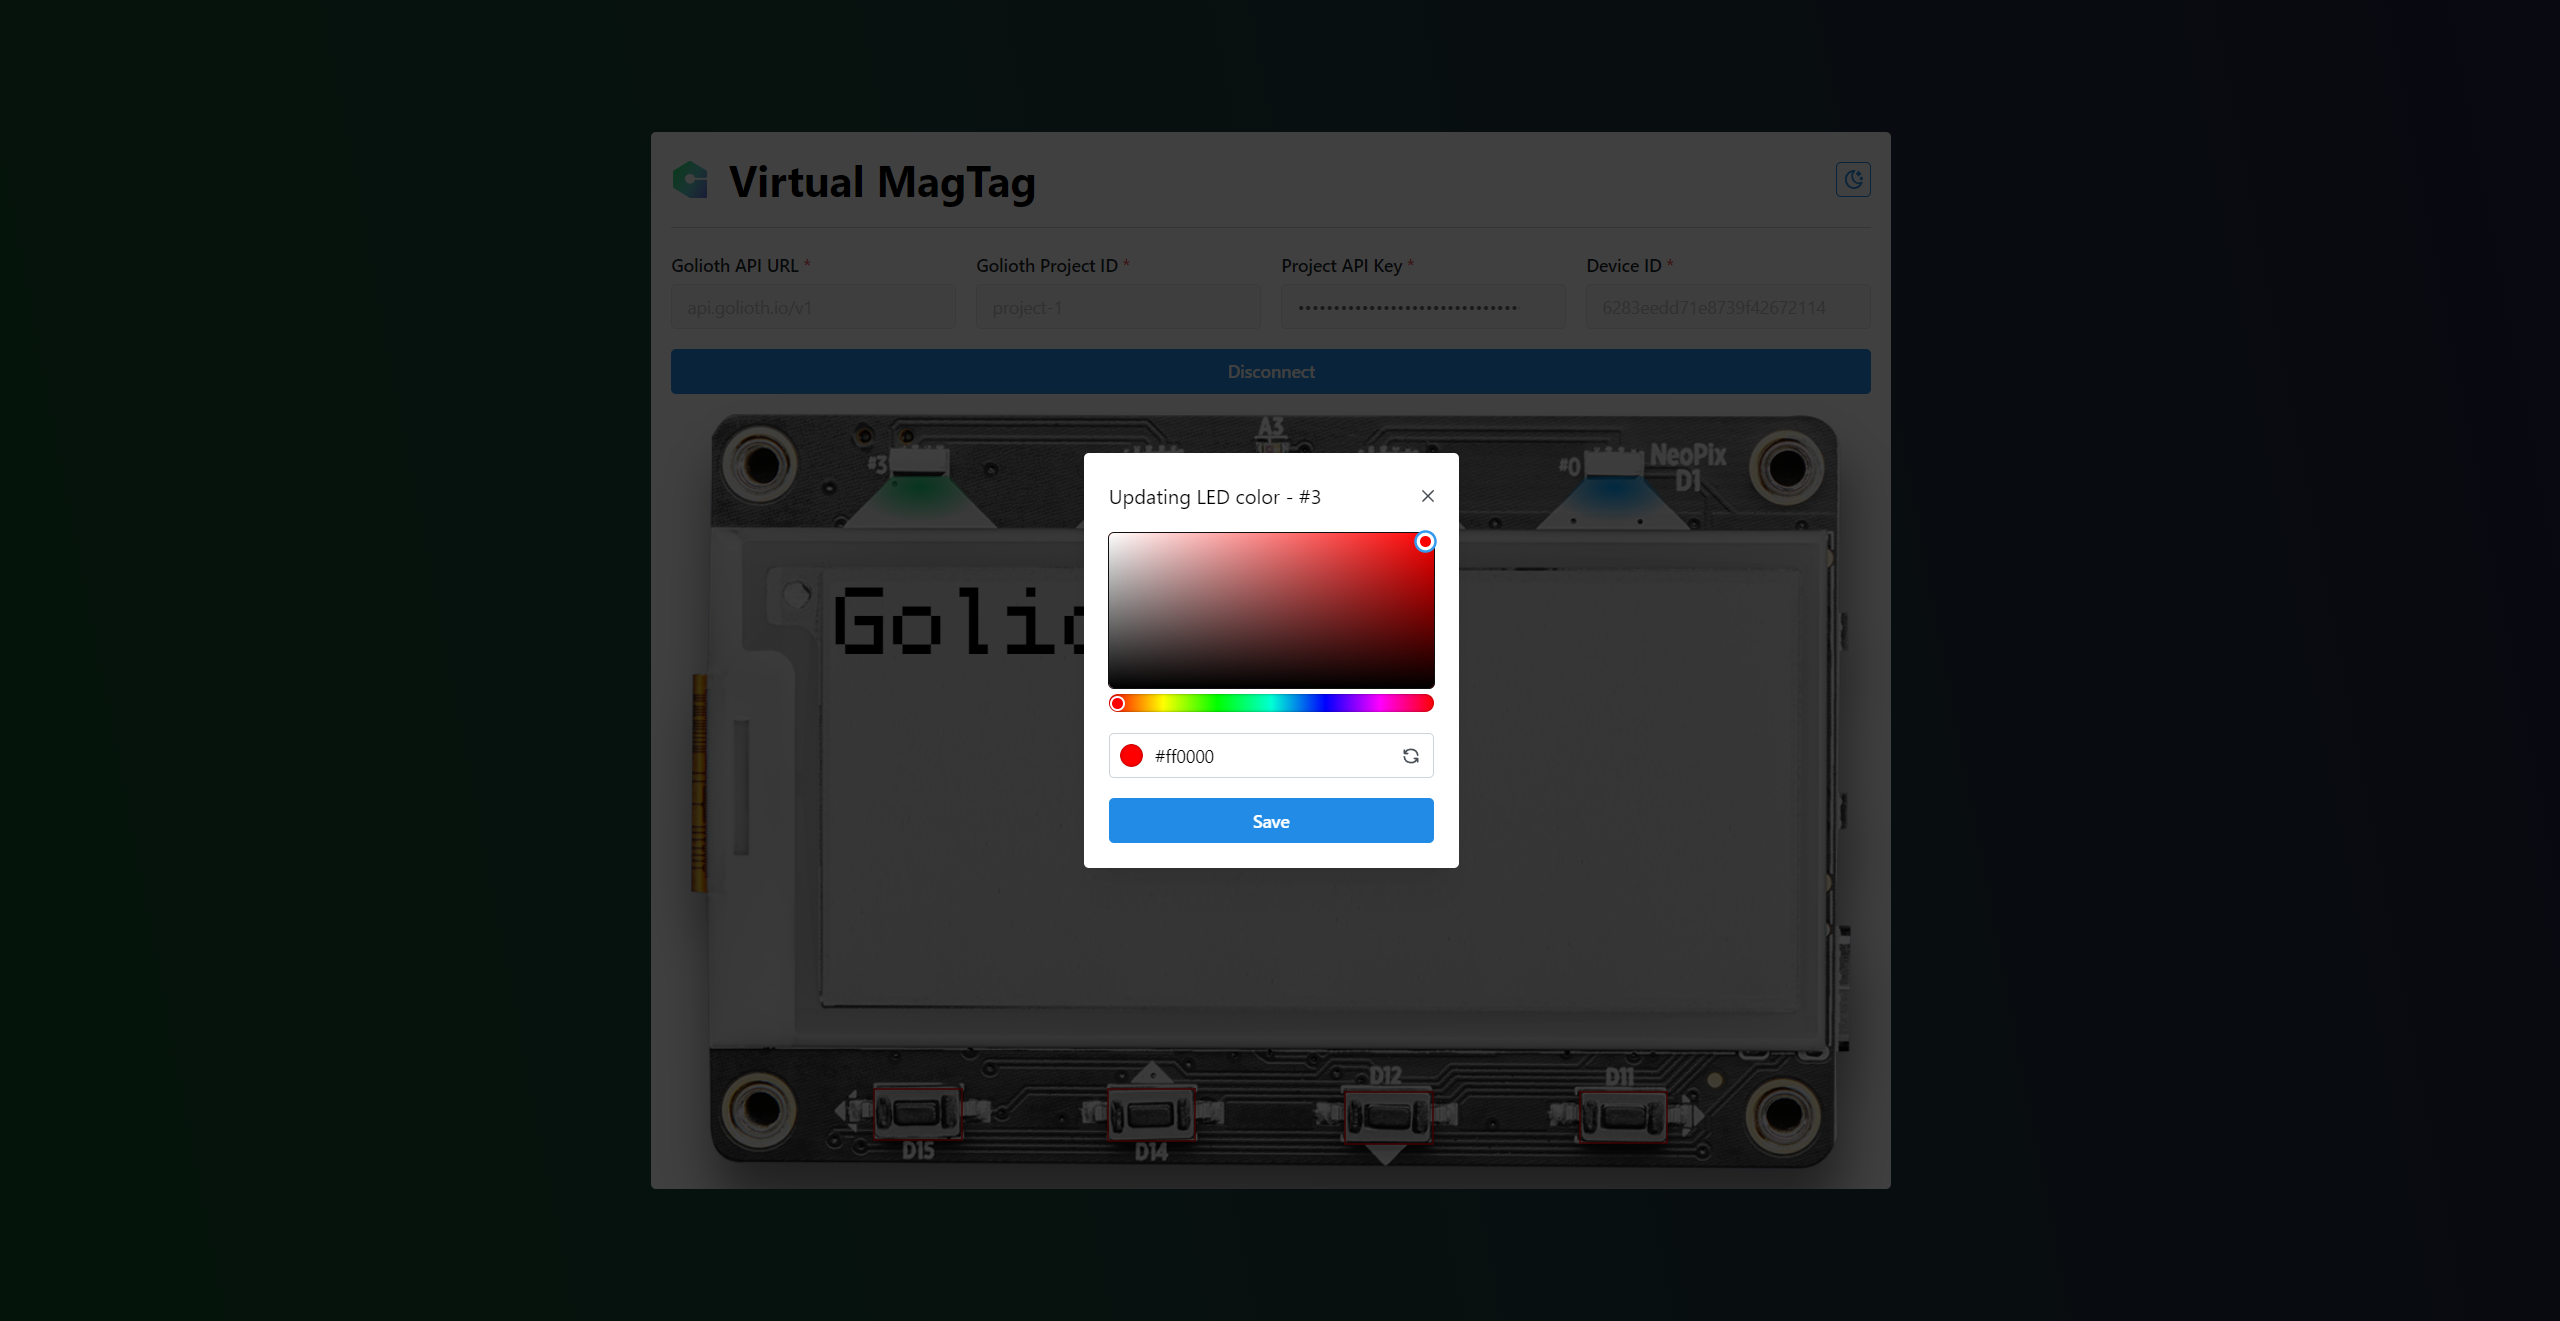
URL:
https://api.golioth.io/v1/projects/project-1/devices/6283eedd71e8739f42672114/data/desired/leds
Payload:
[sourcecode lang=”js”]
{
“3”: “#ff0000”
}
[/sourcecode]
Using the same modal and form, we can set all leds states, by clicking on top of the led position.
Text:
Using the same logic, we can also use a modal and a textarea to set the text, with preserved line breaks.
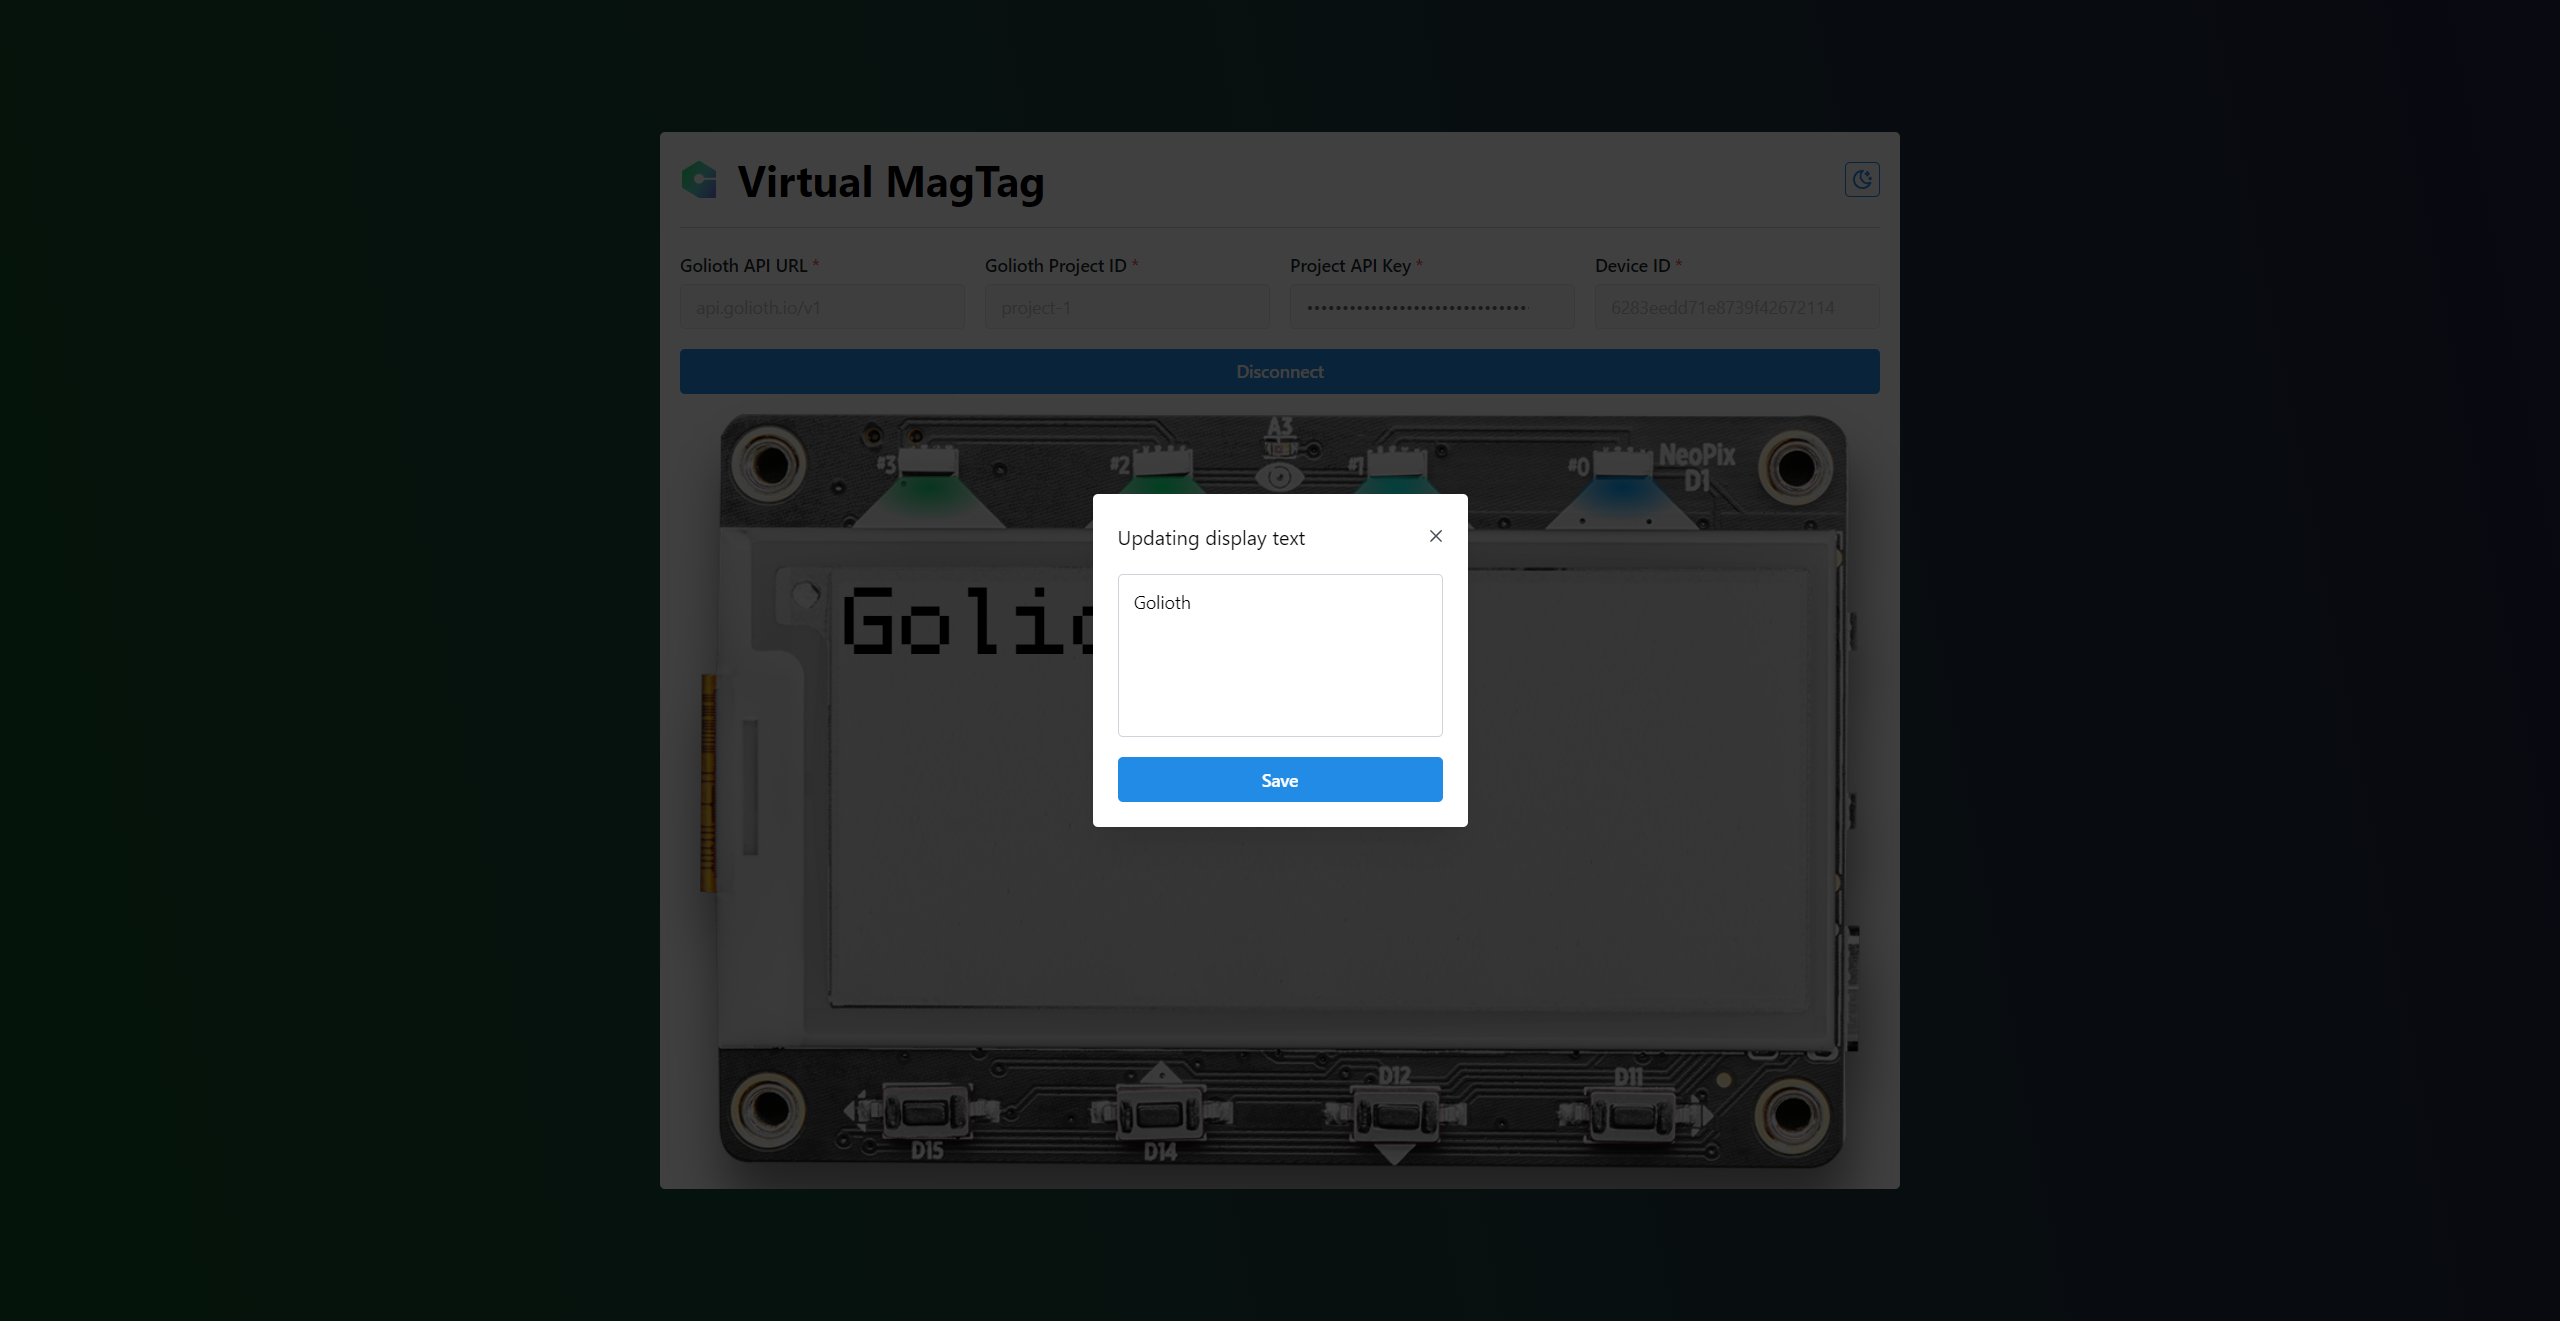
URL:
https://api.golioth.io/v1/projects/project-1/devices/6283eedd71e8739f42672114/data/desired
Payload:
[sourcecode lang=”js”]
{
“text”: “MagTag”
}
[/sourcecode]
Buttons:
Buttons don’t have an actual state, so here I just added some boxes on top of their positions on the MagTag image.

This way, when we click on them, the application will change the desired buzz state to true.
URL:
https://api.golioth.io/v1/projects/project-
/devices/6283eedd71e8739f42672114/data/desired/buzz
Payload:
[sourcecode lang=”js”]
true
[/sourcecode]
LightDB State Result:
[sourcecode lang=”js”]
“desired”: {
“buzz”: true,
“leds”: {
“0”: “#ff0000”,
“1”: “#00ffee”,
“2”: “#00ff84”,
“3”: “#1ad57a”
},
“text”: “MagTag”
}
[/sourcecode]
The device is also listening for changes on the desired state, so when the buzz state changes to true, the device will take action. In this case, the actual MagTag will emit a buzz, and then change the desired buzz state back to 0.
Just a taste of what you can do with a custom UI
The simple steps I’ve shown here are just the beginning of what you can accomplish with your own custom user interface. If you are managing fleets for a customer, you may want to give them a simpler interface that only includes relevant controls and data. Whether it’s a Digital Twin like the MagTag in my example, or more traditional web interface, knowing that Golioth will work for any web-control need you come across is yet another powerful tool to have at your disposal.
