Golioth has just released a Grafana WebSocket Data Source plugin. This open source plugin allows you to create a graphic dashboard using data from any WebSocket URL that uses JSON formatting. This means you can you directly connect the Golioth Cloud API and have Grafana render incoming data in real time as graphs, charts, maps, etc.
Grafana Takes Care of Data Visualization
Grafana is an open source visualization and analytics software from GrafanaLabs. It allows you to query, visualize, alert on, and understand your metrics no matter where they are stored. We chose Grafana because we heard it mentioned multiples times by our community members and found that it streamlines the process of managing device data and visualizing. You can build from source and run it locally (the power of open source), or use the free tier of the hosted Grafana Cloud platform.
We’re Going to Need WebSockets
At Golioth, we recently added WebSocket support for some of our services like Logs, LightDB State, and LightdDB Stream. Actaully, Chris wrote a blog post all about it. You can now connect to a WebSocket URL and get real-time data updates from your devices without the need to poll for updates like you would with a REST API.
As awesome as it is, Grafana didn’t have a WebSockets plugin, so we created one! It allows you to connect to any WebSocket URL and visualize the data in Grafana. You can get a copy of the WebSockets plugin code in our repo. But we have also submitted it as an official plugin – it should be available in Grafana soon!
Let’s Try the Demo!
Setting Up a Device to Send Data
As a hardware beginner, I followed one of our easiest samples using PlatformIO and our Arduino SDK to get my ESP32 board connected to our platform, see our examples folder on our Arduino SDK repo.
Note: The arduino-sdk repository showcased in this post is deprecated. GoliothLabs has an experimental repository that may work as a replacement:
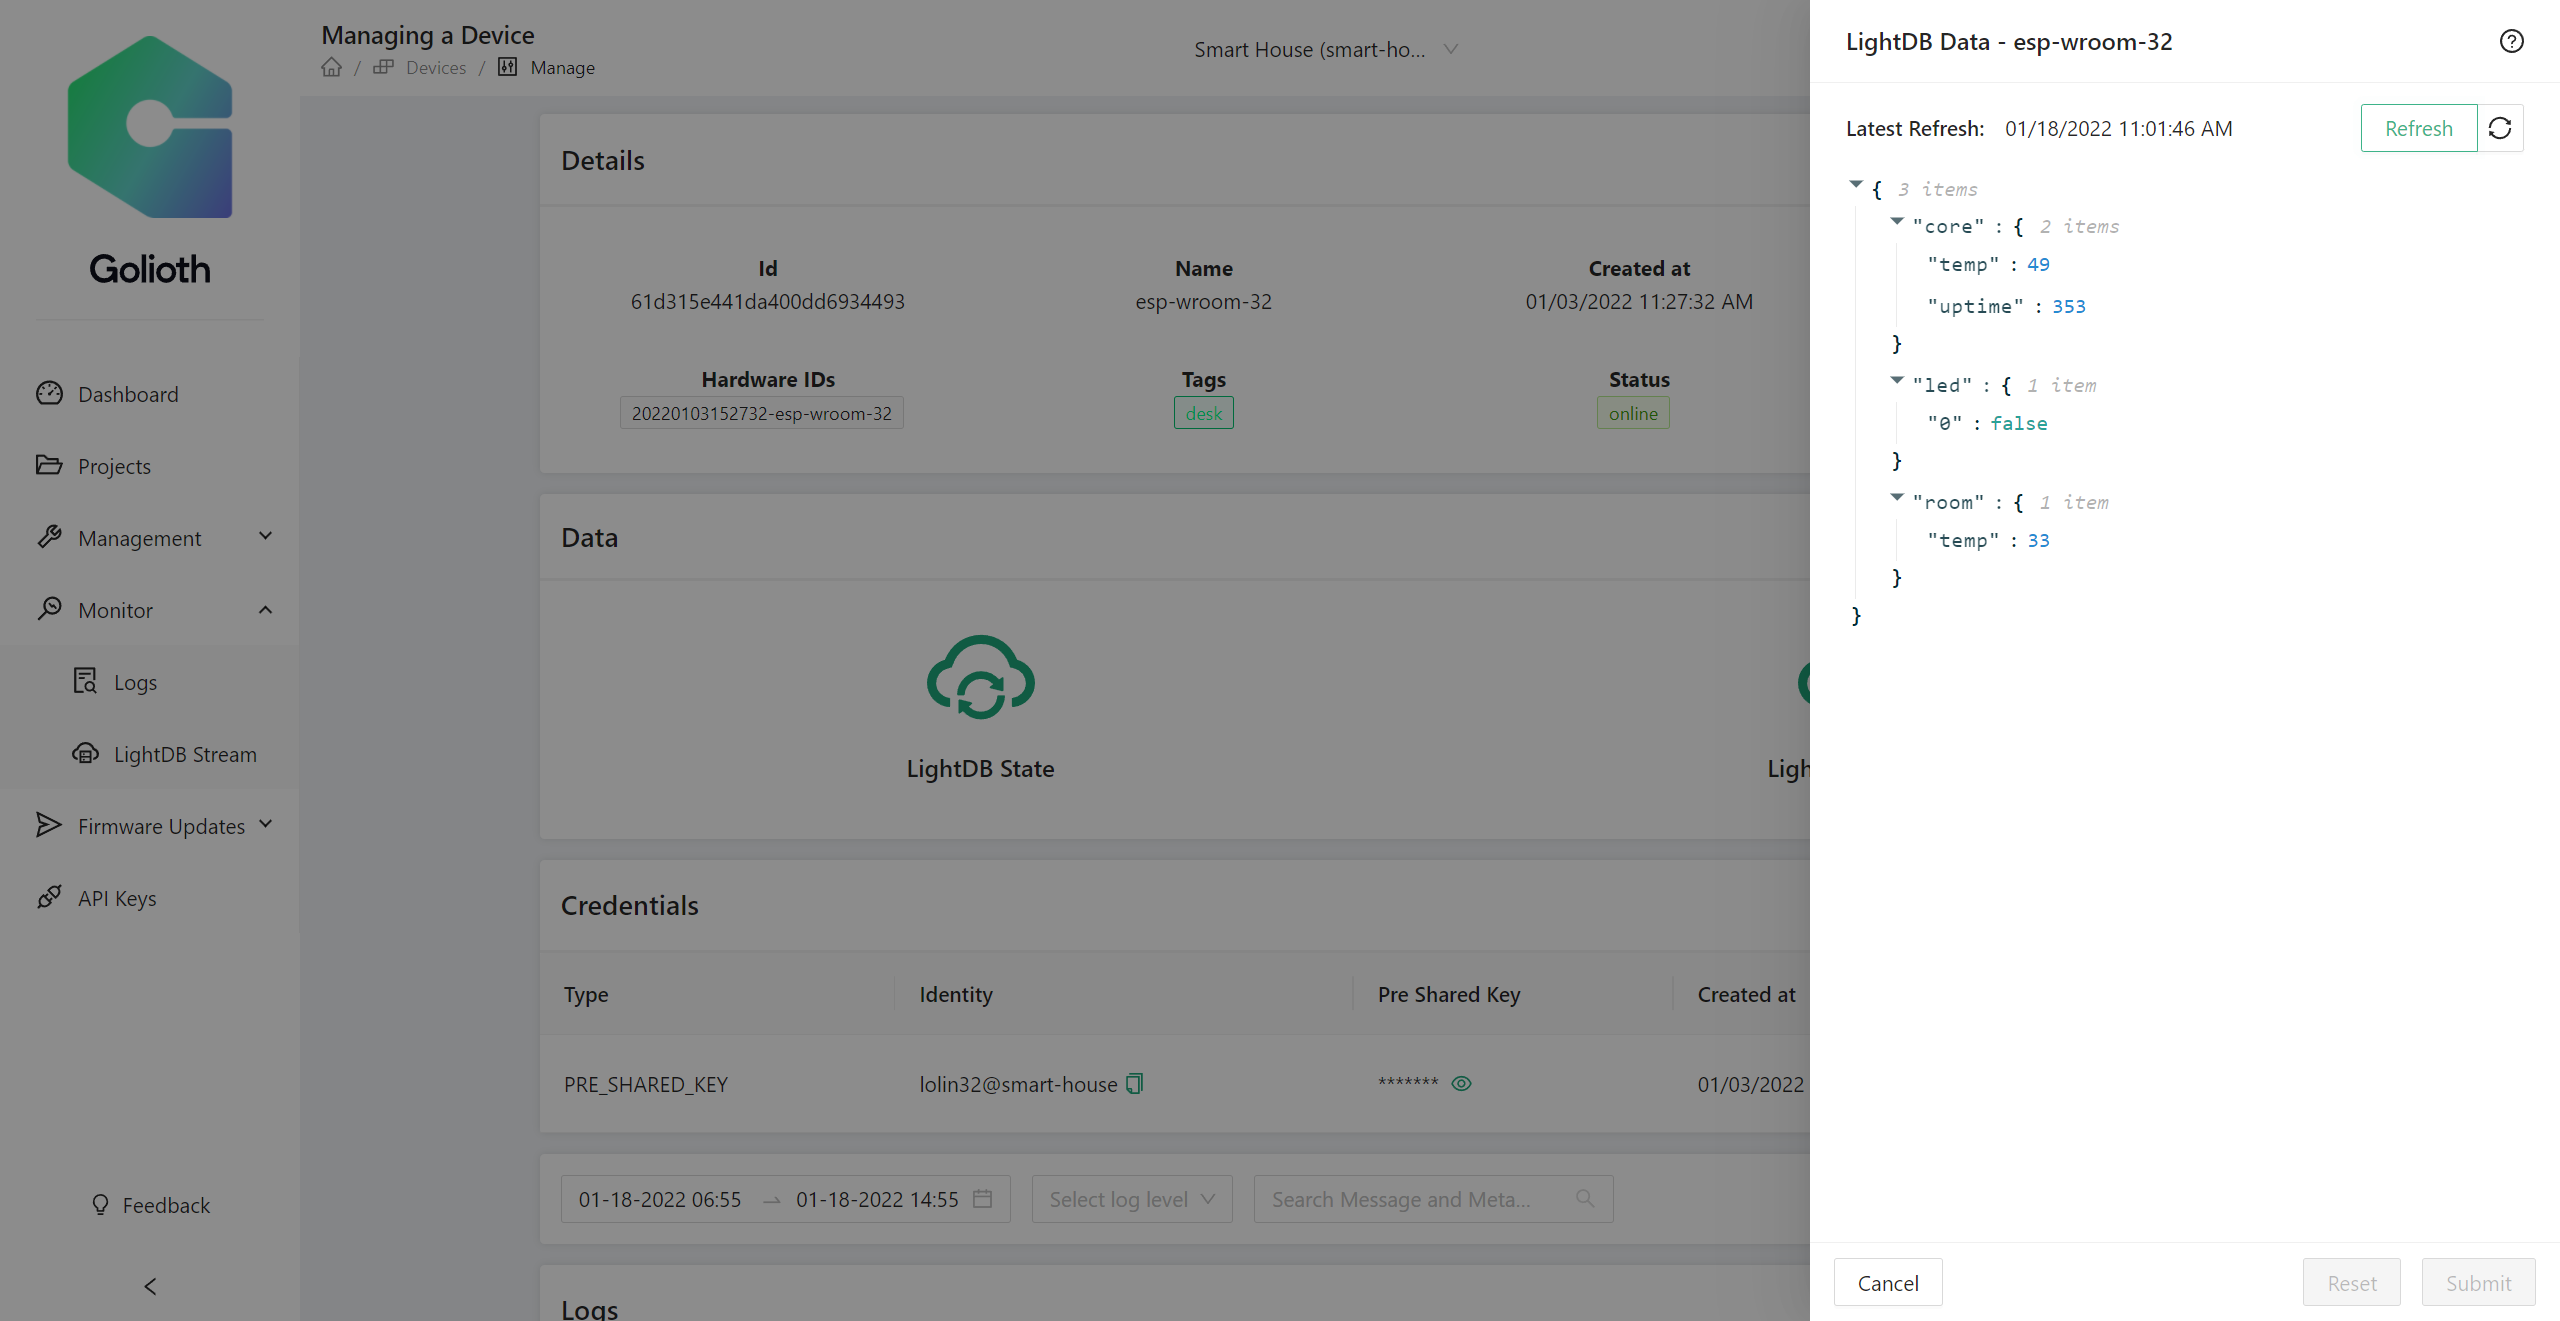
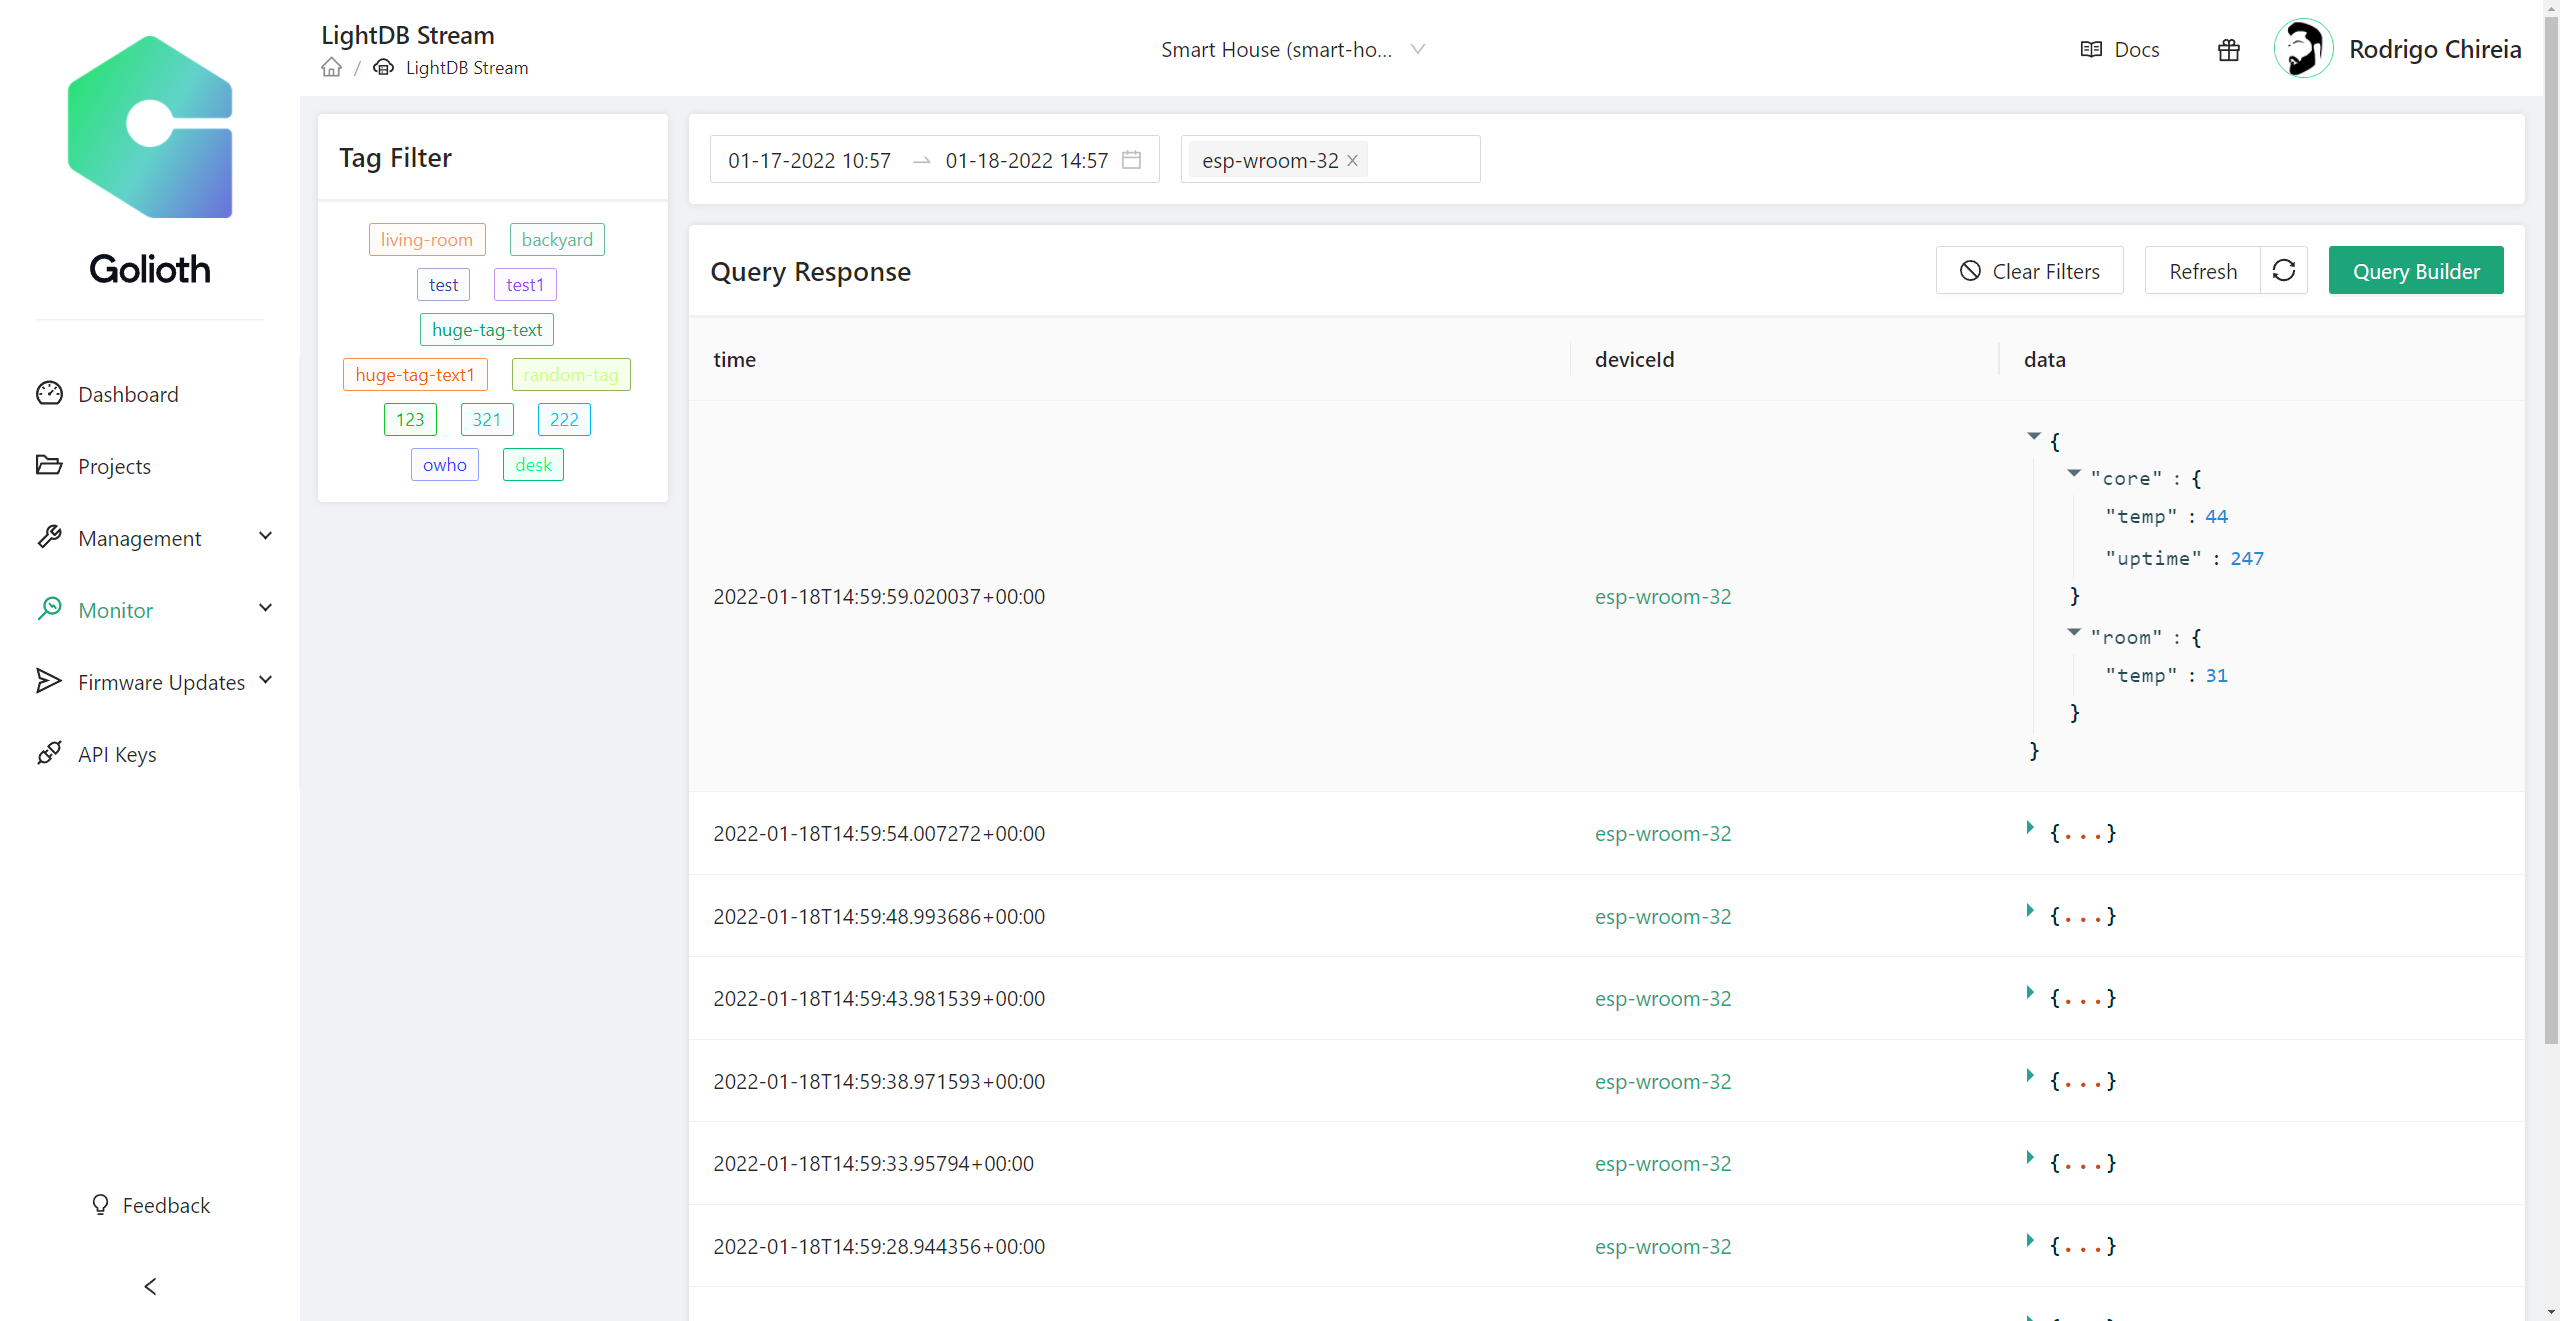
I’m writing data on both of our services in a 5 seconds loop, updating my device’s state with LightDB State and reporting time series data for our LightDB Stream service.
[sourcecode lang=”cpp”]
// Every 5 seconds loop
…
int core_temp = randomNumber(40, 60);
int room_temp = randomNumber(27, 33);
int uptime = millis() / 1000;
String payload =
"{
\"core\":
{
\"temp\":" + String(core_temp) + ",
\"uptime\":" + String(uptime) +
"},
\"room\":
{
\"temp\":" + String(room_temp) + "
}
}";
client->setLightDBStateAtPath("/", payload.c_str());
client->sendLightDBStream("/", payload.c_str());
…
[/sourcecode]
This small program sends random numbers as core/room temperatures, and the device’s uptime. We have data, now let’s graph it!
Golioth’s WebSockets API
WebSockets “listens” for changes, so every 5 seconds those updates on State and Stream are also available thru Golioth’s WebSocket API. We can follow the WebSockets docs to setup a connection to listen to them.
Below you can see how the WebSocket hosts URLs are formatted. Use the Golioth Console to find the projectId, deviceId, API key, and any paths you need. (This information is also available using the goliothctl command line tool.)
LightDB State
// Websocket URL format: wss://api.golioth.io/v1/ws/projects/{projectId}/devices/{deviceId}/data{/path=**}?{x-api-key|jwt}={API_KEY|JWT}

wss://api.golioth.io/v1/ws/projects/smart-house/devices/61d315e441da400dd6934493/data?x-api-key={projectApiKey}
LightDB Stream
// Websocket URL format: wss://api.golioth.io/v1/ws/projects/{projectId}/stream?{x-api-key|jwt}={API_KEY|JWT}

wss://api.golioth.io/v1/ws/projects/smart-house/stream?x-api-key={projectApiKey}
With those I was able to test the endpoint using websocat to make sure that the data my device was sending created notifications through the WebSocket connection as expected.

Grafana WebSocket Plugin Setup
For this demo I’m running everything locally (both Grafana and the Plugin itself), but we have submitted the signed plugin to Grafana’s Cloud so soon you will be able to find it there by default.
To use the plugin, there are a few configuration steps we need to follow:
- Once you’ve logged into Grafana, go to the Configuration page (gear icon) and then to Plugins
- Search for WebSocket API, select and then click on Create a WebSocket API data source
Now we fill in the fields as the API requires and hit save. For Golioth’s WebSocket API you can see I’ve entered the URL, and I’ve specified x-api-key and stored the API key that I generated on the Golioth Console.

Notice that I’m not using the full path, but only through the project level (smart-house). This way we can select the specific path we want to listen to later on the Panel’s Query page. This allows more flexibility.
Building the Dashboard that Shows the Data
With the data source set up, it’s time for us to build the query on an actual panel.
Something to keep in mind is that, right now, it will only listen to future events, so if there’s any update on the Query Field, Path, Panel or Dashboard, the current stored data will be wiped.
Graphing LightDB Stream:
- Hover on the plus sign at the sidebar and select Dashboard
- Then click on Add a new panel
- Select WebSocket API under the Query’s data source
- Go to Query A Path tab and fill with your desired path. In my case
/stream
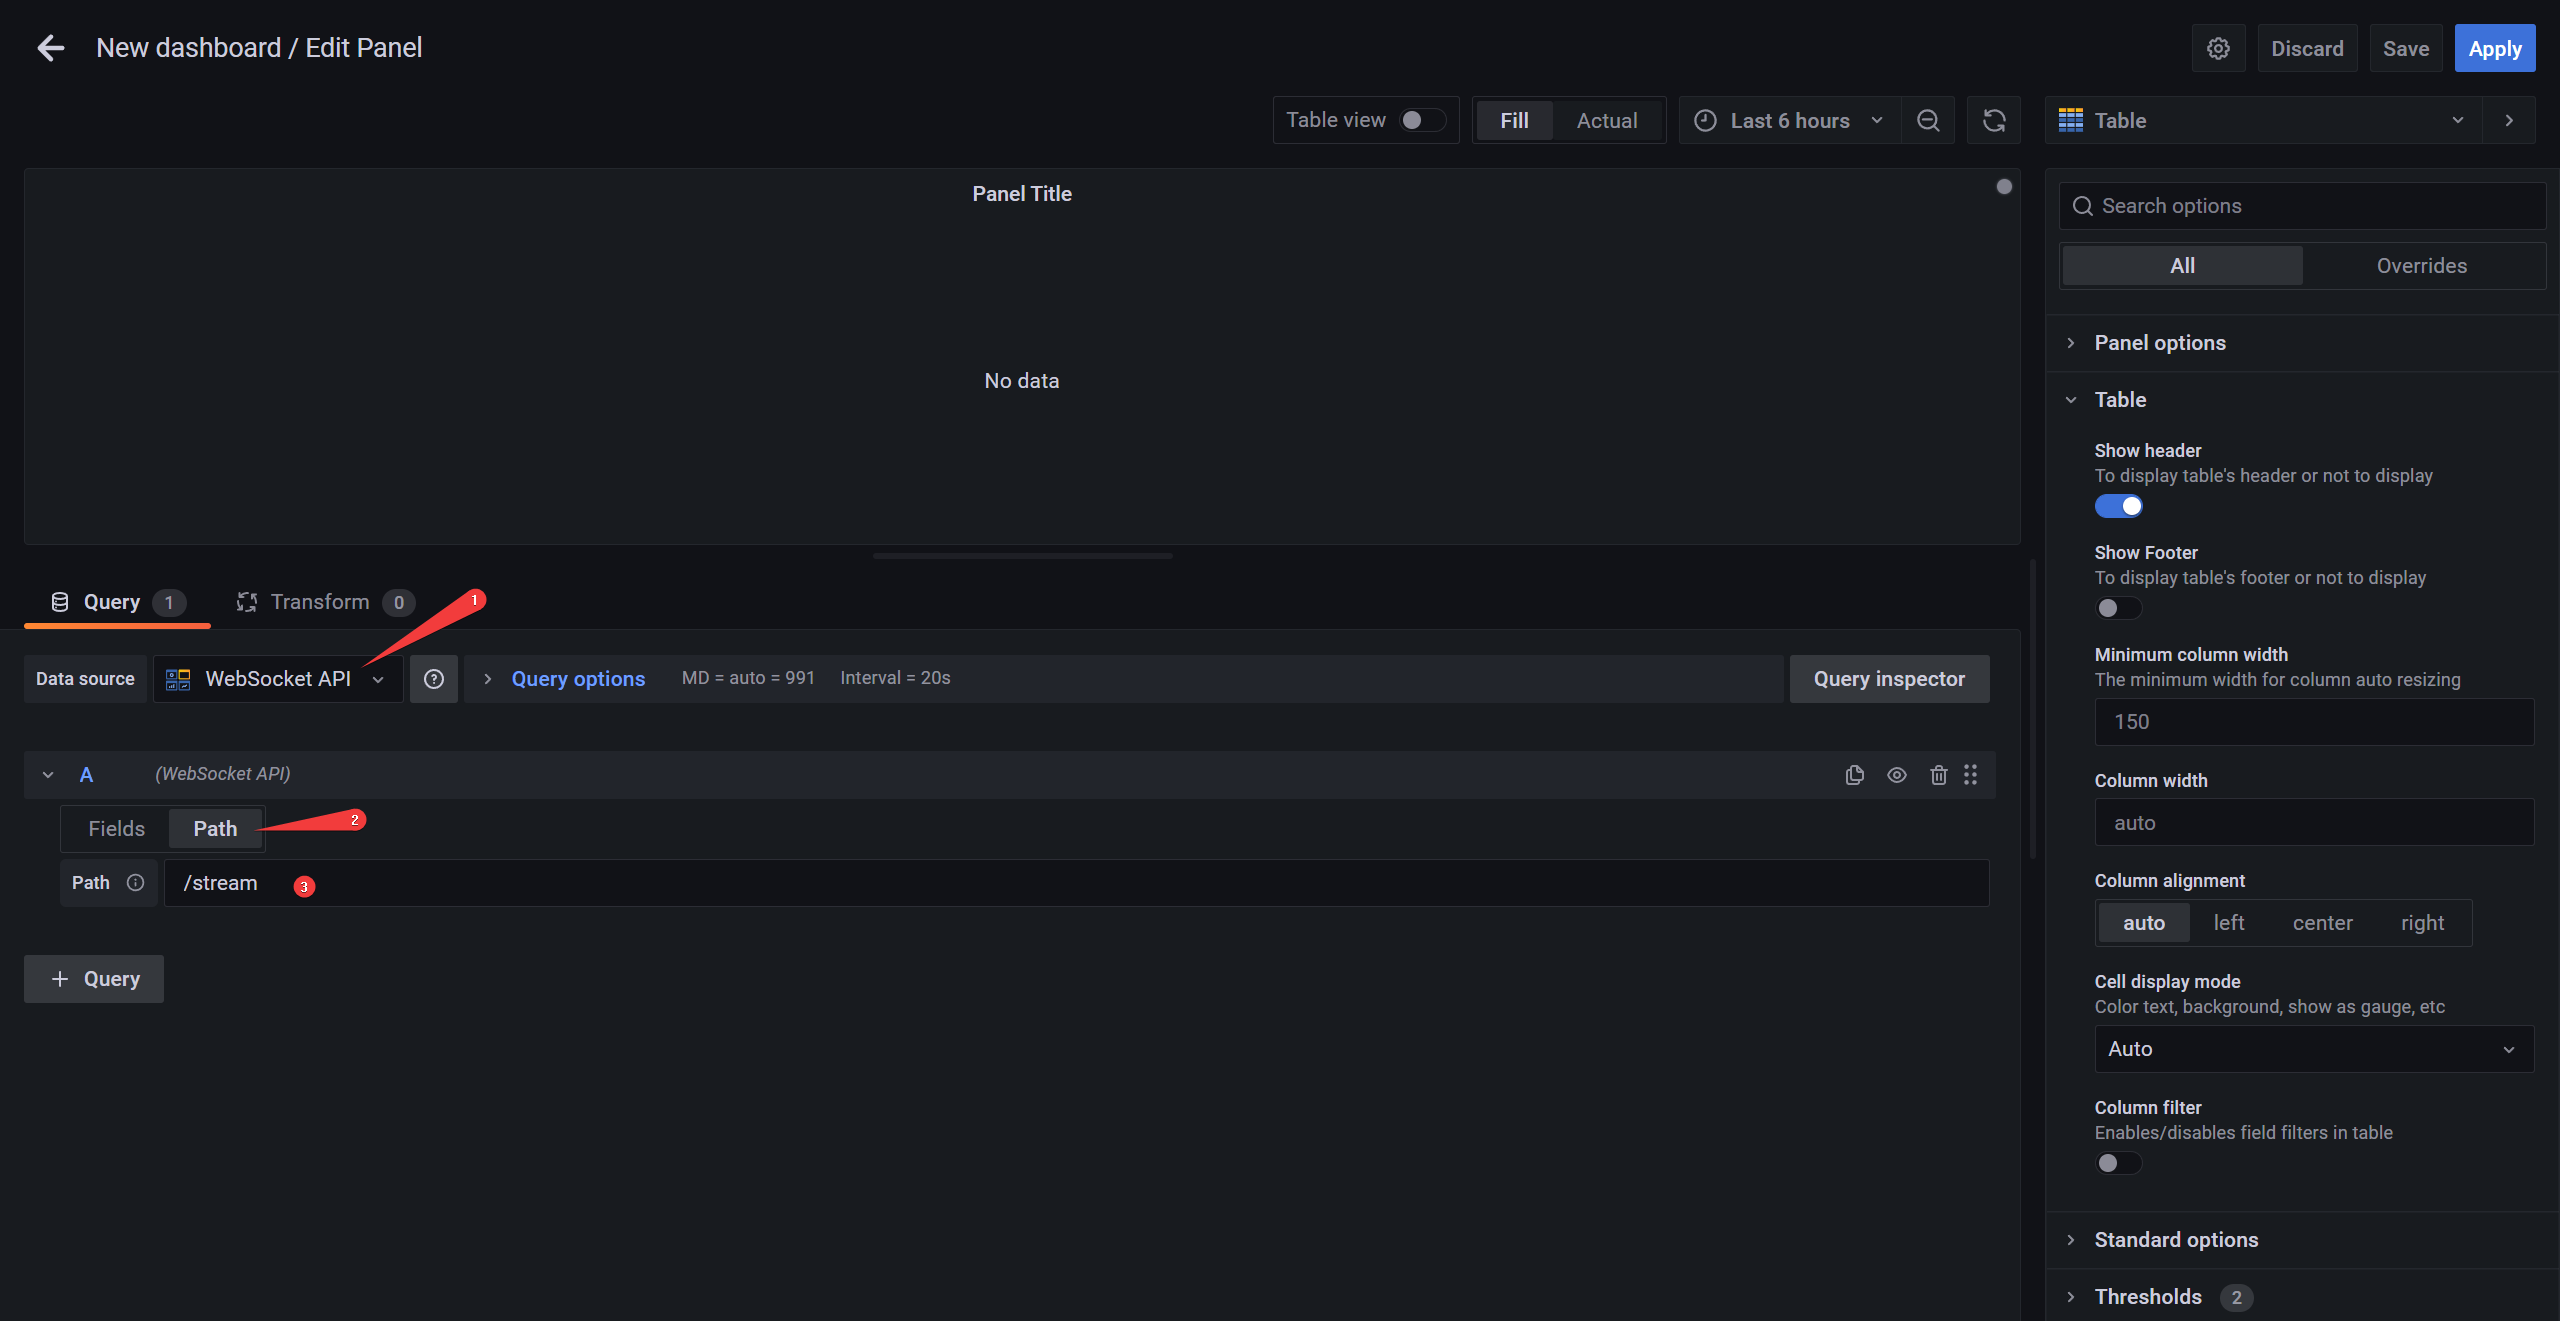
- Under Fields tab, use JSONPath reference to transform the JSON result into something that the dashboard can display. Here I’ve used
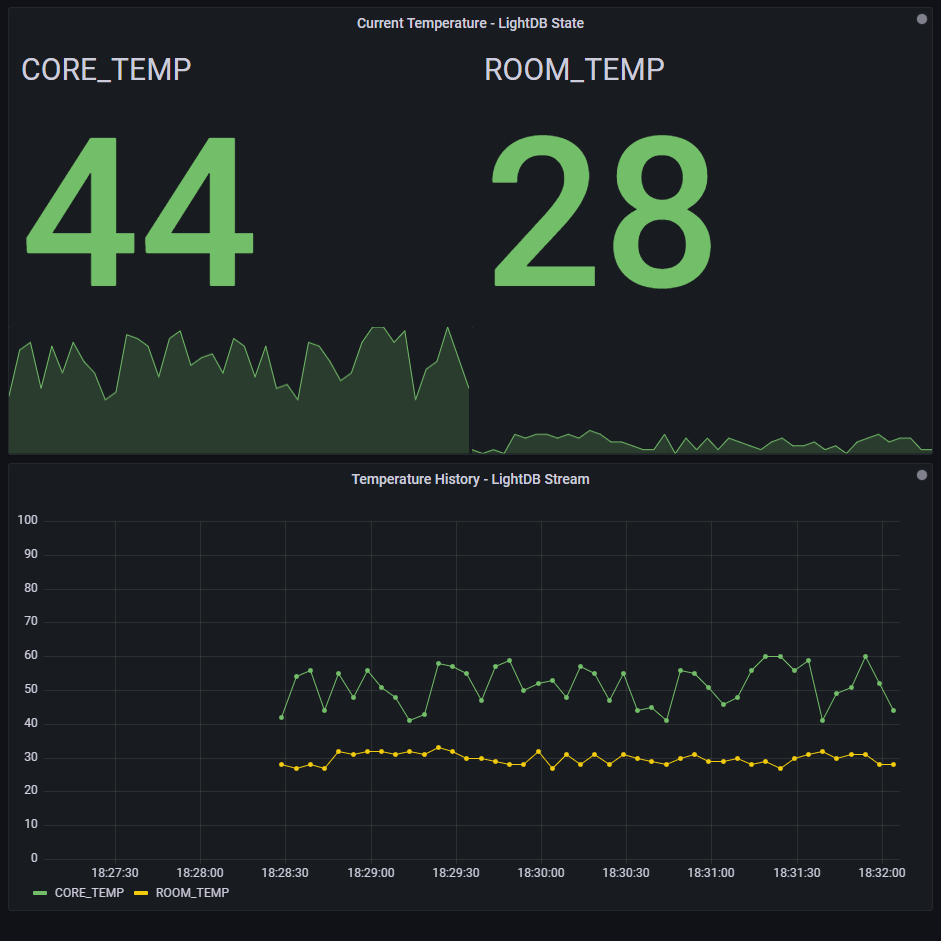
$.result.data.timestamp,$..core.temp, and$..room.temp - I want to display the last 5 minute events of my device’s temperature, both for the core and room. So I changed the panel’s type into Time Series on the top right corner, and filled with the fields required:
- Hit Save, and its done.
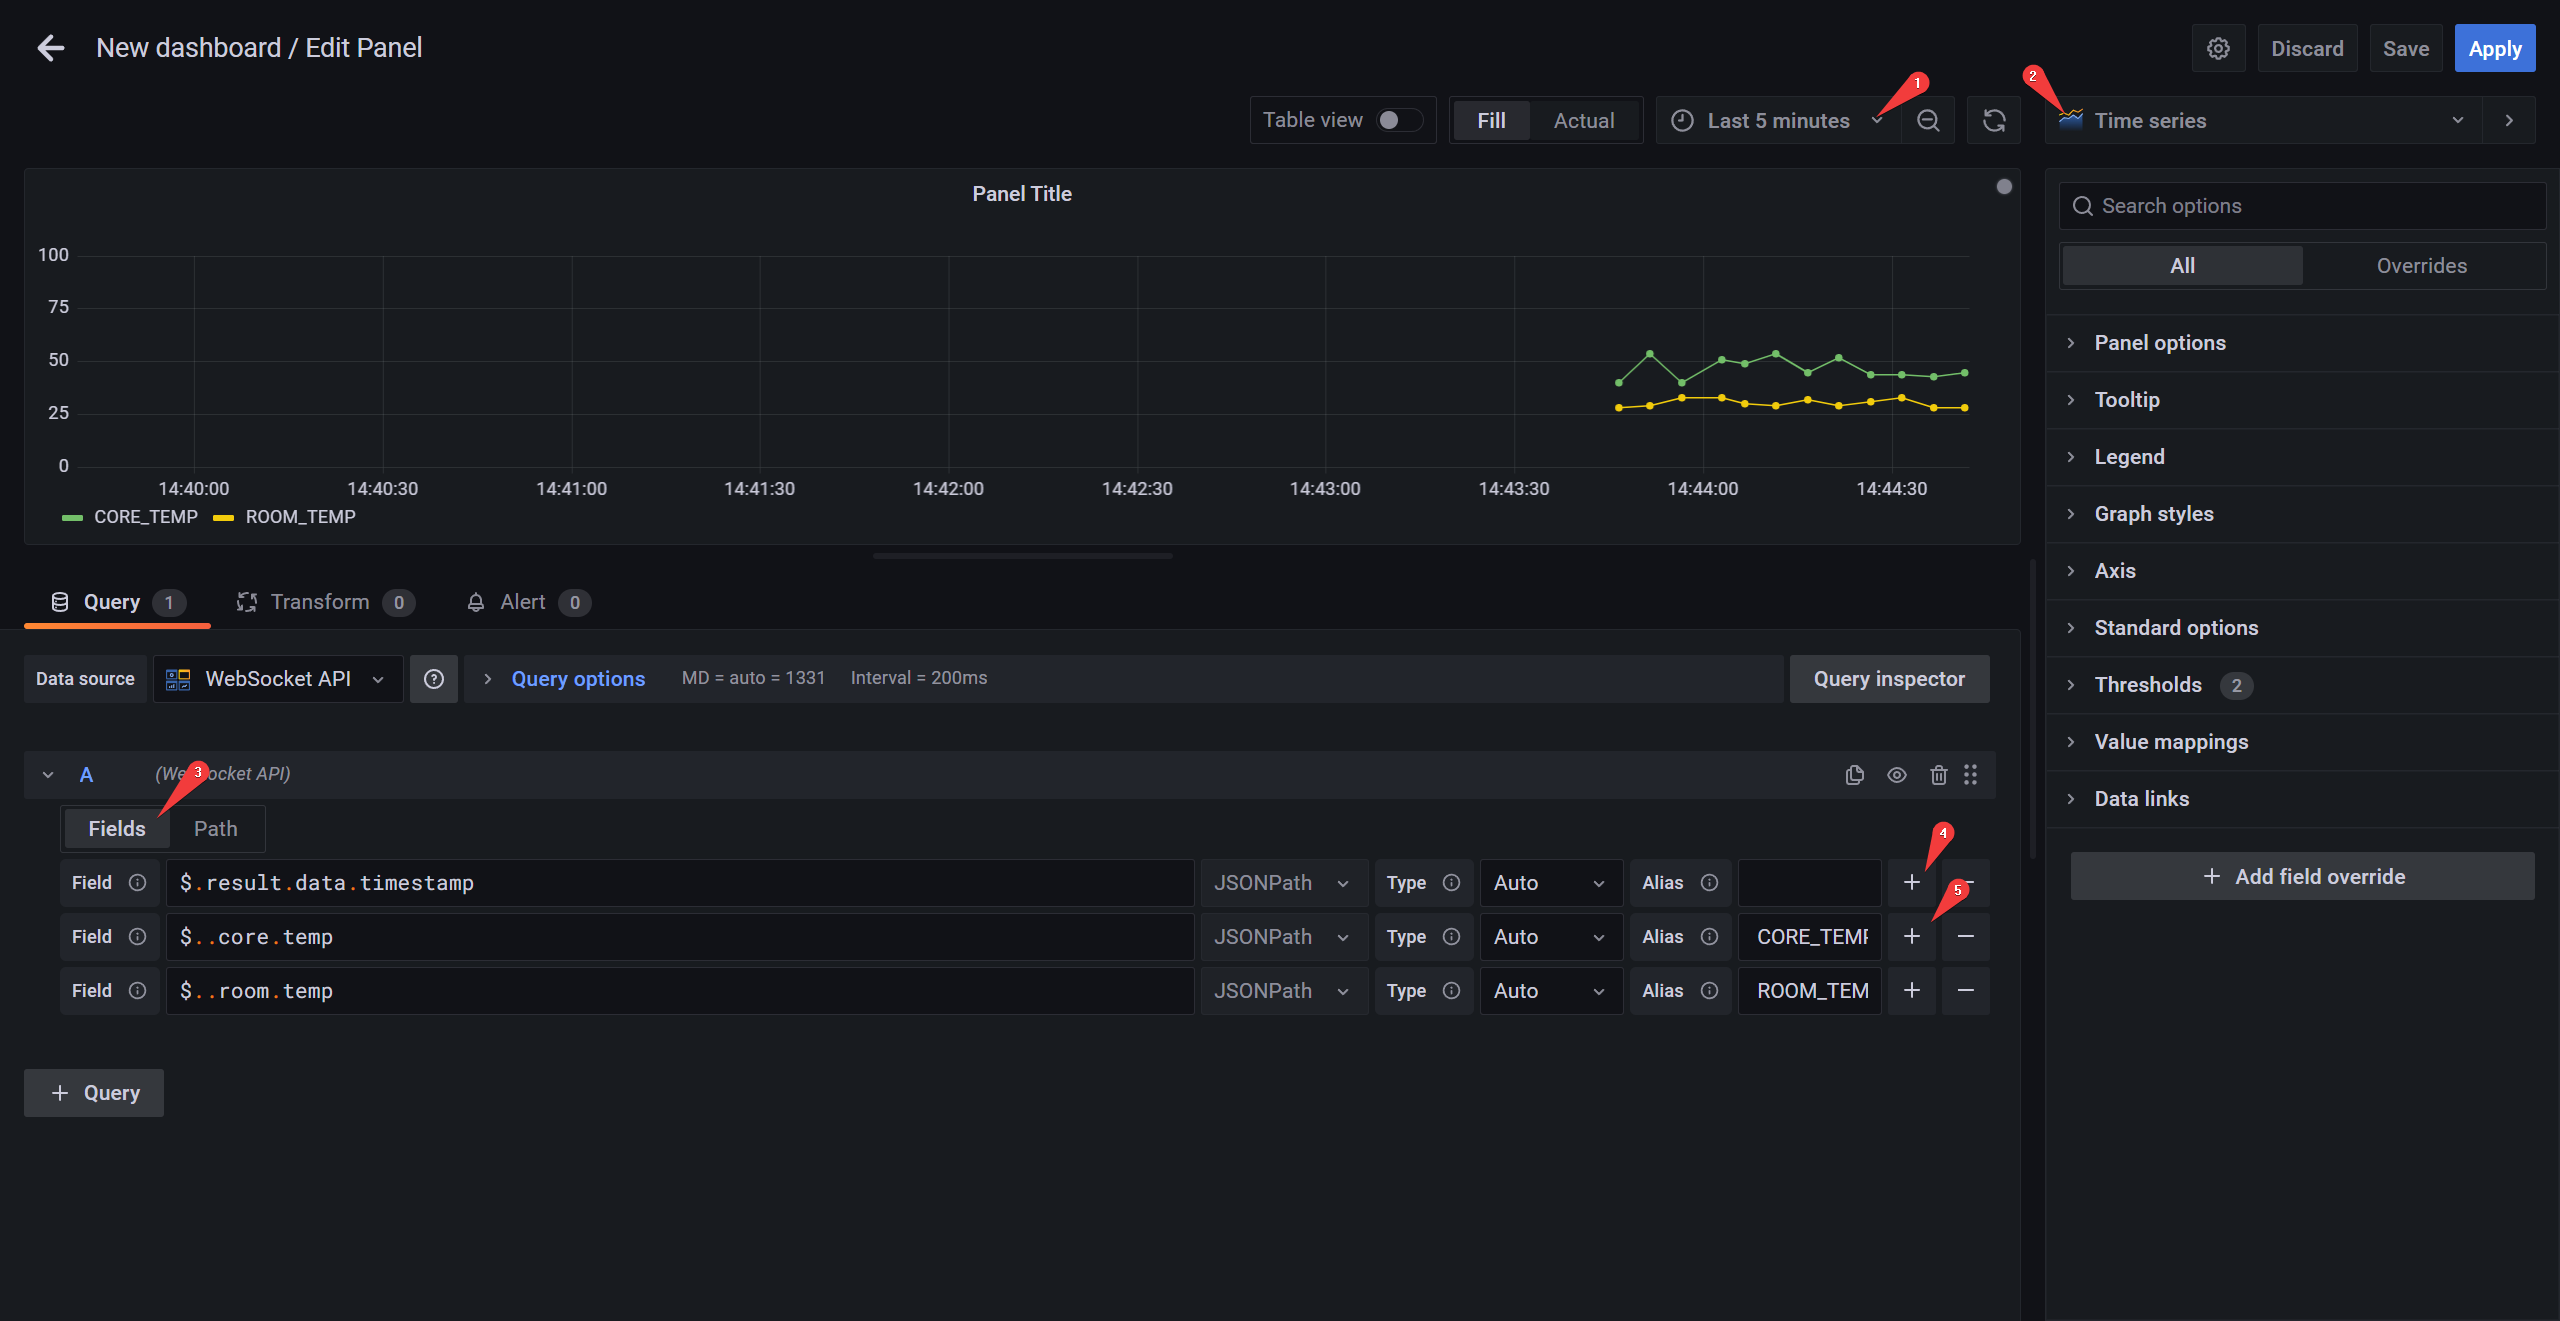
As long as data is streaming in from a device, it will be graphed in real time. One tip as you get used to handling data, try starting with Table View on to better understand the JSON by your query.
Displaying LightDB State
To create another panel for the LightDB State we can just duplicate the first one and update his its Path, so:
- Grab your device Id and update the Path following the LightDB State guideline
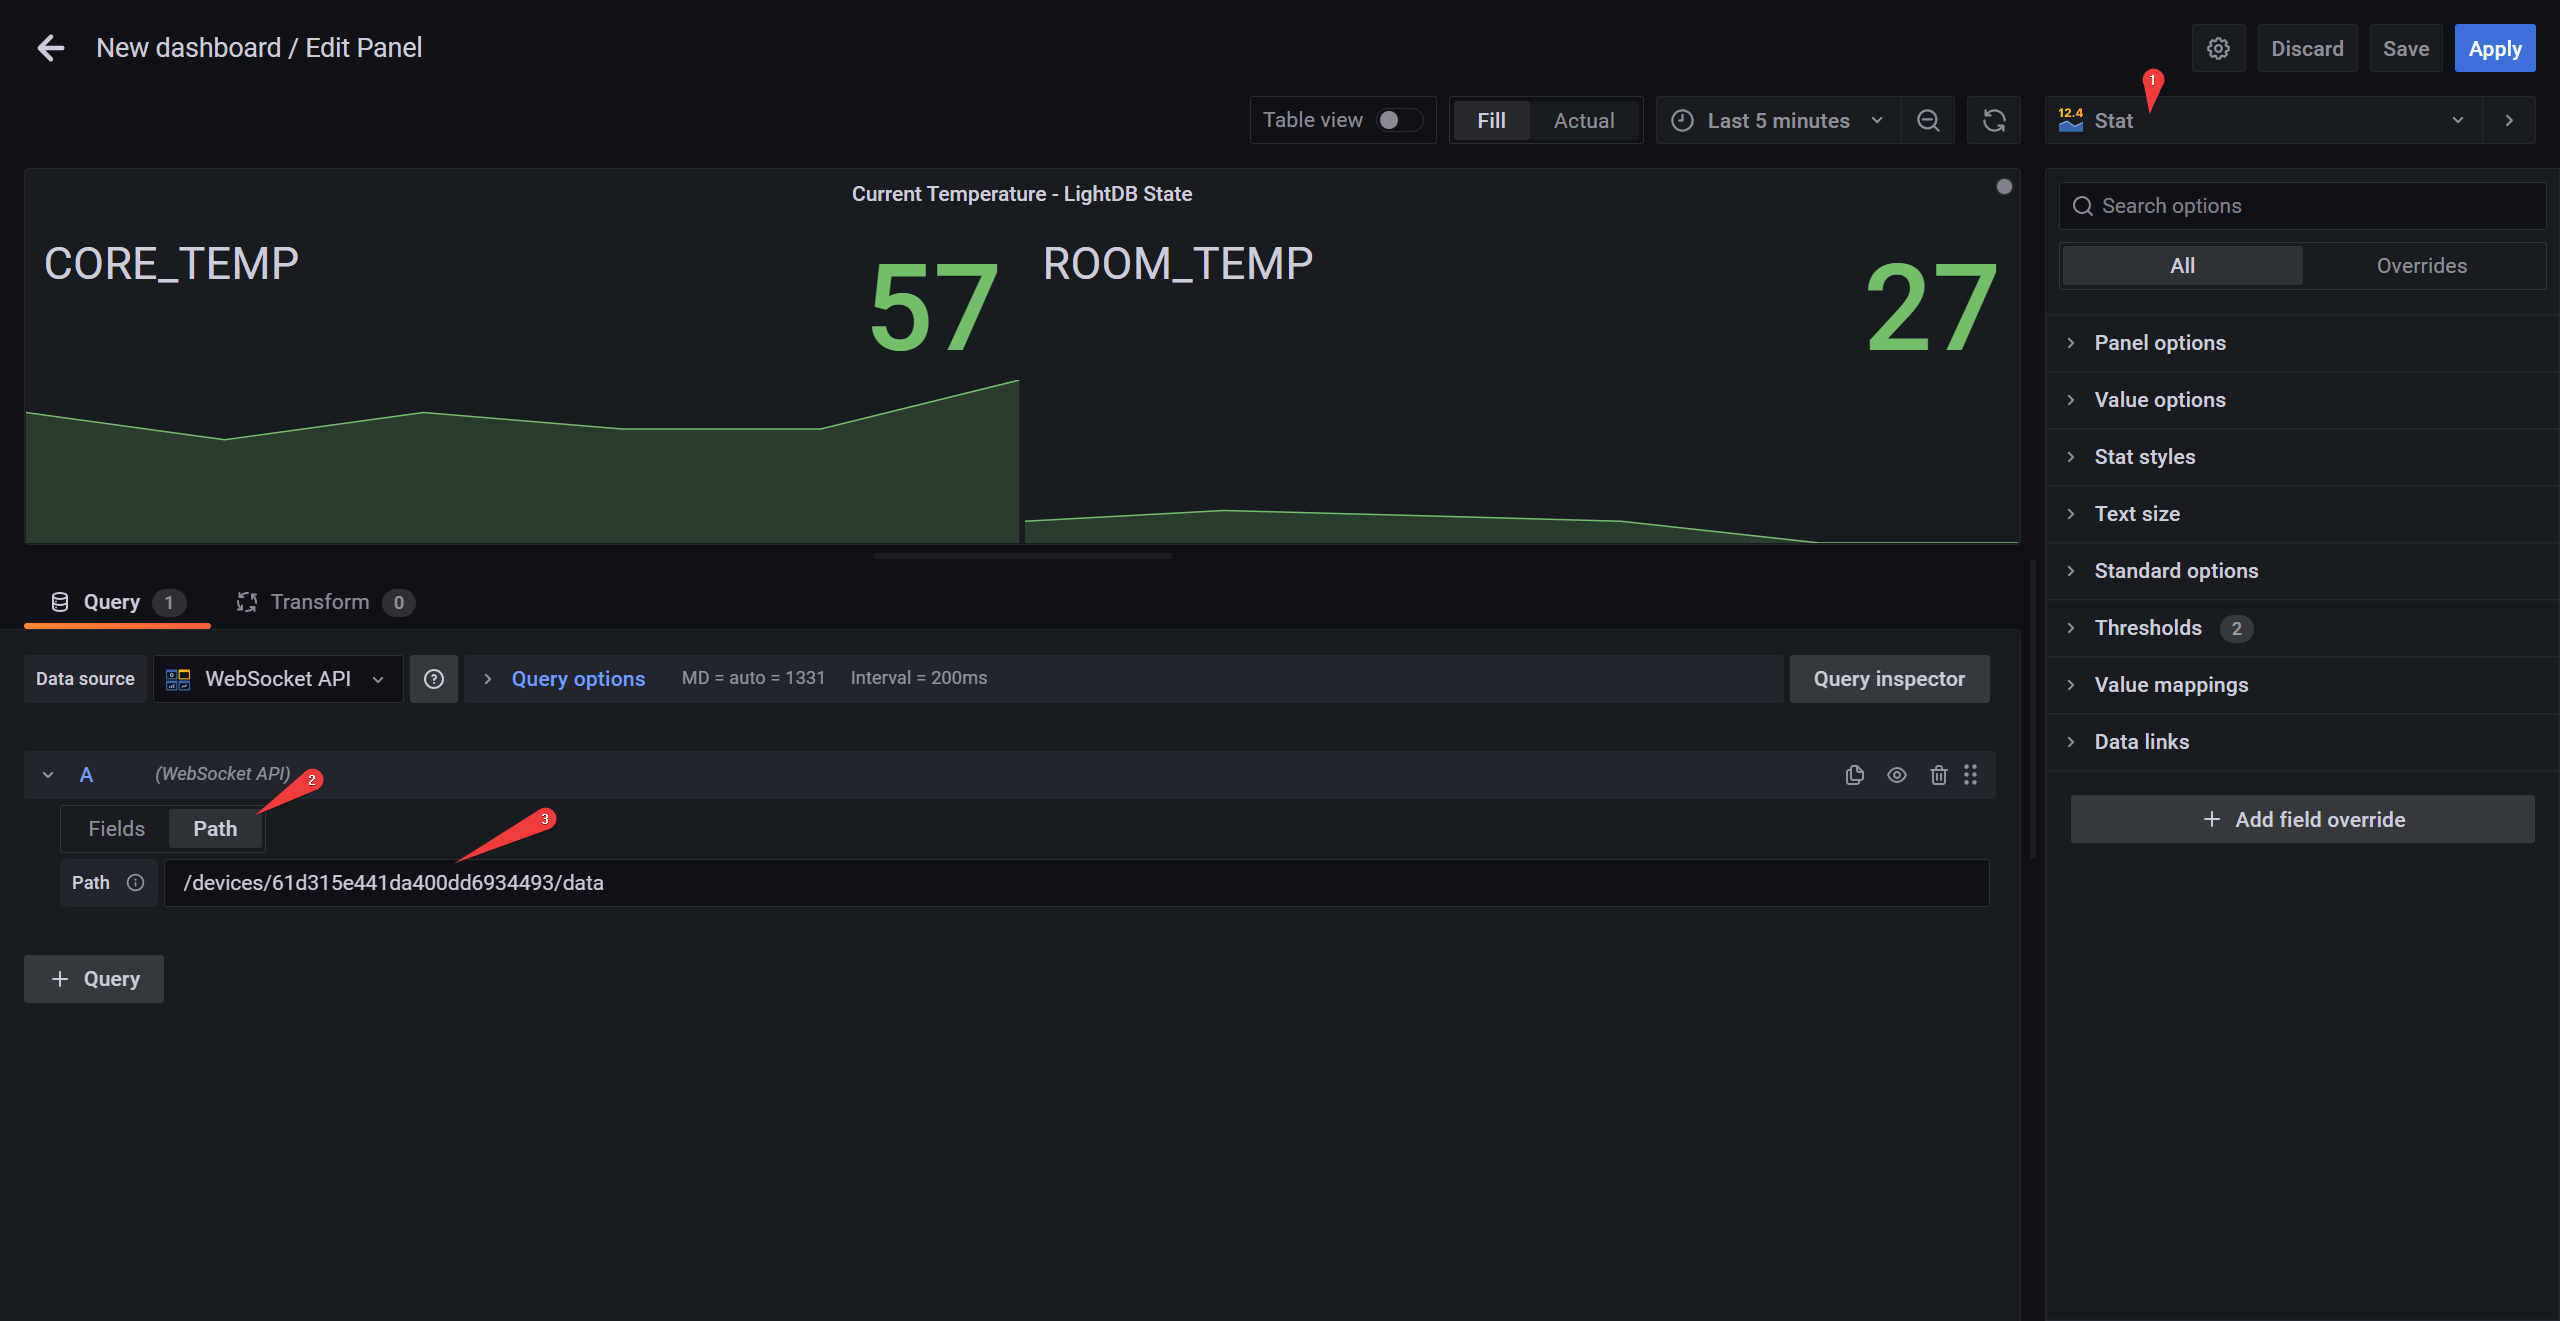
There’s a small differences here, LightDB State can have deeper paths e.g. .../data/core/temp but they will only be notified via WebSockets when there’s an update on them. Because I want to listen to multiple path updates for this Panel, I will leave the path set to the root level, that is .../data.
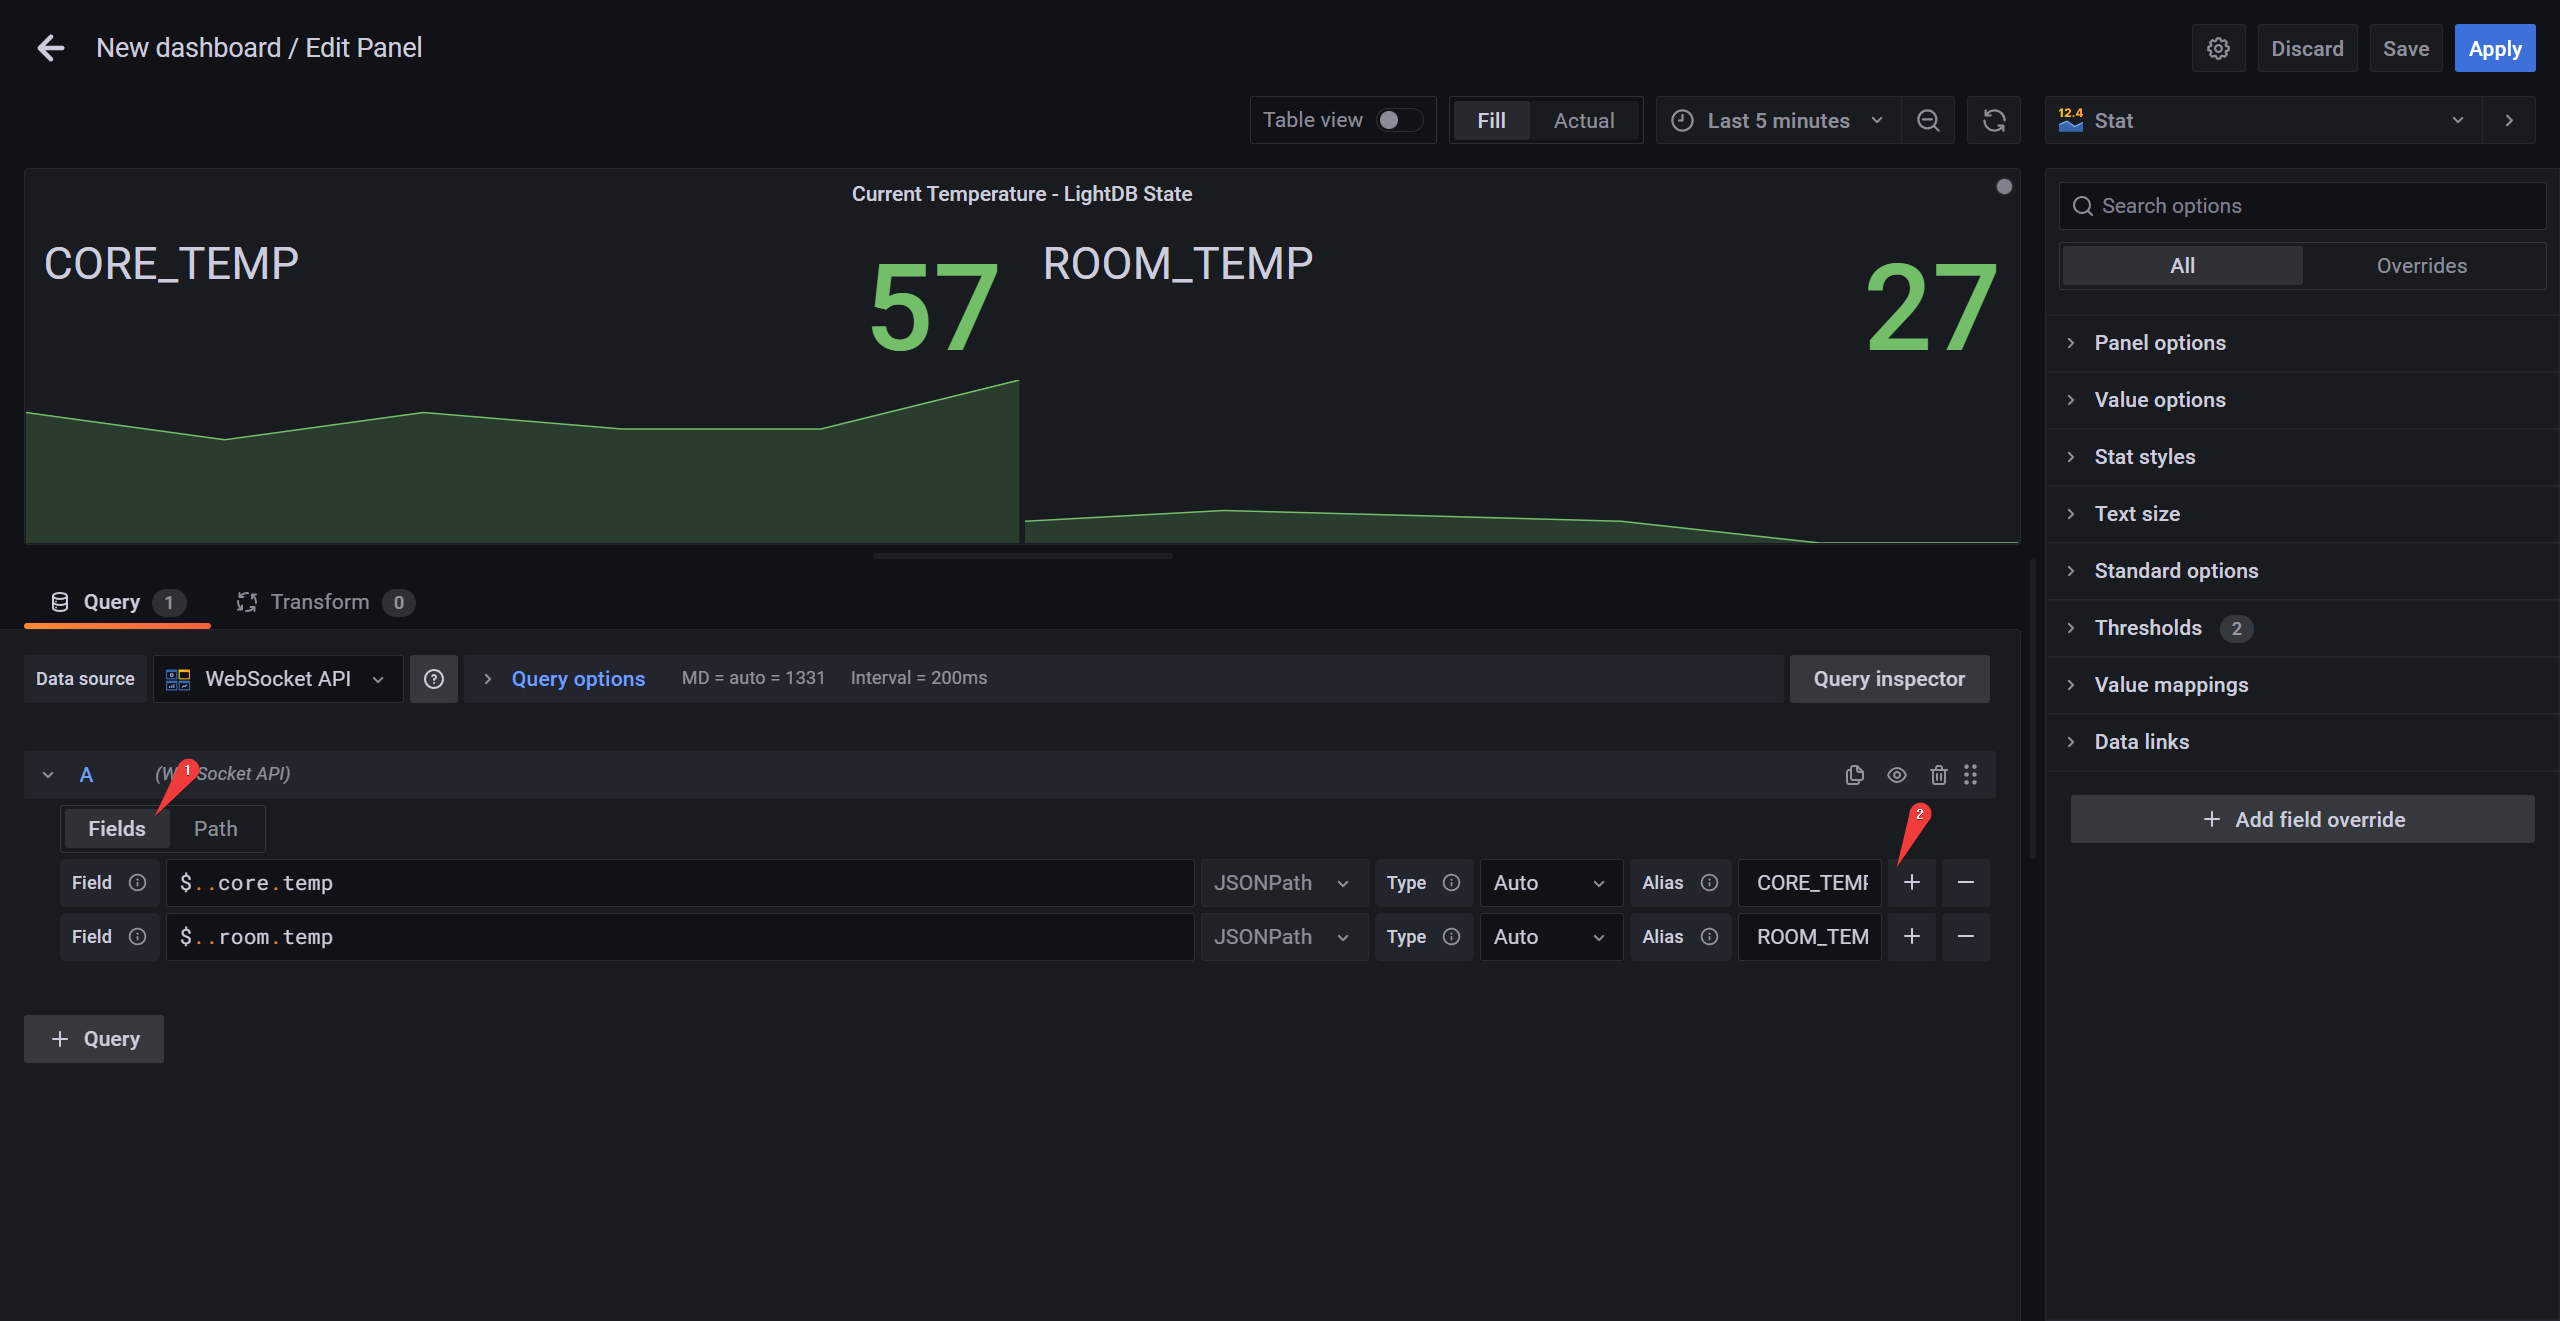
- Transform the query fields to use
$..core.tempand$..room.temp - Hit Save, and it’s another one done.
Final Results
Like that, we have 2 panels ready to listen for updates coming from both LightDB Stream and State in real-time. Feel free to add more data and to listen to different State paths.
Conclusion
Grafana is an awesome tool that allows us to connect and create professional visualizations. Because it is open source, a major part of its improvement over time is a result of its community. We’re building an amazing platform at Golioth and we also want to empower our community with the freedom to build things they love with us. With WebSockets now available on our platform, we built this plugin to share that excitement with our users and with the entire world.
Hopefully you’ll give this a try, and we want your feedback! Get in touch with us on the Golioth Discord server and please join us there for our Office Hours every Wednesday at 10 am Pacific Time.
