Golioth is a device management cloud that is easy to add to any Zephyr project. Just list the Golioth Zephyr SDK as a module in your manifest file and the west tool will do the rest. Well, almost. Today I’ll walk through how to add Golioth to an existing Zephyr project. As an example, I’ll be using our hello sample. We chose this because it already has networking, which makes explaining things a bit easier. Generally any board that has led0 defined in the device tree and you can enable networking should be a good fit. What we want to do here is showcase the elements that allow you to add Golioth, so let’s dive in!
0. Understanding the west manifest
A Zephyr workspace is made up of a number of different code repositories all stored in the same tree. Zephyr uses a west manifest file to manage all of these repositories, including information like the origin URL of the repo, the commit hash to use, and where each repository should be placed in your local tree.
Think of the manifest as a code repository shopping list that the west update command uses to fill up your local Zephyr tree. There may be more than one manifest file, but today we’ll just focus on the main manifest.
1. Add Golioth to the west manifest
Start by locating your manifest file and opening it with a code editor.
~/zephyrproject $ west manifest --path
/home/mike/zephyrproject/zephyr/west.yml
Under projects: add an entry for the Golioth Zephyr SDK (highlighted in the abbreviated manifest sample below).
manifest:
  defaults:
    remote: upstream

  remotes:
    - name: upstream
      url-base: https://github.com/zephyrproject-rtos

  #
  # Please add items below based on alphabetical order
  projects:
      # Golioth repository.
    - name: golioth
      path: modules/lib/golioth
      revision: v0.2.0
      url: https://github.com/golioth/golioth-zephyr-sdk.git
      import:
        west-external.yml
    - name: canopennode
      revision: 53d3415c14d60f8f4bfca54bfbc5d5a667d7e724
...
Note that I have called out the v0.2.0release tag. You can set this to any of our release tags, to main, or to a specific commit.
Now run an update to incorporate the manifest changes:
west update
2. Select libraries to add to the build
We use KConfig to build in the libraries that Golioth needs. These changes are made in the prj.conf file of your application.
The first set of symbols deals with Zephyr’s networking stack. Of course every Internet of Things thing needs a network connection so you likely already have these symbols selected.
# Generic networking options
CONFIG_NETWORKING=y
CONFIG_NET_IPV4=y
CONFIG_NET_IPV6=n
Golioth is secure by default so we want to select the mbedtls libraries to handle the encryption layer.
# TLS configuration
CONFIG_MBEDTLS_ENABLE_HEAP=y
CONFIG_MBEDTLS_HEAP_SIZE=10240
CONFIG_MBEDTLS_SSL_MAX_CONTENT_LEN=2048
Now let’s turn on the Golioth libraries and give them a bit of memory they can dynamically allocate from.
# Golioth Zephyr SDK
CONFIG_GOLIOTH=y
CONFIG_GOLIOTH_SYSTEM_CLIENT=y

CONFIG_MINIMAL_LIBC_MALLOC_ARENA_SIZE=256
Every device needs its own credentials because all connections to Golioth require security. There are a few ways to do this, but perhaps the simplest is to add them to the prj.conf file.
# Golioth credentials
CONFIG_GOLIOTH_SYSTEM_CLIENT_PSK_ID="220220711145215-blinky1060@golioth-settings-demo"
CONFIG_GOLIOTH_SYSTEM_CLIENT_PSK="cab43a035d4fe4dca327edfff6aa7935"
And finally, I’m going to enable back-end logging. This is not required for connecting to Golioth, but sending the Zephyr logs to the cloud is a really handy feature for remote devices.
# Optional for sending Zephyr logs to the Golioth cloud
CONFIG_NET_LOG=y
CONFIG_LOG_BACKEND_GOLIOTH=y
CONFIG_LOG_PROCESS_THREAD_STACK_SIZE=2048
I separated each step above for the sake of explanation. But the combination of these into one block is the boiler-plate configuration that I use on all of my new projects. See this all as one file in the prj.conf from our hello sample.
3. Instantiate the Golioth system client and say hello
So far we added Golioth as a Zephyr module and enabled the libraries using KConfig. Now it’s time to use the Golioth APIs in the main.c file.
The first step is to include the header files and instantiate a golioth_client object. The client is used to manage the connection with the Golioth servers. Including the coap header file is not strictly required to establish a connection, but it is necessary for processing the responses from Golioth, so I always include it.
#include <net/coap.h>
#include <net/golioth/system_client.h>
static struct golioth_client *client = GOLIOTH_SYSTEM_CLIENT_GET();
I also add a callback function to handle messages coming back from the Golioth cloud. Technically this is optional, but if you want two-way communication with the cloud you need it!
/* Callback for messages received from the Golioth servers */
static void golioth_on_message(struct golioth_client *client,
                   struct coap_packet *rx)
{
    uint16_t payload_len;
    const uint8_t *payload;
    uint8_t type;

    type = coap_header_get_type(rx);
    payload = coap_packet_get_payload(rx, &payload_len);

    printk("%s\n", payload);
}
In the main function, I register my callback, start the Golioth client, and call the golioth_send_hello() API.
/* Register callback and start Golioth system client */
client->on_message = golioth_on_message;
golioth_system_client_start();

while (1) {
    /* Say hello to Golioth */
    int ret = golioth_send_hello(client);
    if (ret) {
        printk("Failed to send hello! %d\n", ret);
    }
    else printk("Hello sent!\n");
}
When successful, the golioth_send_hello() call will prompt for a message back from the server which includes the name of the sending device. This is printed out by the golioth_on_message() callback.
Hello sent!
Hello blinky1060
Hello sent!
Hello blinky1060
Hello sent!
Hello blinky1060
Extra Credit: Back-end Logging
Observant readers have noticed that I enabled back-end logging using KConfig symbols but I didn’t use it in the C code. Here’s the really awesome part: just use Zephyr logging as you normally would and it will automatically be sent to your Golioth console.
At the top of main.c, include the log header file and register a logging module.
#include <logging/log.h>
LOG_MODULE_REGISTER(any_name_you_want, LOG_LEVEL_DBG);
In our C functions, call logs as you normal would.
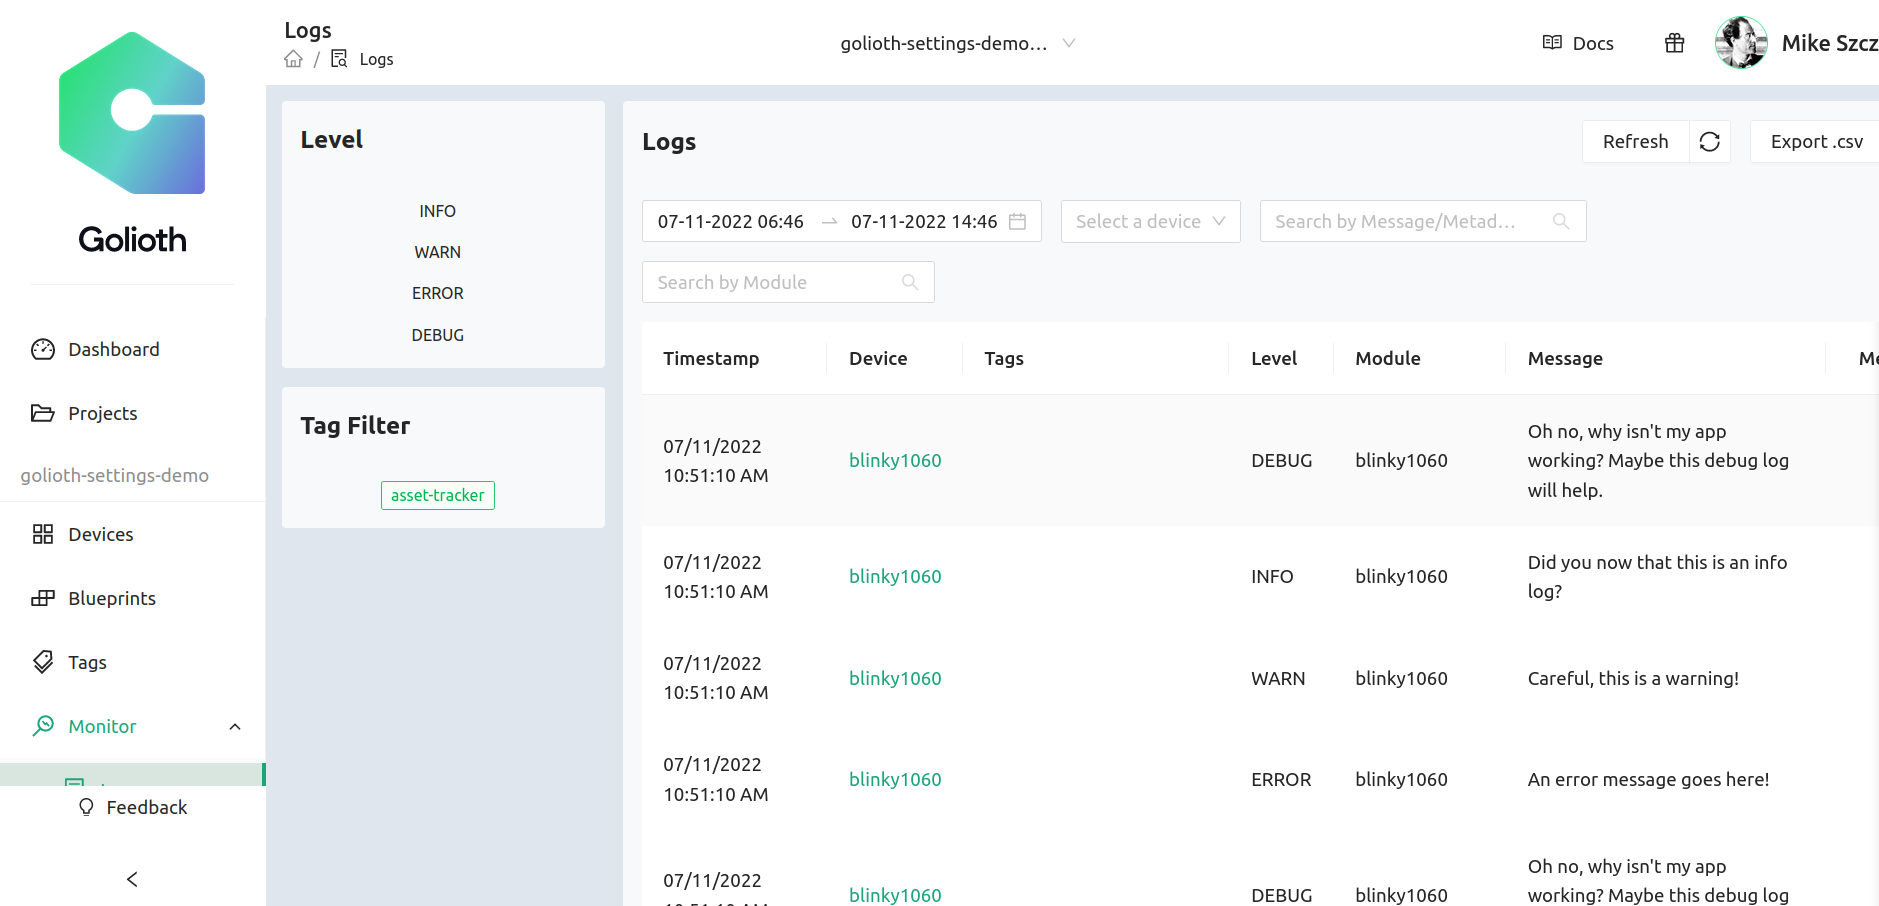
LOG_ERR("An error message goes here!");
LOG_WRN("Careful, this is a warning!");
LOG_INF("Did you now that this is an info log?");
LOG_DBG("Oh no, why isn't my app working? Maybe this debug log will help.");
Now your log messages will appear on the Golioth console!
Further Reading
This covers the basics of adding Golioth to an existing Zephyr project. You can see the steps all in one place by looking at the Golioth code samples. Here are the examples that you’ll find immediately useful:
- Hello – basics of connecting to Golioth and sending log messages (what was covered in this post)
- Lightdb Set – send data to Golioth
- Lightdb Observe – device will be notified whenever an endpoint on the Golioth cloud is updated
To go even deeper, you can see how we use the Golioth Over-the-Air (OTA) firmware update feature, and how to use the Zephyr settings subsystem for persistent credential storage. And remember, the Dev Tier of Golioth includes the first 50 devices, so you can try all of this out for free.
Image from Todd Lappin on flickr
