As a hardware engineer, I have been interested in finding a platform to help me manage my devices for a long time. Seriously, there’s recorded proof. Back in 2018, I was on a podcast talking about my desire to have a management platform for all things IoT. If you continue listening to me describe what I wanted, it’s clear I was looking for what Golioth now offers. At the time though, I was specifically looking for firmware update services (what Golioth calls “Device Firmware Update” or “DFU”) for my small groups of ESP32 devices.
Firmware update for remote devices continues to be our most popular feature, not least of all because we support so many hardware platforms. Any device that meets the 3 following criteria is capable of firmware update using Golioth:
- Firmware built with Zephyr
- Has a network connection recognized in the Zephyr networking layer (including external modems if there is a sufficient driver)
- Implements an MCUboot bootloader on the hardware
Our APIs for DFU are flexible enough that there are other combinations that can work, but the above criteria are enables hundreds of hardware devices. For the ESP32, it was that last point that was not yet enabled. The Espressif Zephyr team has been hard at work enabling more and more features and as of a few weeks ago, MCUboot has been pushed upstream and works on ESP32 devices. What’s more, we have tested this and the ESP32 now has DFU capabilities on Golioth deployments.
A bootloader interlude
What is a bootloader, anyway? A bootloader is the small segment of helper code that handles loading your main application code onto a processor when it starts up. It normally lives at the very beginning of memory and is the first thing that runs when a processor boots. The added advantage is you can tell the bootloader to try out different code than it normally runs, as is the case with a firmware update. If you have loaded a program to a microcontroller over a USB cable (without a programmer) on platforms like an Arduino, you are almost certainly running a serial bootloader. Something on your computer tells the board, “I’m shipping you a new firmware image”. Once it’s loaded, the bootloader restarts and tries out that new image. In this way, the bootloader handles updates to the code that is running on a processor at any given time.
In more complex examples, say you have application code that is able to download binaries over a network interface like WiFi or cellular from an awesome API service like Golioth. Once the application code verifies the contents are all properly loaded into the “trial” section of memory, we can then tell the bootloader to try that new code out. This is the basic idea behind the DFU sample in the Golioth SDK.
Possible, but intricate
The good news is you can build and load MCUboot onto your ESP32. This means you have an open source bootloader that enables integrations like Golioth DFU. The less-good news is this is still a somewhat young implementation and that means you have to build the MCUboot image yourself. We expect this flow will get easier over time and we will continue to update as this workflow changes. For now, let’s look at the steps required to get the bootloader built and loaded from a Linux (Ubuntu) system to an ESP32 (other OSes may be possible, but not featured here). After that, we’ll build Golioth sample code which will be loaded onto the ESP32 by this newly built bootloader.
Build MCUboot
This section of the guide is based on directions on the MCUboot repo for Espressif. Those directions are being replicated here for freezing a known working version and to improve visibility to the community. Additional commands were added to make things more clear and to standardize the install process. For instance, below we will be filling in all of the required variables to match the esp32 target.
Install additional packages required for MCUboot
These are the repository files for MCUboot and also the Python dependencies
[sourcecode]
cd ~
git clone [email protected]:mcu-tools/mcuboot.git
cd ~/mcuboot
pip3 install –user -r scripts/requirements.txt
[/sourcecode]
Update the submodules needed by the Espressif port. This may take a while.
[sourcecode]
git submodule update –init –recursive –checkout boot/espressif/hal/esp-idf
[/sourcecode]
Next, get the Mbed TLS submodule required by MCUboot.
[sourcecode]
git submodule update –init –recursive ext/mbedtls
[/sourcecode]
Now we need to install IDF dependencies and set environment variables via a script. This step may take some time. If you happen to be using a Python virtualenv on your command line, exit it by typing deactivate; this is because the script instantiates a virtualenv for you using shell commands.
[sourcecode]
cd ~/mcuboot/boot/espressif/hal/esp-idf
./install.sh
. ./export.sh
cd ../..
[/sourcecode]
Building the bootloader
The Espressif port of the MCUboot bootloader is built using the toolchain and tools provided by ESP-IDF. Additional configuration related to MCUboot features and slot partitioning may be made using the bootloader.conf. As a reminder, we are specifically building for the esp32 target here.
First we’re going to compile and generate the ELF:
[sourcecode]
cmake -DCMAKE_TOOLCHAIN_FILE=tools/toolchain-esp32.cmake -DMCUBOOT_TARGET=esp32 -B build -GNinja
cmake –build build/
[/sourcecode]
Next we will convert the ELF to the final bootloader binary image, ready to be flashed. In this case, we are targeting a device with a 4MB flash size. This may work on larger devices, but you should check your specific device to ensure you are targeting an ESP32 part with the proper flash region:
[sourcecode]
esptool.py –chip esp32 elf2image –flash_mode dio –flash_freq 40m –flash_size 4MB -o build/mcuboot_esp32.bin build/mcuboot_esp32.elf
[/sourcecode]
Finally, we are going to flash this binary onto the ESP32, which should be connected over USB. As we said in the bootloader interlude above, the bootloader is a chunk of code that lives at the beginning of memory. We need to offset where the code is actually going to start, based upon a normal memory configuration. In the case of the ESP32, the offset is at 0x1000, so we’ll set the variableBOOTLOADER_FLASH_OFFSET = 0x1000.
[sourcecode]
esptool.py -p /dev/ttyUSB0 -b 115200 –before default_reset –after hard_reset –chip esp32 write_flash –flash_mode dio –flash_size 4MB –flash_freq 40m 0x1000 build/mcuboot_esp32.bin
[/sourcecode]
We are using /dev/ttyUSB0 because this is for an Ubuntu based system. An OSX (Mac) machine will likely target UART at /dev/tty.SLAB_USBtoUART
Build your image
Now we have a bootloader on the ESP32, hooray!
From here, we want to build a Golioth example for DFU to showcase the capabilities of the platform. The ESP32’s new MCUboot bootloader won’t do anything on its own, we need to pass data to it through the MCUboot API (taken care of in the Golioth sample). In order to fetch that data from the Golioth servers, we need to have application code that checks whether firmware is up-to-date and whether it should be fetching a new version. This is built into the Golioth DFU sample code, as well. We will build an initial version of this application code locally on our machine and manually push it onto the ESP32 using USB.
Building your initial DFU sample image to load directly on the ESP32
The steps below assume your Zephyr directory is located at ~/zephyrproject. If you haven’t built and tried any other samples for the ESP32, it’s probably worthwhile going through the ESP32 quickstart guide, which will take you through all of the required toolchain install steps for Zephyr. If your toolchain is in place, we can move on to edit the DFU sample’s prj.conffile:
[sourcecode]
cd ~/zephyrproject/modules/lib/golioth
nano samples/dfu/prj.conf
[/sourcecode]
We’ll add the following to this file, like we do on all ESP32 samples. The first set of variables enables WiFi access onto your local network, the second set are your credentials for your device on the Golioth Cloud.
CONFIG_ESP32_WIFI_SSID="YOUR_NETWORK_NAME"
CONFIG_ESP32_WIFI_PASSWORD="YOUR_NETWORK_PW"

CONFIG_GOLIOTH_SYSTEM_CLIENT_PSK_ID="DEVICE_CRED_ID"
CONFIG_GOLIOTH_SYSTEM_CLIENT_PSK="DEVICE_PSK"
Then we’ll build the DFU sample
[sourcecode]
west build -b esp32 samples/dfu -p
[/sourcecode]
Now we have a binary that we need to sign so that MCUboot knows this is a secure version of firmware. The key used here will not be unique and you will see warnings that this key should not be used in production. We agree! Generating and using a different key will be showcased in a future post. But you still need to sign the image. Note that this first image will be signed without a firmware version.
[sourcecode]
west sign -t imgtool — –key ../../../bootloader/mcuboot/root-rsa-2048.pem
[/sourcecode]
Finally we’ll flash this image to the board over USB.
[sourcecode]
west flash –bin-file build/zephyr/zephyr.signed.bin –hex-file build/zephyr/zephyr.signed.hex
[/sourcecode]
Building a new DFU sample image to load directly onto the Golioth cloud
OK! Now we have a Golioth DFU sample loaded onto our ESP32 using the custom MCUboot bootloader. When the device boots up, the bootloader will first load this binary into the ESP32 and it’ll start processing. The application-level code will be monitoring for changes on the Golioth servers and waiting to hear if there is an update to the firmware version. So that’s our last step: building a version to load on the Golioth Console.
This build will look very similar to the last set of steps, with a few crucial differences. First, we build the firmware (no changes are needed for the source code):
[sourcecode]
west build -b esp32 samples/dfu -p
[/sourcecode]
Then we sign the image. Note that we are now giving this new binary a version number. This helps make it easy to tell which version is going onto your fleet of devices.
[sourcecode]
west sign -t imgtool –no-hex -B new.bin — –key ../../../bootloader/mcuboot/root-rsa-2048.pem –version 1.0.0
[/sourcecode]
Finally we upload this to the Golioth Cloud. This can be done from the command line using goliothctl or you can upload an image directly as an “Artifact” using the GUI. We walked through using the GUI in the nRF91 OTA DFU video, and have included screenshots of the process below.
Artifact upload process using command line tools:
[sourcecode]
goliothctl login
goliothctl dfu artifact create ./new.bin –version 1.0.0
[/sourcecode]
Artifact upload process using the Golioth Console GUI:
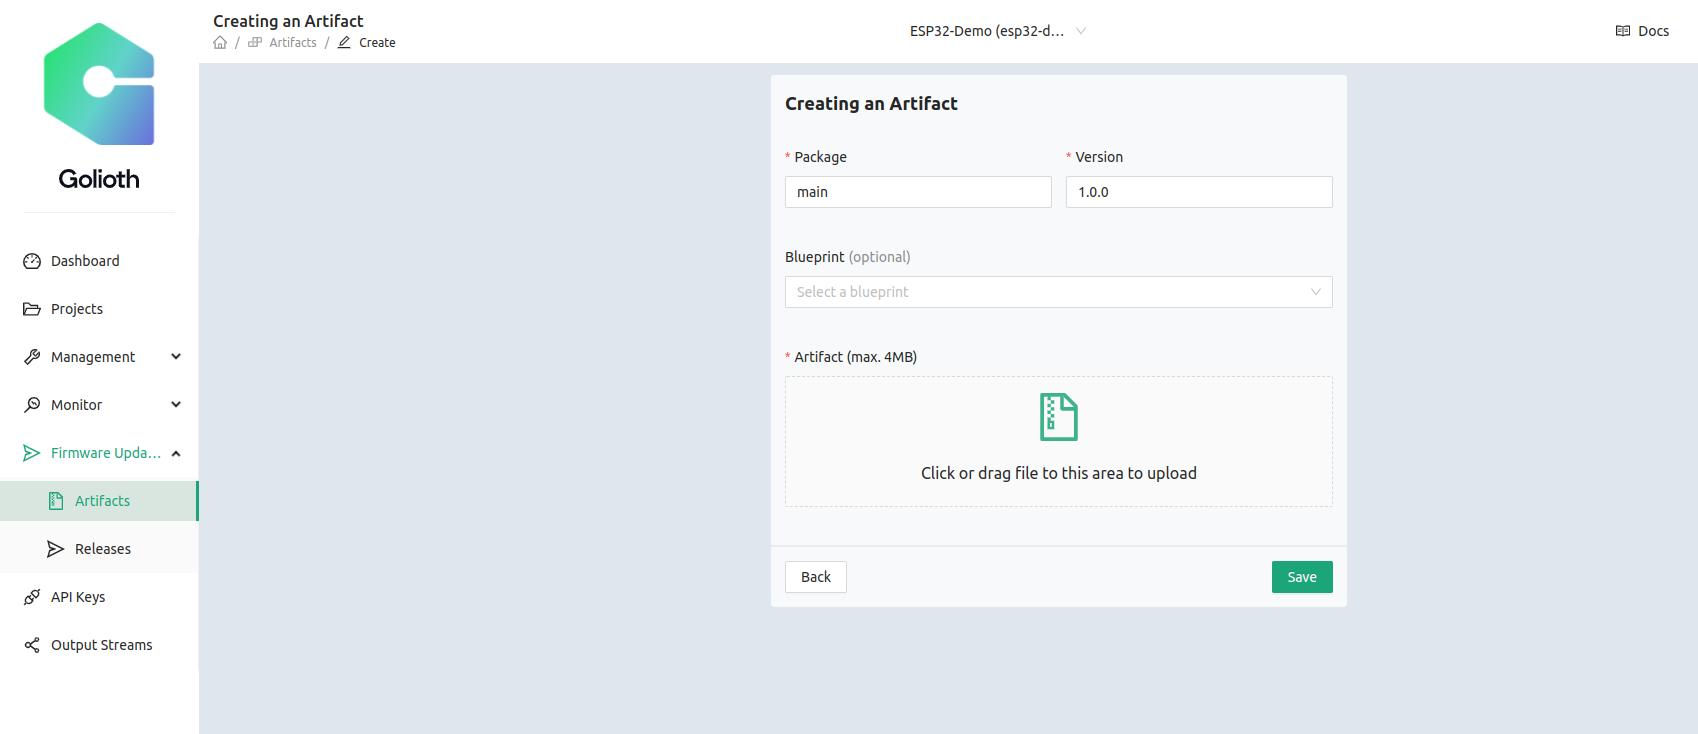
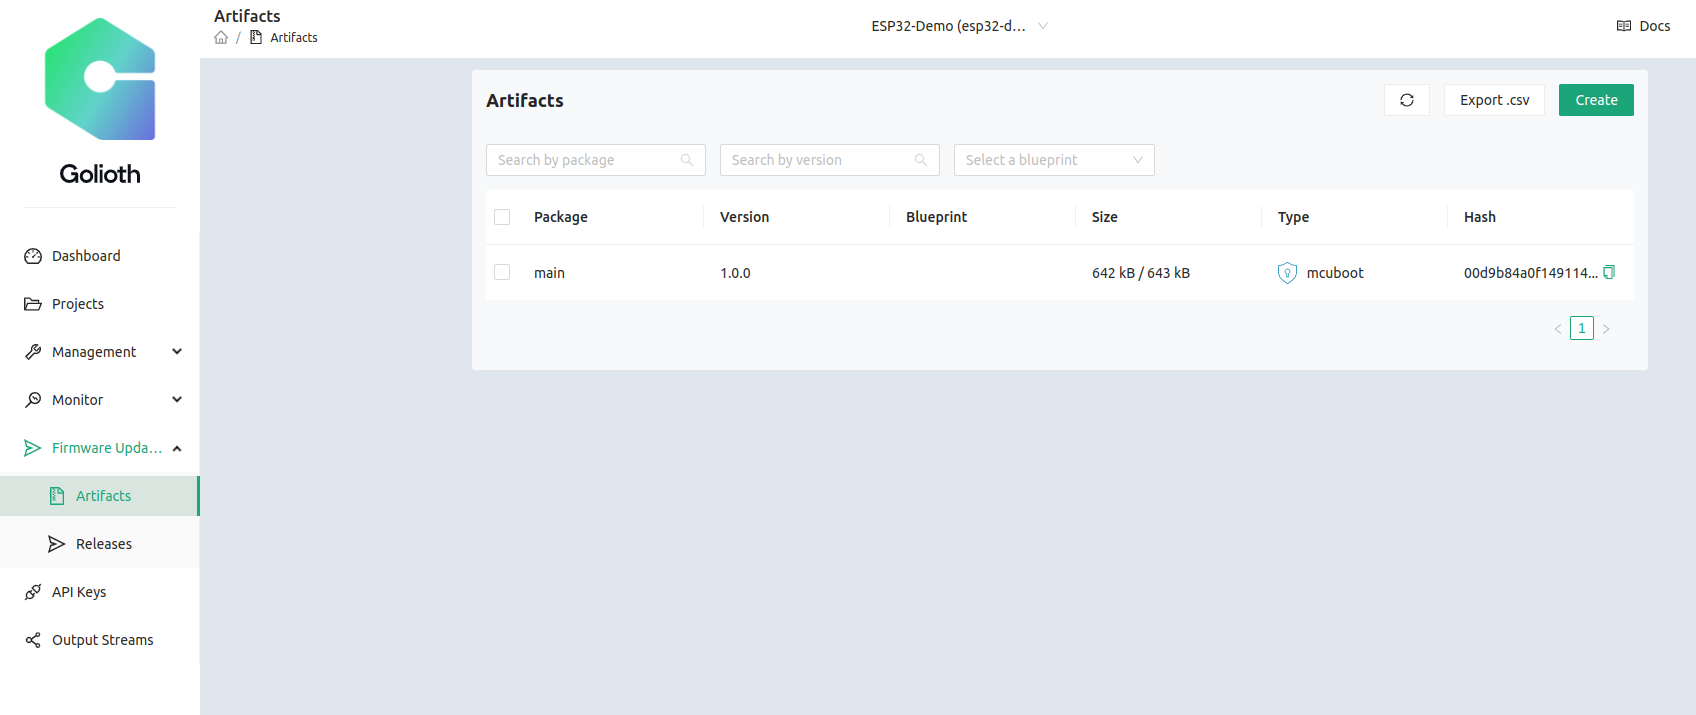
We see that the Artifact list shows a hash based on the signing of the image, and the Golioth Cloud has recognized that the image was built for MCUboot. We did not include a Blueprint, but we also could have done that to only target devices that also had a specific Blueprint assigned.
Ready, set, firmware update
Finally, we’ll create a Release that includes this Artifact. The Release is capable of bundling multiple binaries together, but in our case we only have one. So we’ll include that into a new release that we create on the Golioth Console
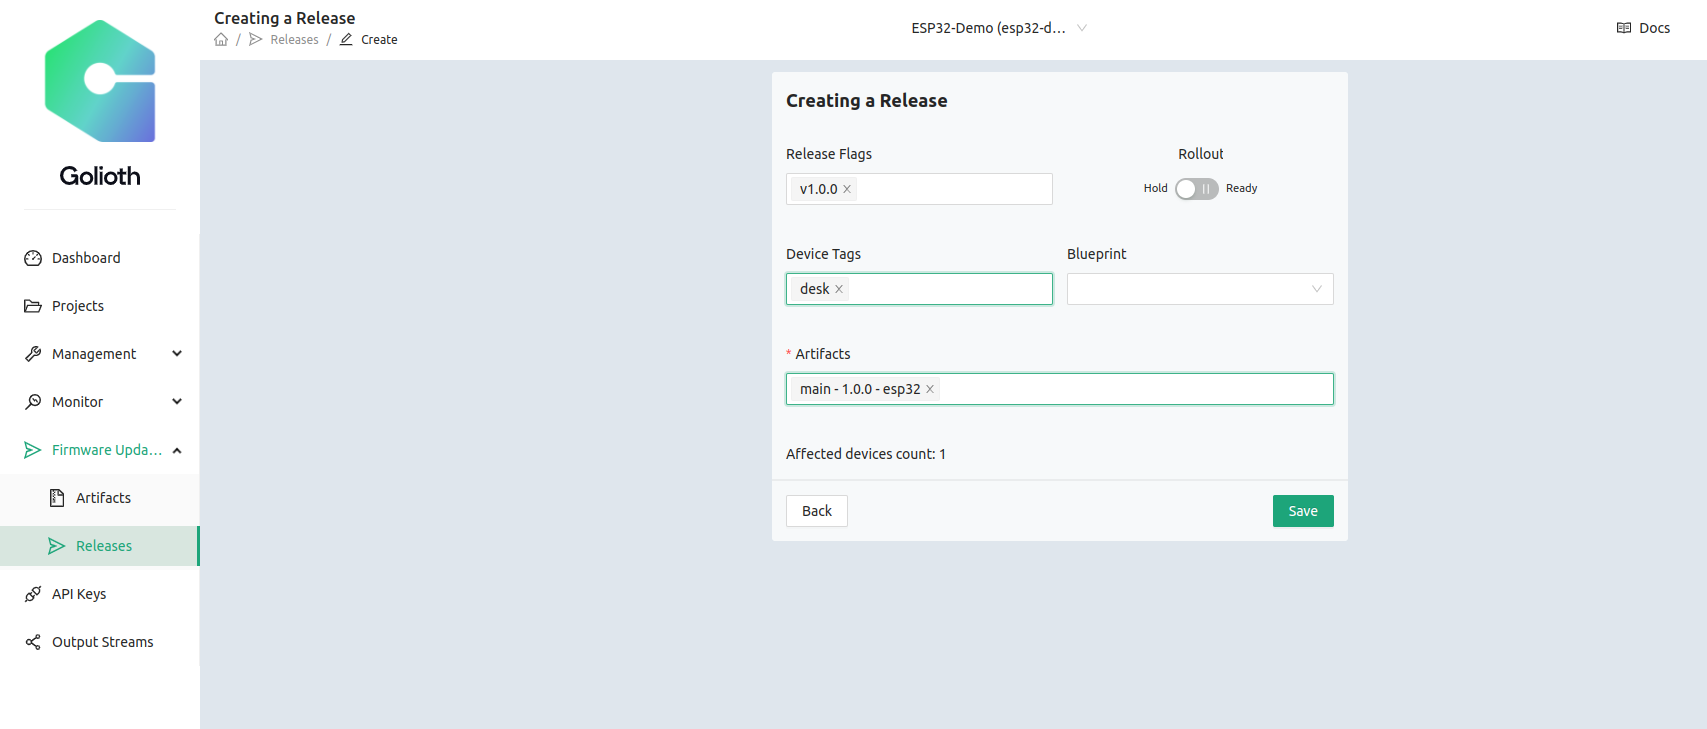
I’m targeting the device that is tagged desk (because it’s, you know…on my desk). Only devices with matching tags will get the update. Also note that Rollout is not yet selected.
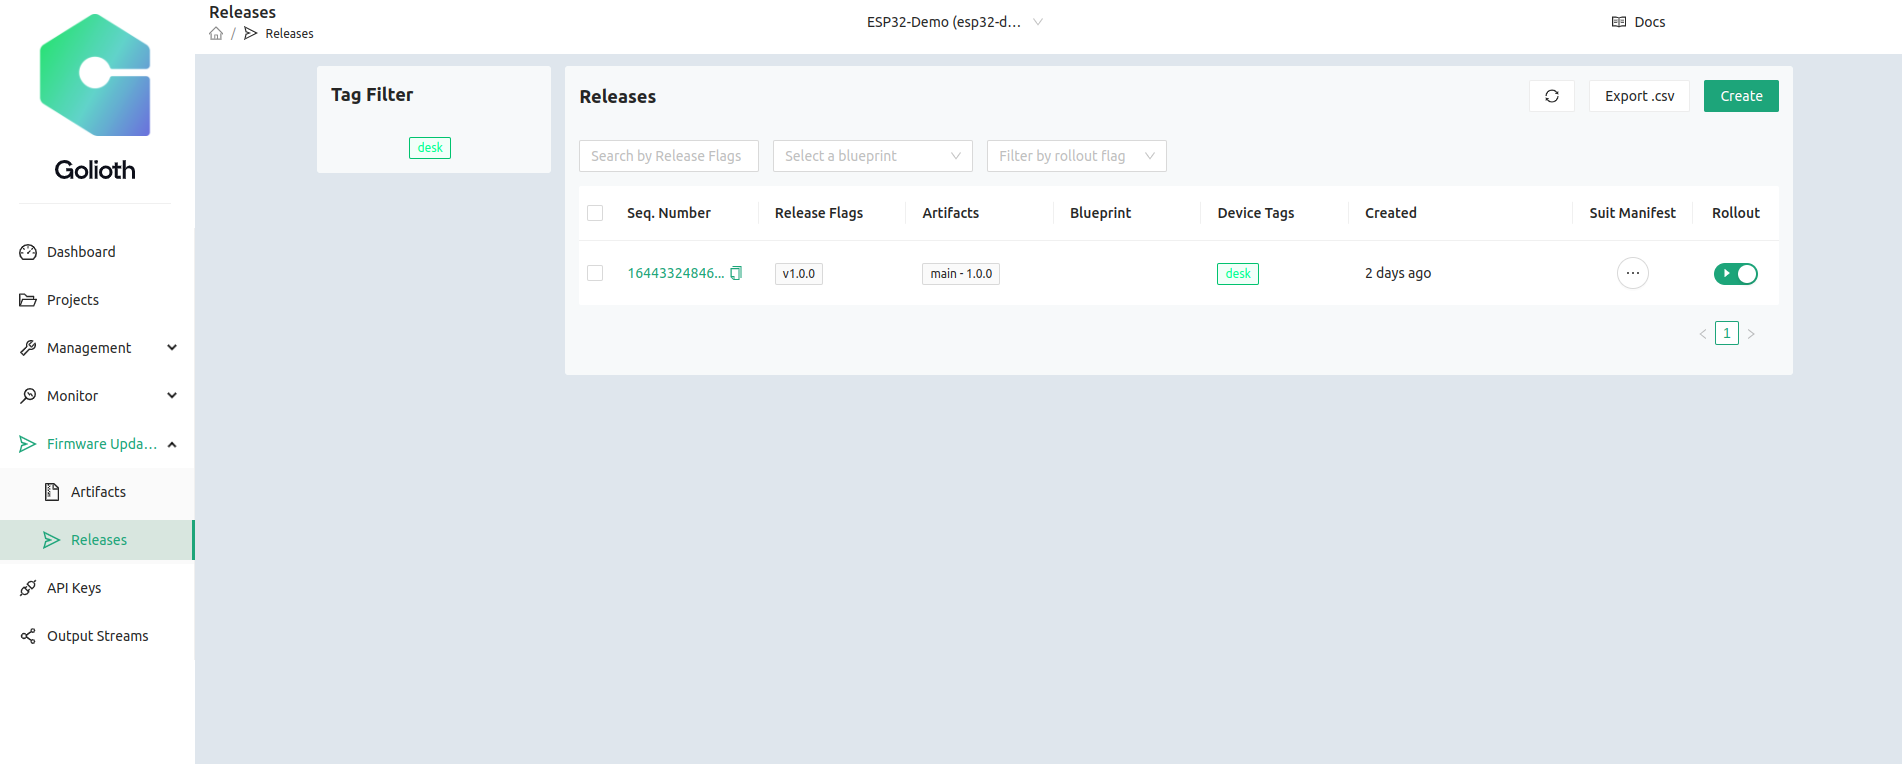
This is the Release page showing this release, which includes the main-1.0.0 Artifact uploaded in the previous step. In the above screenshot, I have clicked Rollout which means any devices matching desk will try to download and install this image. I open a serial terminal to my ESP32 with MCUboot bootloader installed using this command
[sourcecode]
sudo screen /dev/ttyUSB0 115200
[/sourcecode]
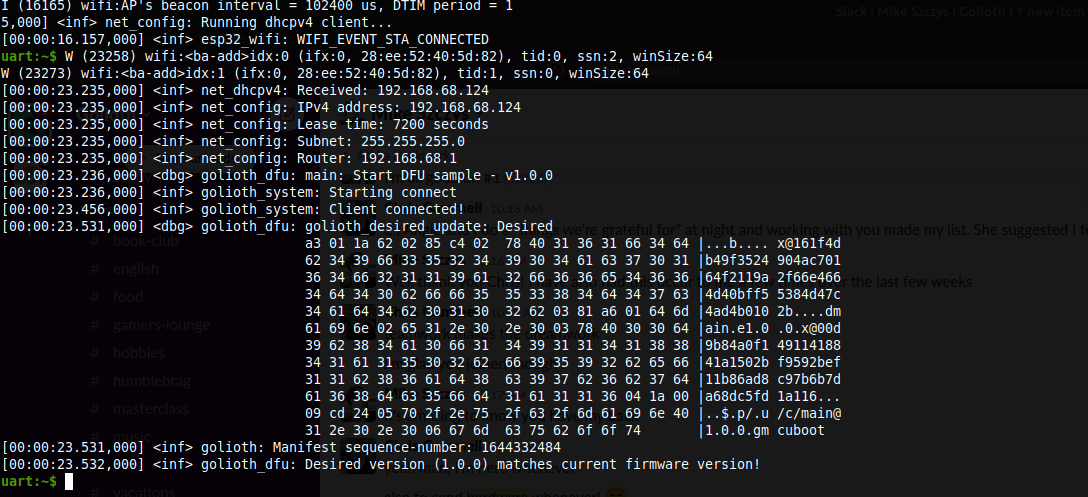
And I see the upload process starting! After it downloads the various pieces of the new v1.0.0 image, MCUboot restarts the processor and loads the new image. At boot time, we see it checking the server to see if it has the latest release. The key message is Desired version (1.0.0) matches current firmware version!
More updates to come
It’d be a stretch to say that was a short or smooth process. With so many steps involved, it might take a couple of tries to get the bootloader working smoothly. If you have run the DFU process a few times, the flow for compiling and uploading to the server becomes like second nature. The MCUboot build process should only have to be done the first time. But we want to keep improving the process for our customers and our partners.
If you have trouble with this process, be sure to hop over to our Discord server for live help from the Golioth team or post on our Forum for help in longer form. Happy updating!
