Over the holidays I tried out a fun experiment that combines Arduino and PlatformIO with Golioth. The work was prompted by a customer with an existing Arduino code base. Their long-term plan is to port the code over to ESP-IDF, but this serves as an intermediary step while they work out their own library transition plans. It works for them and today I’ll cover how you can give it a try for yourself. But first, some disclaimers.
Golioth Labs means Experimental
We use the Golioth Labs organization on GitHub for our experimental projects. That means you should not build for production devices using any of those repositories. This experiment targets the ESP32 family of chips. We have full support for ESP-IDF in the Golioth Firmware SDK, which is what we recommend using.
That being said, what if you have an existing Arduino project and want to test out some Golioth features? This is a “what am I getting myself into” step, and depends on your code being able to run on an ESP32 since the experiment builds Arduino as a component of ESP-IDF. The “cherry on top” wraps the project up into PlatformIO, an IDE built around VScode that has become a popular alternative to the native Arduino IDE.
Test Driving Golioth + PlatformIO + Arduino
As a prerequisite you need to install VScode and the PlatformIO extension for it.
With those tools in place, let’s walk through how to clone the Golioth repository and set up submodules, then finish up by building and running the demo program.
Clone the Repository and Submodules
By default, PlatformIO stores new projects in the ~/Documents/PlatformIO/Projects folder. You may clone this project anywhere you like, but that’s as good of a place as any.
Navigate to your preferred folder and clone the GoliothLabs repo and submodules:
# Clone the repository
git clone https://github.com/goliothlabs/golioth_platformio_arduino.git
# Enter the newly created folder
cd golioth_platformio_arduino
# Initialize the submodules (this will take more than 10 minutes)
git submodule update --init --recursive
# Clone a nested repository (yes, this is odd)
git clone https://github.com/hathach/tinyusb.git third_party/esp32-arduino-lib-builder/components/arduino_tinyusb/tinyusb
That’s it for setup. The last step in the commands listed above is an odd one. According to Espressif’s Arduino as an ESP-IDF component documentation, the tinyusb library needs to be nested inside of the esp32-arduino-lib-builder library’s components folder.
Build and Run the Golioth Sample
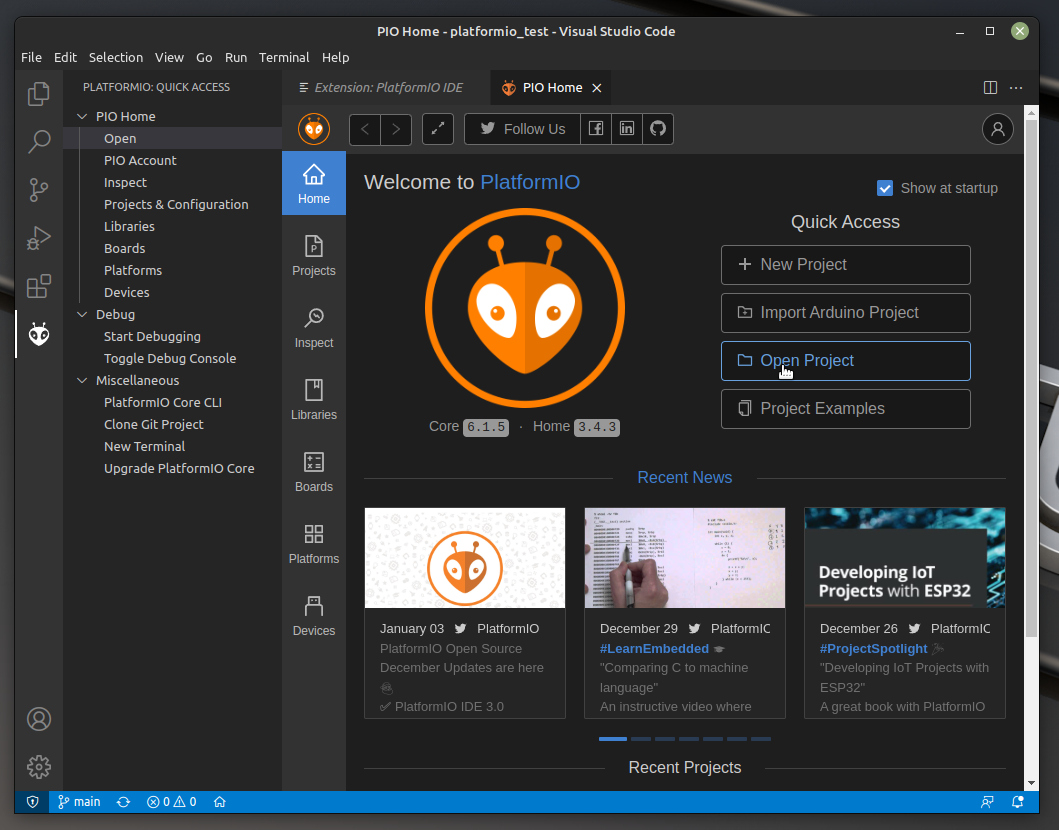
- Start by importing the project into PlatformIO.In VScode, click the alien icon on the left sidebar, choose PIO Home→Open from the sidebar that appears, and select Open Project from the PlatformIO home screen.

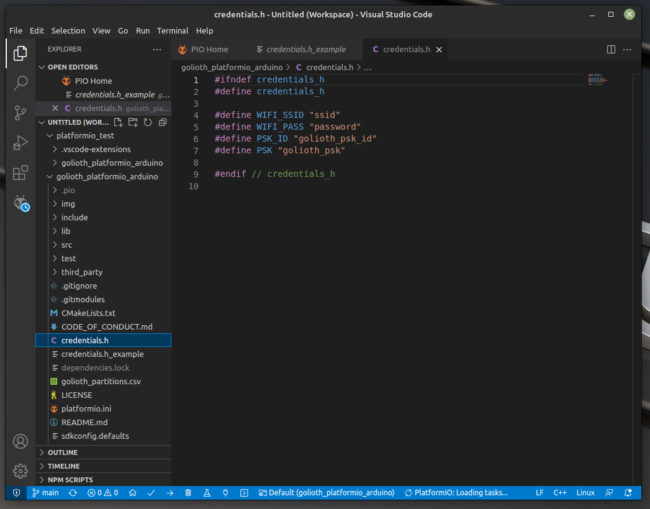
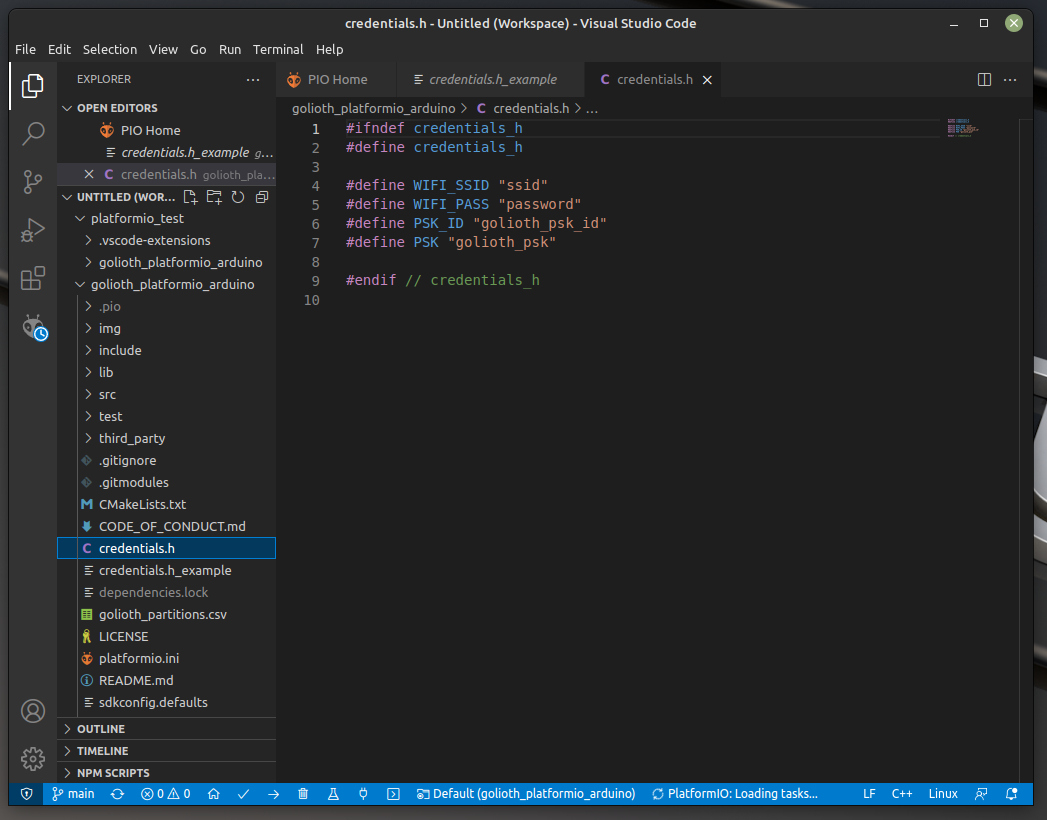
- Next, set up your credentials.Make a copy of the credentials.h_example file and rename it credentials.h. In this file, place the credentials for your WiFi access point, and the PSK-ID/PSK for the device you created using the Golioth Console.Note: With our Dev tier, your first 50 devices are free. Use the Credentials tab when viewing a device to access the PSK-ID/PSK.
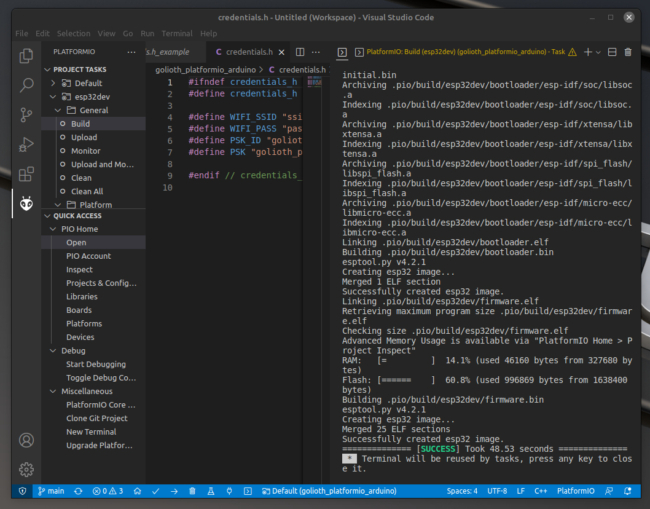
- Now build the project.Click on the alien icon on the left sidebar and choose Build from the Project Tasks menu. A terminal window will open and the build process will begin.
- Finally, flash the device and observe the output.From the Project Tasks menu, click on Upload and Monitor. The project will build, upload to the ESP32, and then open a terminal window to show the serial output from the ESP32.

You will see an output similar to the following:
I (942) wifi:new:<6,0>, old:<1,0>, ap:<255,255>, sta:<6,0>, prof:1
I (944) wifi:state: init -> auth (b0)
I (952) wifi:state: auth -> assoc (0)
I (957) wifi:state: assoc -> run (10)
I (970) wifi:connected with golioth-staff, aid = 1, channel 6, BW20, bssid = c2:ff:d4:a8:fa:10
I (970) wifi:security: WPA2-PSK, phy: bgn, rssi: -39
I (977) wifi:pm start, type: 1

I (1041) wifi:AP's beacon interval = 102400 us, DTIM period = 2
.W (1556) wifi:<ba-add>idx:0 (ifx:0, c2:ff:d4:a8:fa:10), tid:0, ssn:1, winSize:64
␛[0;32mI (1727) esp_netif_handlers: sta ip: 192.168.1.157, mask: 255.255.255.0, gw: 192.168.1.1␛[0m
.IP address:
192.168.1.157
␛[0;32mI (1936) golioth_mbox: Mbox created, bufsize: 2184, num_items: 20, item_size: 104␛[0m
␛[0;32mI (1937) golioth_fw_update: Current firmware version: 1.0.0␛[0m
Hello, Golioth! #0
␛[0;32mI (1953) golioth_example: Updating counter to: 0␛[0m
␛[0;32mI (1987) golioth_coap_client: Start CoAP session with host: coaps://coap.golioth.io␛[0m
␛[0;32mI (1988) golioth_coap_client: Session PSK-ID: platformio-test@golioth-arduino-demo␛[0m
␛[0;32mI (1998) libcoap: Setting PSK key
␛[0m
␛[0;32mI (2005) golioth_coap_client: Entering CoAP I/O loop␛[0m
Hello, Golioth! #1
␛[0;32mI (6955) golioth_example: Updating counter to: 1␛[0m
␛[0;33mW (9968) golioth_coap_client: CoAP message retransmitted␛[0m
␛[0;32mI (11492) golioth_coap_client: Golioth CoAP client connected␛[0m
Hello, Golioth! #2
␛[0;32mI (11957) golioth_example: Updating counter to: 2␛[0m
␛[0;32mI (13544) golioth_fw_update: Waiting to receive OTA manifest␛[0m
Hello, Golioth! #3
␛[0;32mI (16959) golioth_example: Updating counter to: 3␛[0m
Hello, Golioth! #4
␛[0;32mI (21961) golioth_example: Updating counter to: 4␛[0m
Hello, Golioth! #5
␛[0;32mI (26963) golioth_example: Updating counter to: 5␛[0m
^CHello, Golioth! #6
␛[0;32mI (31965) golioth_example: Updating counter to: 6␛[0m
Hello, Golioth! #7
␛[0;32mI (36967) golioth_example: Updating counter to: 7␛[0m
In this example, we are sending Arduino Serial.print() commands and Golioth logs that are displayed on the terminal and sent to the server. They show an upcounting timer that is stored on the Golioth LightDB state service. Over-the-Air (OTA) firmware update is also available.
While this shows a very small subset of Golioth features, everything shown in our golioth_basics example code can be used with this project.
What to do Next
As I mentioned earlier, you should not build production hardware around this repo. This is merely a way to test drive Golioth with your existing Arduino code base. The longer term goal should be to transition your ESP32-based hardware over to the ESP-IDF flavor of the Golioth Firmware SDK. If you’re using non-ESP32 hardware, you should target the Golioth Zephyr SDK.
While Arduino and PlatformIO are great platforms, directly targeting the ESP-IDF framework results in a more stable and predictable build. The Golioth SDK is built as a component of ESP-IDF for rock-solid performance. Building for ESP-IDF is definitely the end goal if you are migrating an existing fleet, and the best place to start if you are bootstrapping new designs.
Do you have questions about how to best integrate Golioth for managing your IoT devices? We’d love to hear from you! Post a message on the Golioth Forum, or reach out to our Developer Relations folks to set up a meeting.

No comments yet! Start the discussion at forum.golioth.io