Embedded software can be difficult to debug and the embedded developer’s tool chest is typically more limited than what is accessible when working with larger platforms. One of the most common debugging tools is the UART peripheral over which log output can be printed to report information regarding the state of a program’s execution and the contents of important items in device memory. This insight aids in determining the root cause of bugs and also verifying the success of a program that has run as intended. One of the lesser-known methods of obtaining such console log output is via Real Time Transfer (RTT).
Real Time Transfer is a Segger technology that is available when using a J-Link hardware debug probe. It is a high-performance bidirectional communication protocol for communication between a host CPU and target MCUs in the Cortex-M and RX processor families. And it has few notable advantages beyond what a UART can offer.
RTT offers better timing; reduces dedicated pins
Debugging using print statements and the UART console may interrupt time-sensitive applications, but using RTT for console output preserves MCU real-time performance. And one of the biggest advantages of RTT is that UART pins are not needed.
RTT uses the SWD pins on the standard 10 pin J-Link header that you’ve likely already accounted for in order to program the chip. When designing a custom platform that will be used for development prior to manufacturing, UART pins do not need to be exposed in the design.
Enabling RTT in Zephyr
Both hardware and software configuration for RTT in Zephyr is trivial. A J-Link, an RTT-compatible debug target, and access to SWD programming pins round out the hardware requirements. For this example I’m using Zephyr OS, which has abstracted use of the RTT protocol. It is enabled with a few configuration options and greatly eases accessibility of the technology. I tested this example using the Nordic Semiconductor Thingy:91 as the target.
If you’re looking for a simple app to test this out on, try the Golioth Getting Started Guide and use the basic Hello application. The Kconfig directives shared below will simply move the console log output found in the Hello application from the standard UART pin routing and use the RTT over the SWD pins instead.
To enable RTT in a Zephyr application, add the following configurations to the application prj.conf file:
CONFIG_UART_CONSOLE=n
CONFIG_RTT_CONSOLE=y
CONFIG_USE_SEGGER_RTT=y
The first config will disable passing of console output to the standard UART path. The second configuration will enable the RTT console path. The third configuration enables use of the Segger RTT communication protocol.
Viewing RTT output on a computer
Viewing the output requires a special viewing tool provided in the free J-Link software package. Navigate to the folder on your computer that contains the SEGGER J-Link software tools. Find JLinkRTTViewer, and execute it. A window similar to the following will appear.
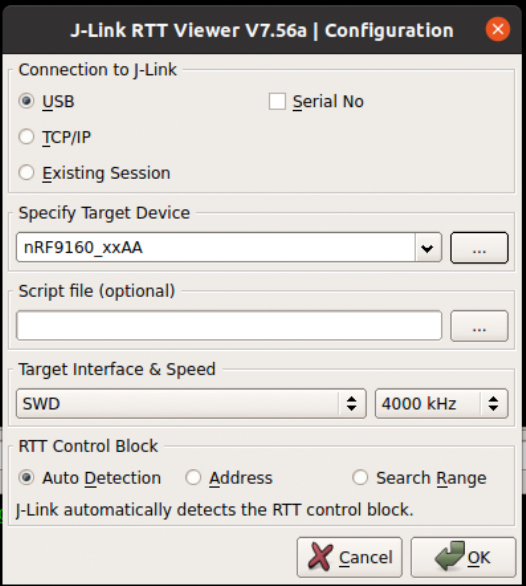
The default configurations are acceptable other than the Target Device. The tested example target is the Thingy:91 and the corresponding Target Device is the nrf9160_xxAA. Before clicking OK, build and flash the target with the configurations specified above.
The Viewer will not connect unless the associated software has been enabled to facilitate the connection. This is an important distinction between this method versus UART. The viewer will actively attempt a connection with the target and will fail to connect if the target has not been configured to use RTT previously. It will not monitor for an active connection to occur after programming. The Viewer will need to be restarted after flashing if it fails to connect.
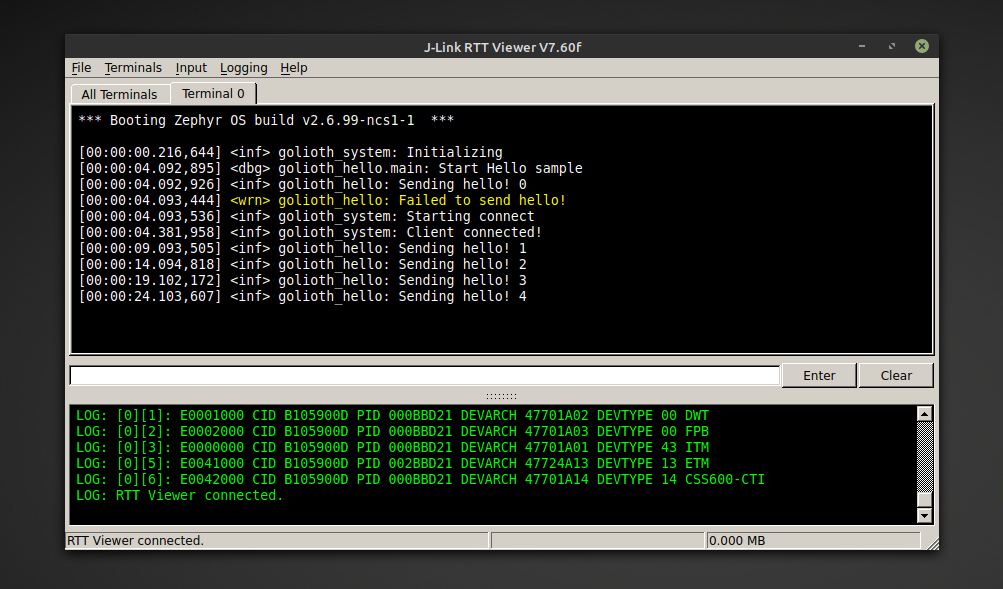
The lower console window reports RTT Viewer activity and will indicate when it has successfully connected to the target. The Hello app output will be viewable in the “All terminals” tab, along with a terminal-specific tab (in this case Terminal 0) which include colored syntax highlighting.
Simple and Easy
There aren’t any secrets to using RTT, other than knowing that it is an option. But having the ability to see console output in cases where your target doesn’t have extra pins available, or when all of the UART periphersals are already in use, is a trick you’ll want to keep in mind. Real Time Transfer has a few other tricks up its sleeve, but those are a story for another post.
