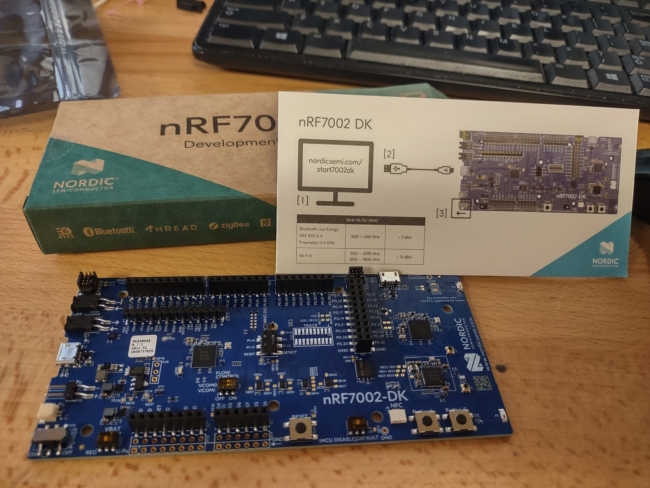
My experience with Nordic microcontrollers and modern cloud connectivity began in December of 2017. However, it is only this month that Nordic Semiconductor finally released a Wi-Fi capable component. The nRF7002 is a low power Wi-Fi 6 helper chip (no microcontroller internally) that is deeply integrated with the Nordic Connect SDK (NCS). This article details how I got it booted and why I decided to make my first foray into using it with the Golioth Cloud.
Using Golioth for my 1st nRF7002 project
Most of my experiences straddle the worlds of hardware and software. Network connectivity, security, and cloud “backend” can get complex quickly. For hardware-oriented minds, navigating the complexities of modern data transport are daunting. Gone are the days when adding embedded “internet connectivity” meant all one had to do was send a raw UDP packet!
Likewise, folks experienced in modern web backend technologies infrequently approach embedded development. Golioth appeared to be a bridge between these two worlds. Providing engineers on the embedded side tools for easily and securely connecting to the cloud is a big deal. Likewise, an experienced backend engineer will love hearing about access via REST APIs.
The arrival of the nRF7002-DK was a great opportunity for me to “kick the tires”. I also had personal interest in the secure approach to CoAP with DTLS.
Setup to “Live on the Edge” with nRF7002-DK
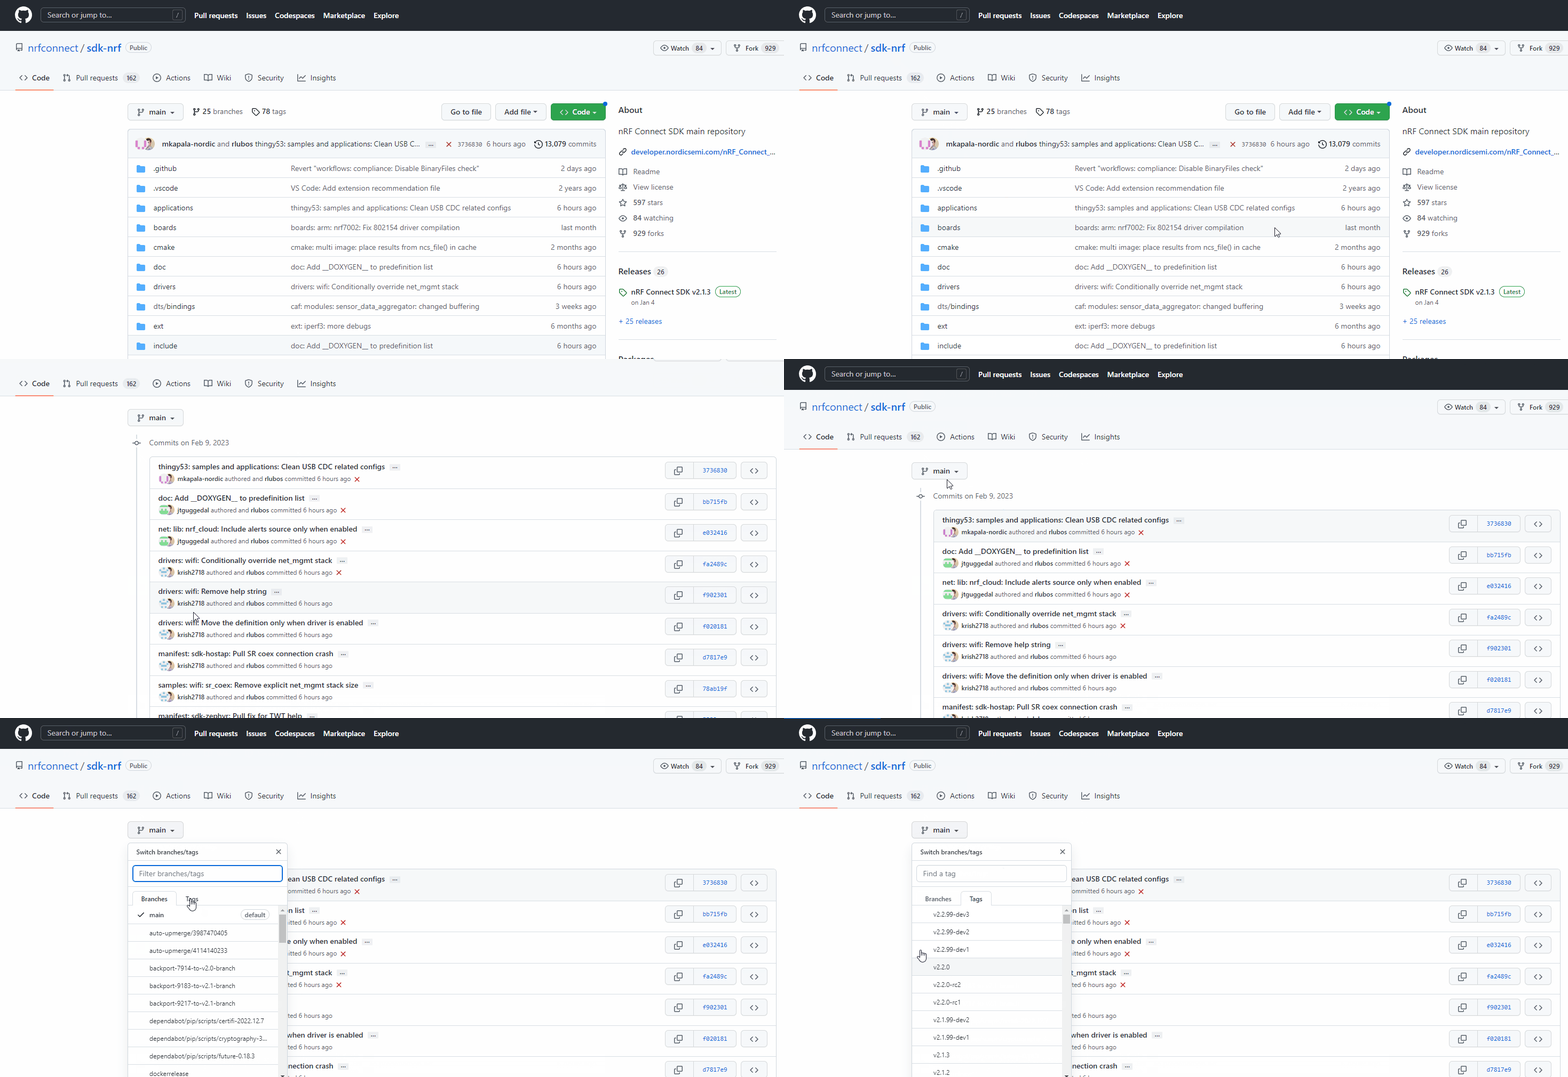
At the time of this writing, Zephyr support for the nRF7002 is still in active development. One of my soapbox pitches for Zephyr is that it is much more than an RTOS. It comes with a testing framework, open community development model, and packaging system. I could see the current nRF7002 activity on the main branch of the sdk-nrf repository. The last official release was v2.2. To experiment with the nRF7002 I needed to work from main or with one of the v2.2.99 development tags.
Observing nRF7002 development activity
Zephyr’s west tool is used to manage packages and dependencies through a west manifest. Golioth takes full advantage of this system by building their Golioth Zephyr SDK with the NCS in mind. I knew in advance that I would be hacking on samples in the Golioth SDK tree and that I would also need to use a bleeding edge version of the nRF SDK. In this case, I chose to use the fork approach for development. Namely, I forked the Golioth SDK to give myself a personal sandbox.
Forking the Golioth Zephyr SDK
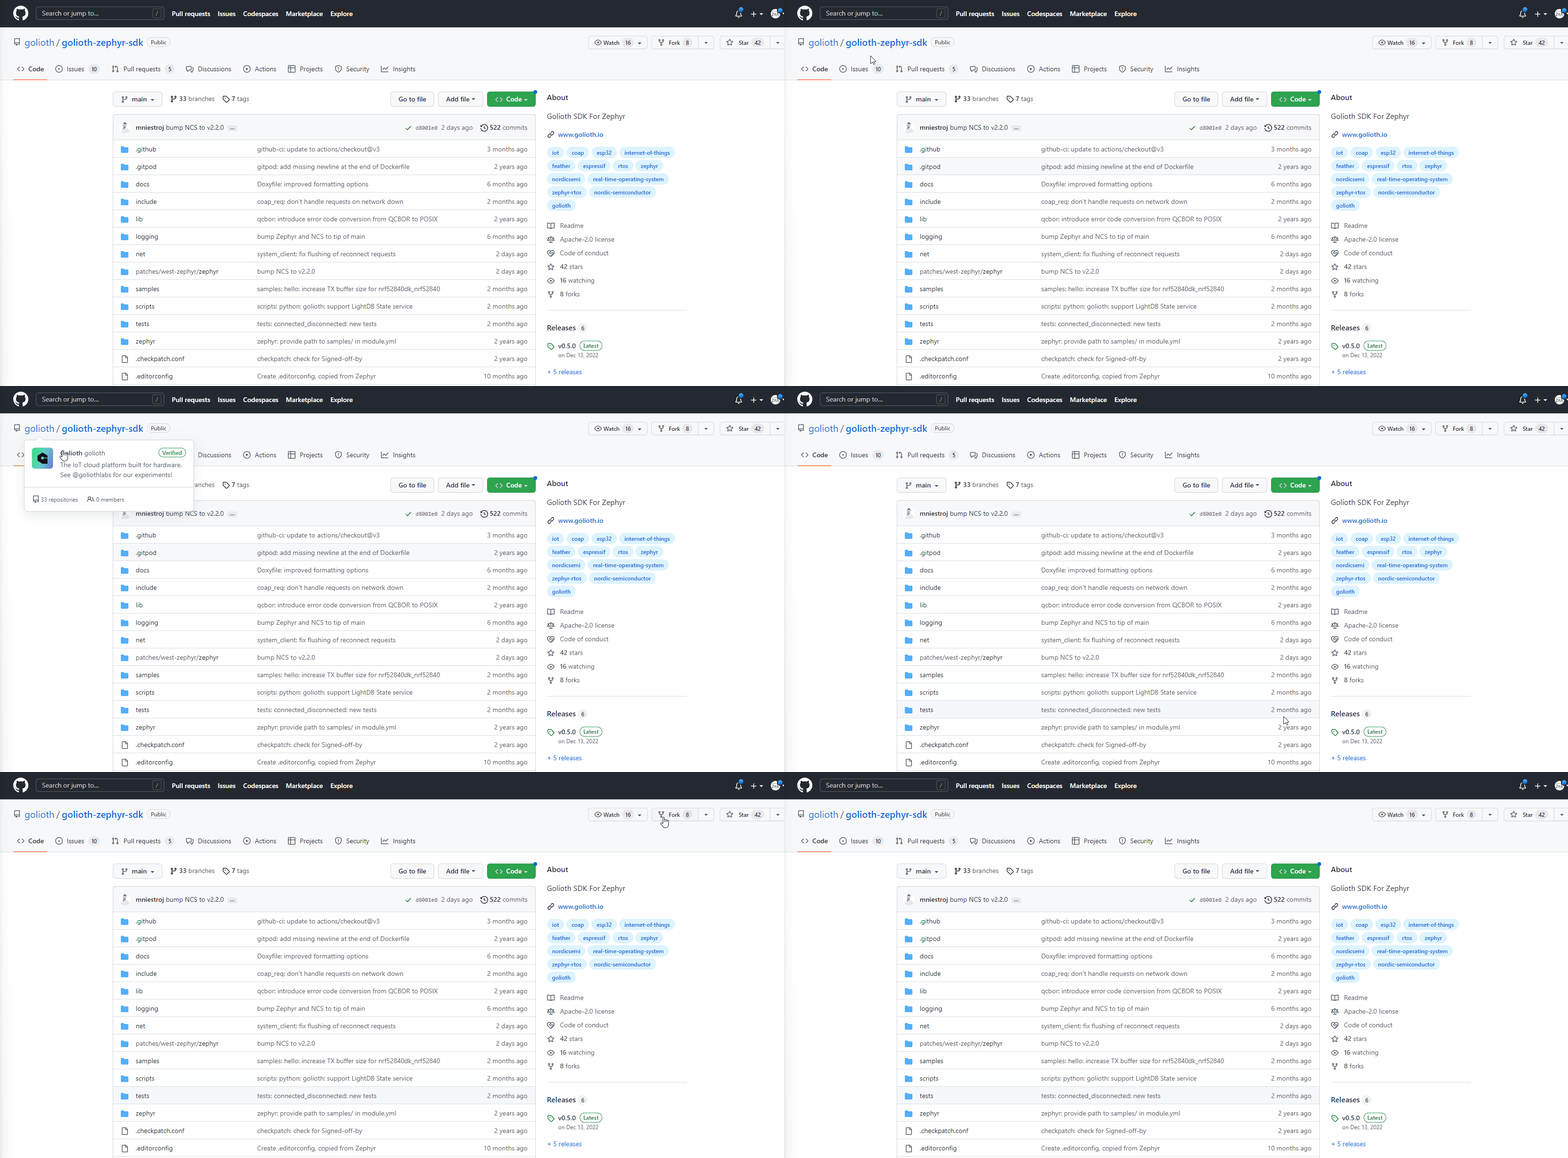
This approach has the advantage that I can experiment with the Golioth samples and submit a pull request to the Golioth team in case I come up with something useful. With my fork in place, the west manifest can be modified so I can be working with the latest nRF7002 examples.
Inside the Golioth SDK is west-ncs.yml, the manifest file for Nordic specific development.
A “one liner” to be on the bleeding edge
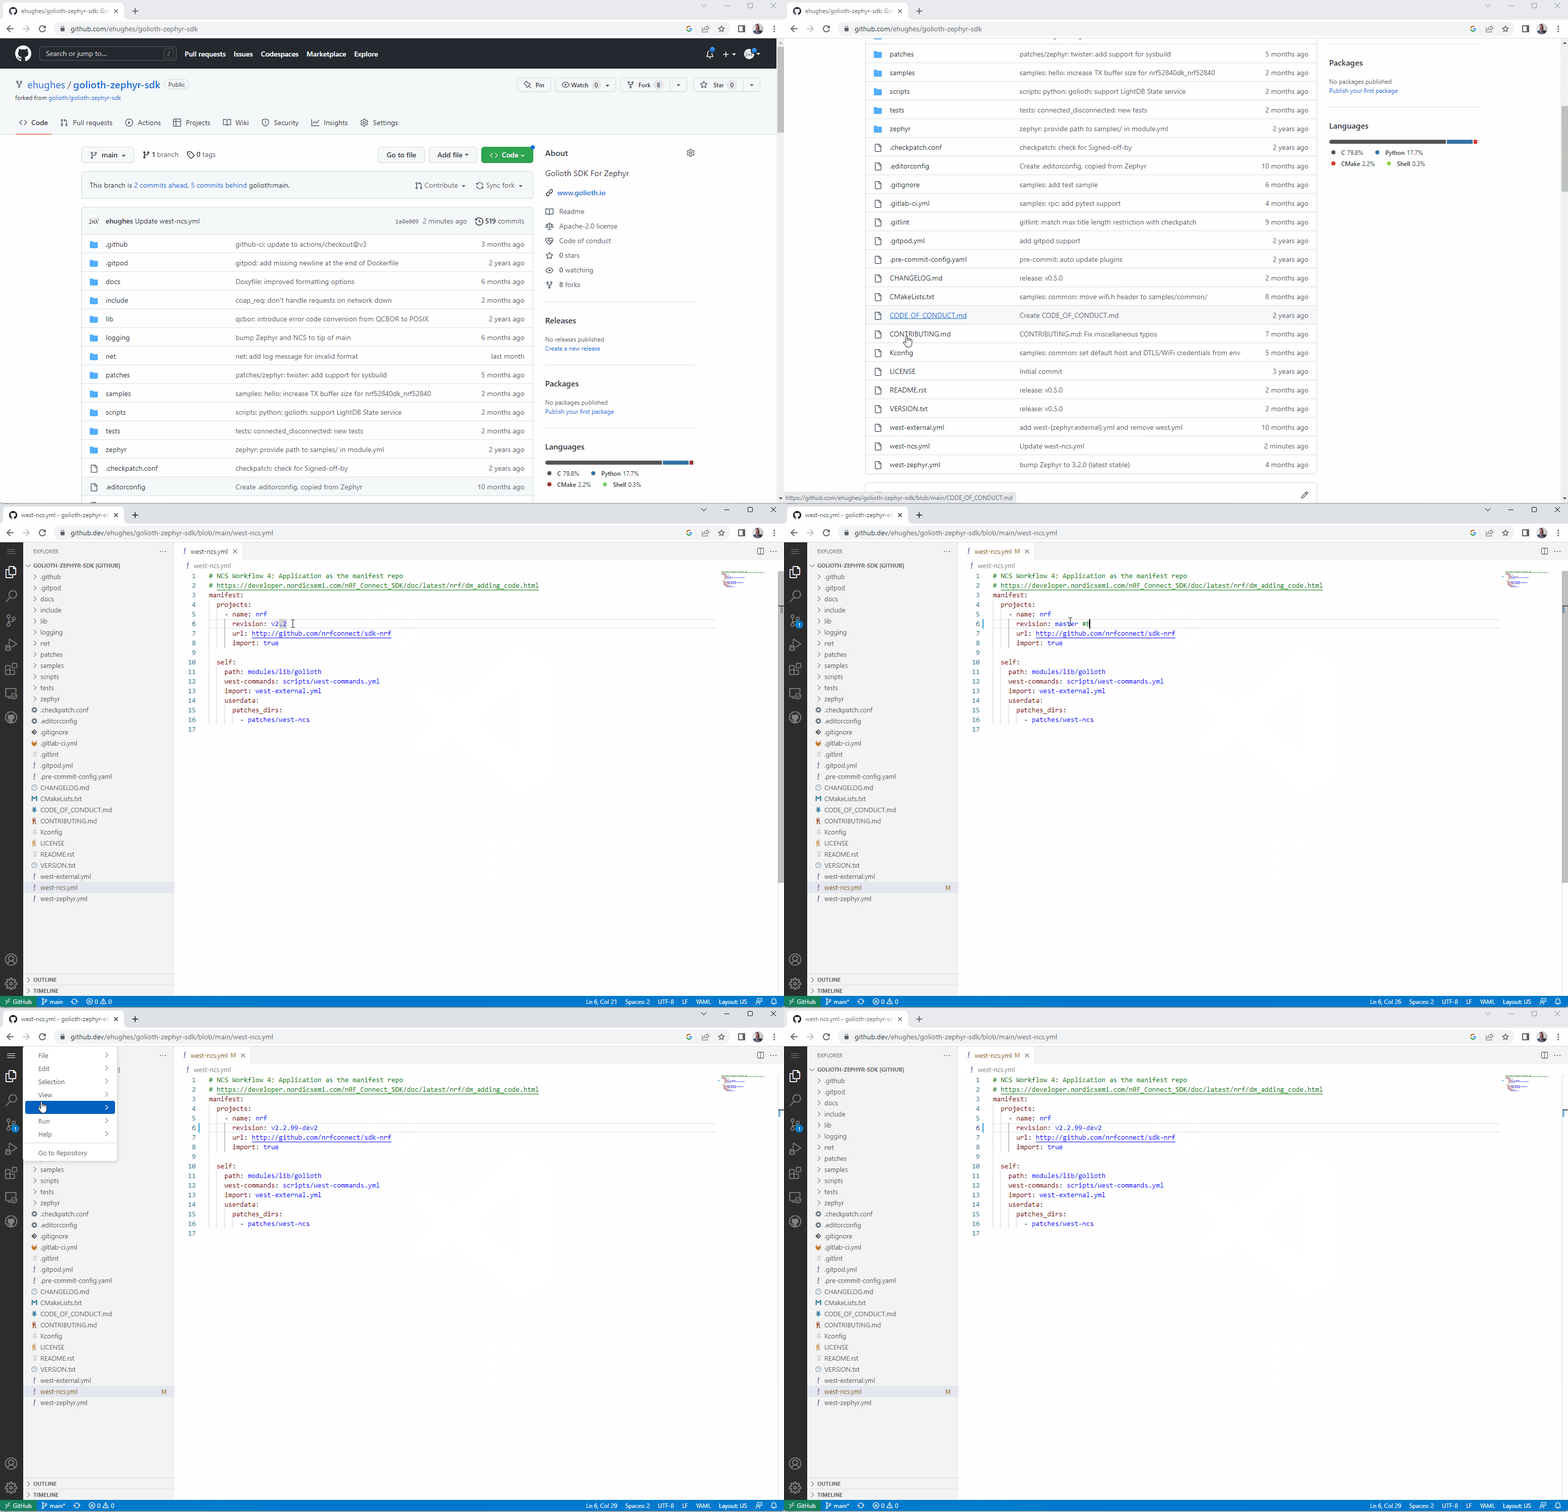
It literally is a “one-liner” to be on the bleeding edge, From here, I pull everything down to my local machine to get started.
Initializing my “sandbox” fork of the Golioth SDK
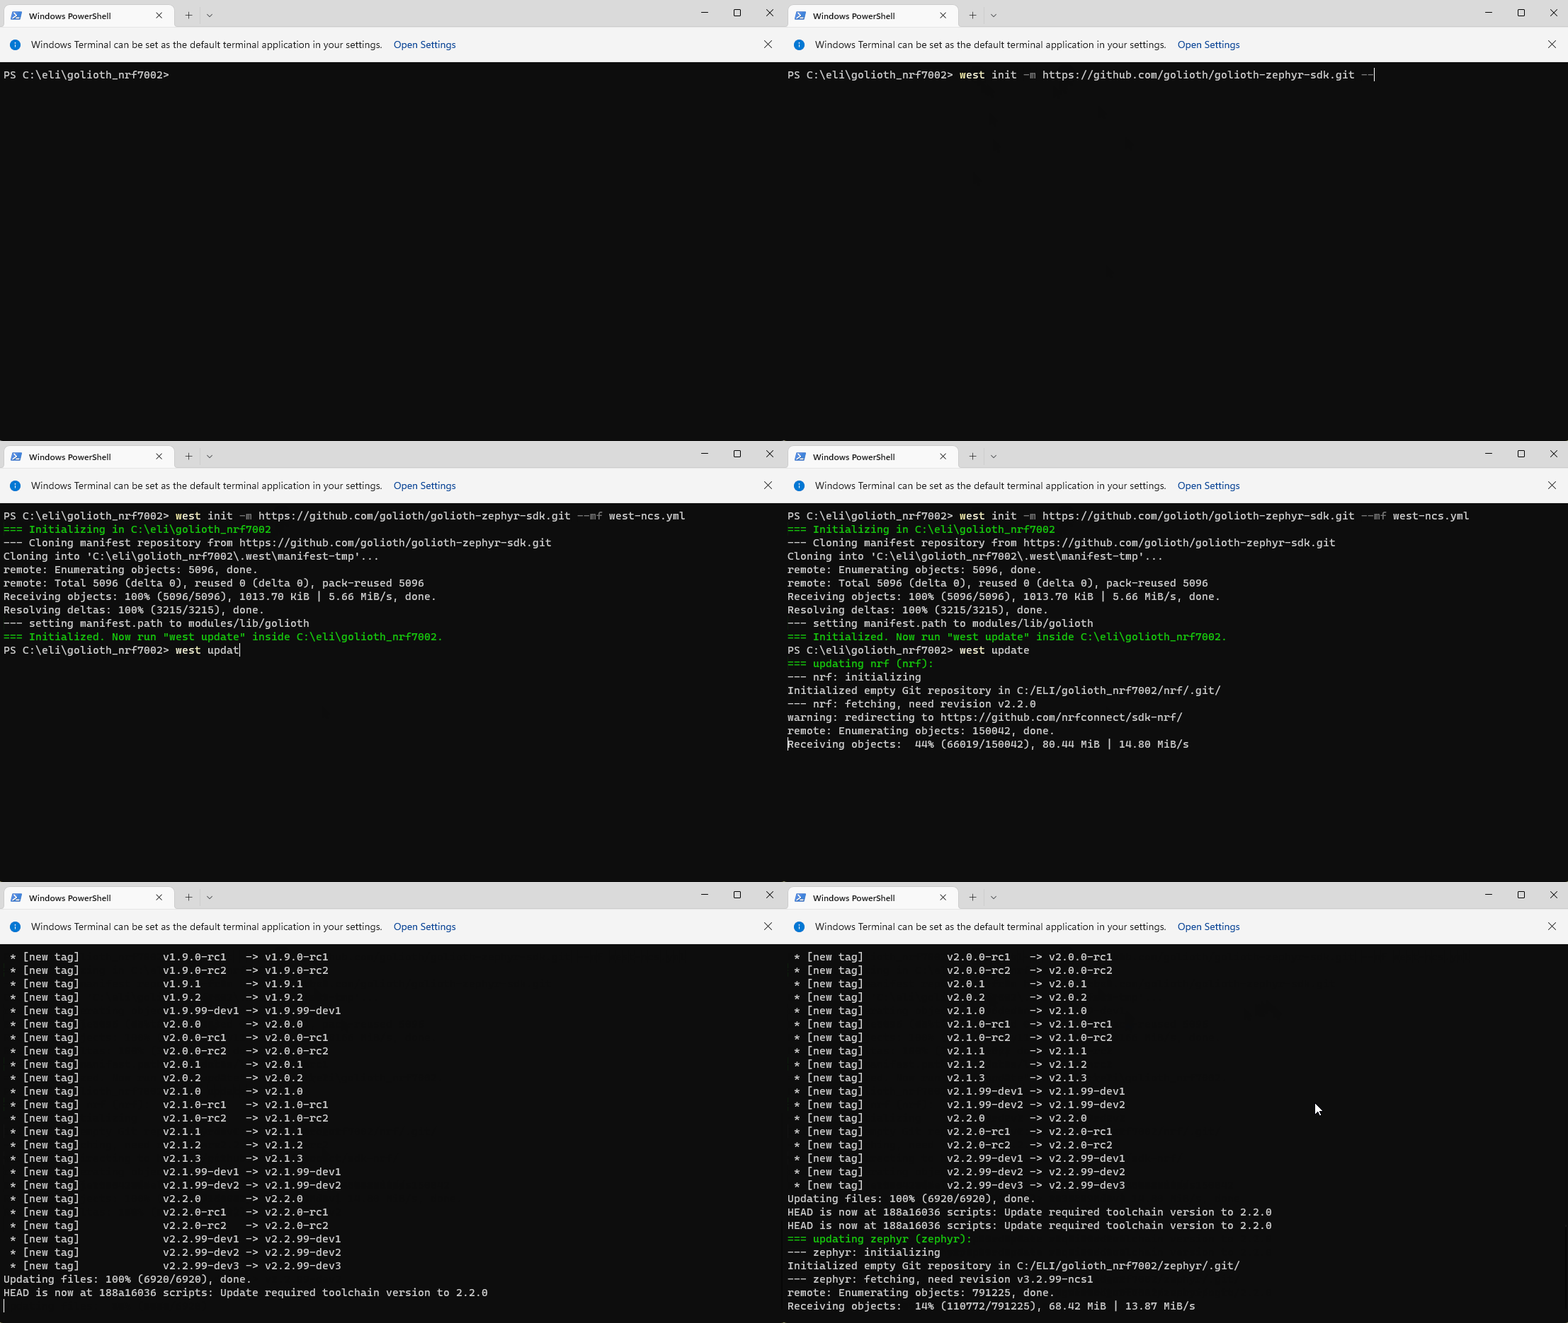
The west update operation can take a while the first time. It is pulling down all the repositories specified in the manifest.
Basic Verification of the nRF7002
Before I dove into the Golioth samples, I loaded a nRF7002 sample to verify Wi-Fi connectivity. Inside of nrf/samples/wifi/shell is a shell sample which exposes Wi-Fi and network behaviors.
Kicking off a “pristine” build using the nRF7002dk_nrf5340_cpuapp board
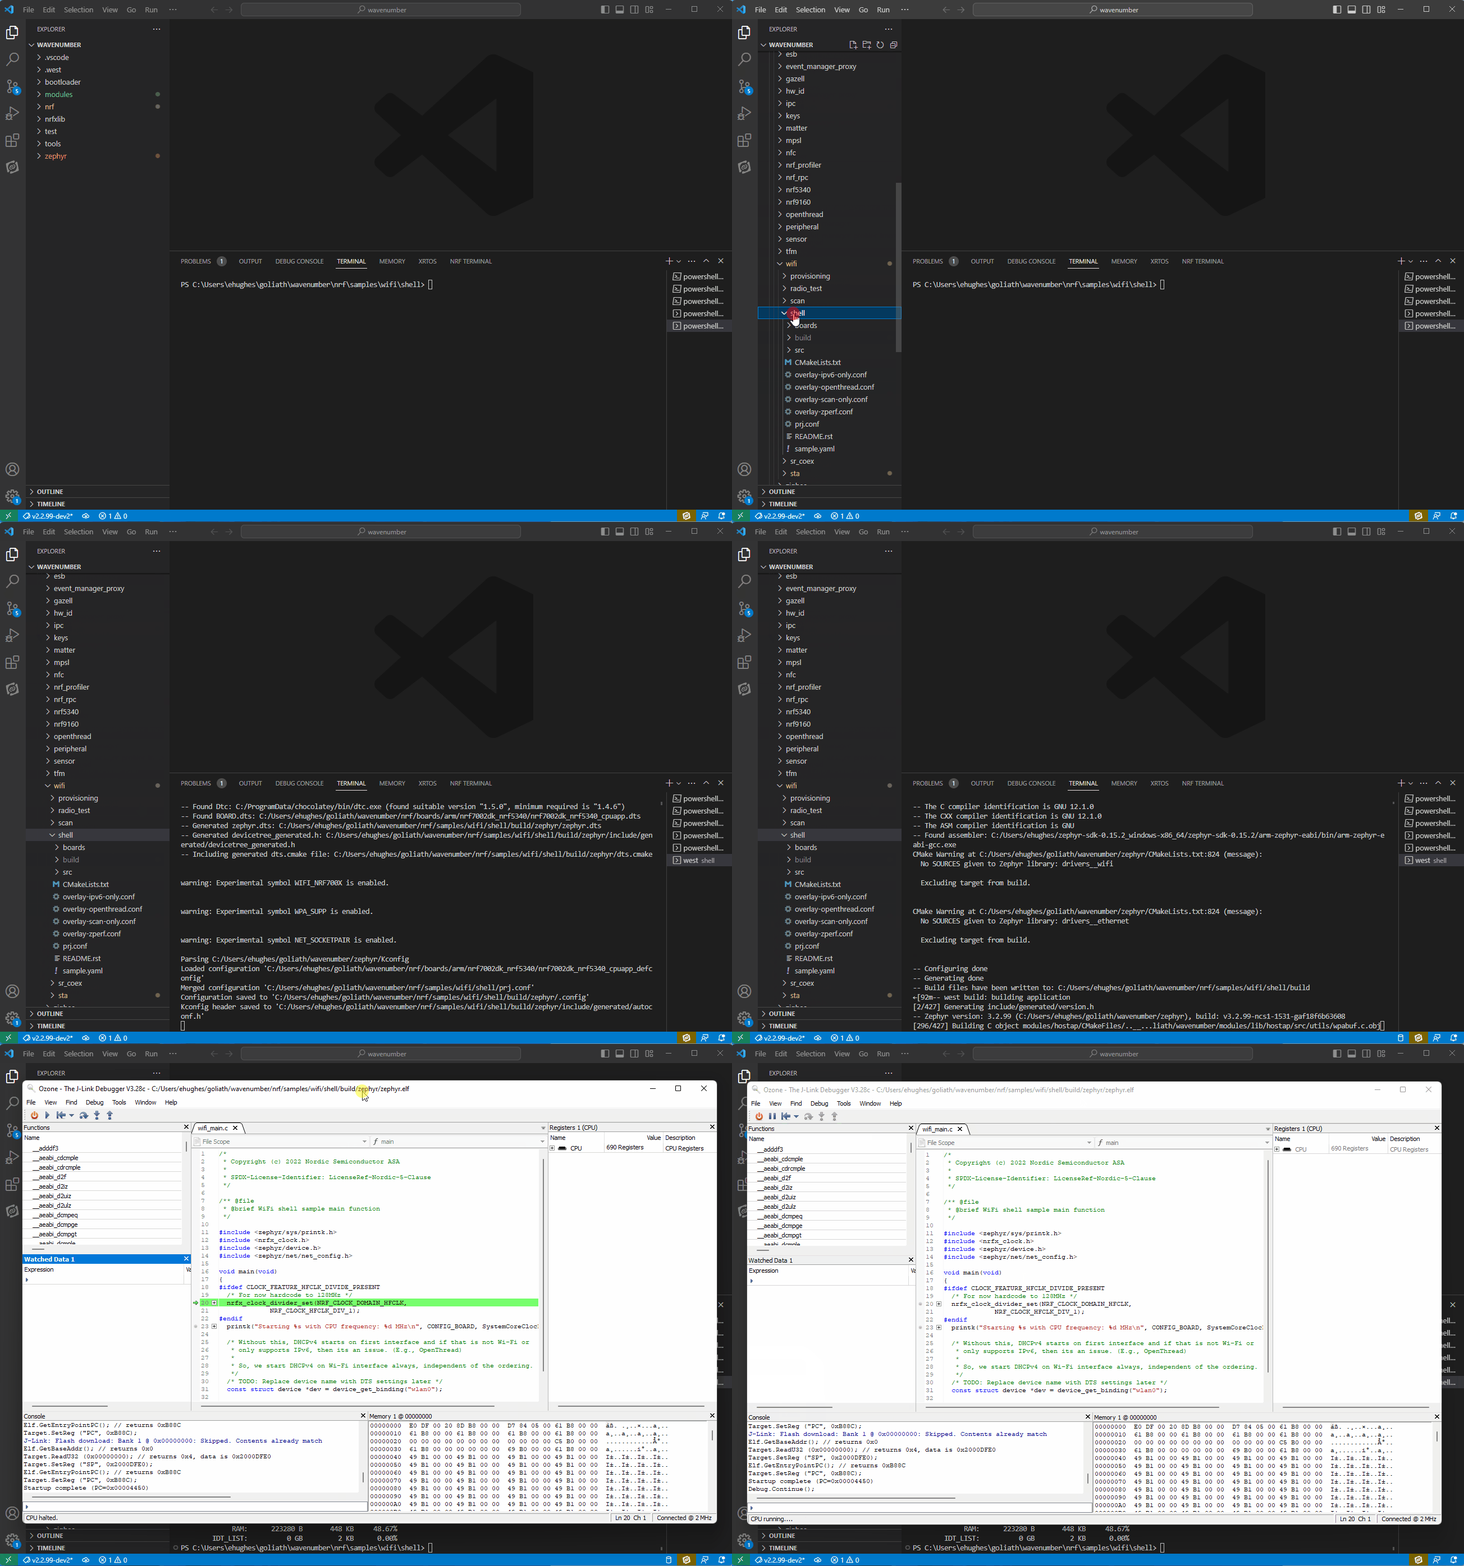
The nRF7002-DK has a J-Link debugger onboard and I prefer the Ozone programming/debugging experience. Note that the nRF7002 is a Wi-Fi companion the nRF7002-DK uses a nRF5340 as the host processor. The Zephyr Wi-Fi shell is a helpful tool. I could quickly connect to my guest network and perform network operations such as a ping and DNS query.
Using the Zephyr Wi-Fi Shell for connectivity verification
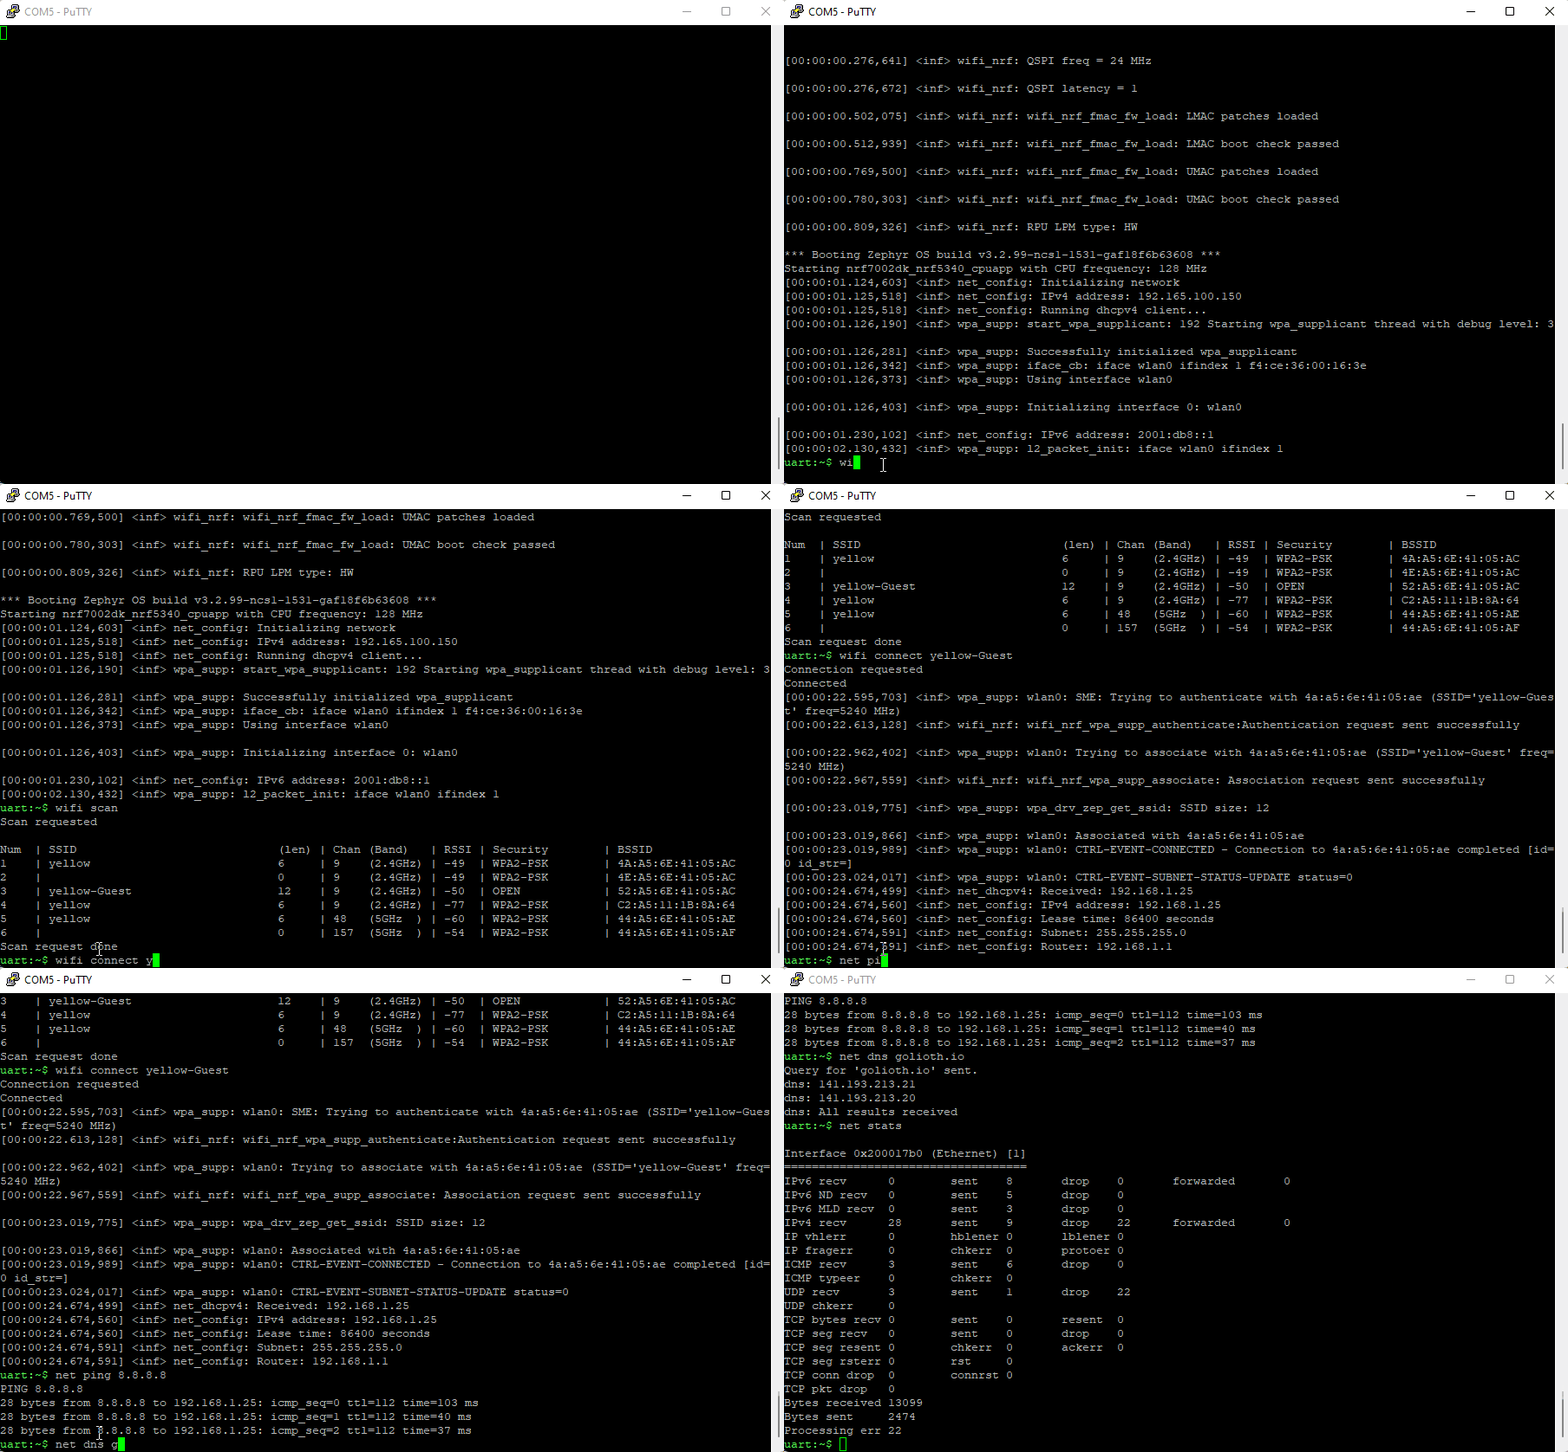
Getting to Golioth
I choose to start with the Golioth logging sample located in modules/lib/golioth/samples/logging inside the forked repository. Logging is a fundamental Zephyr feature and Golioth implements a logging backend to get data up to the cloud with minimal hassle. Since the nRF7002 board is on the bleeding edge, an nRF7002dk_nrf5340_cpuapp.conf board configuration had to be added to the logging sample. The Golioth examples have board Kconfig overlays located in boards directory inside of the example application folder. These overlays are used to select settings tailored for specific board or hardware platforms.
Adding a nRF7002dk_nrf5340_cpuapp board Kconfig overlay for the Golioth Logging Sample
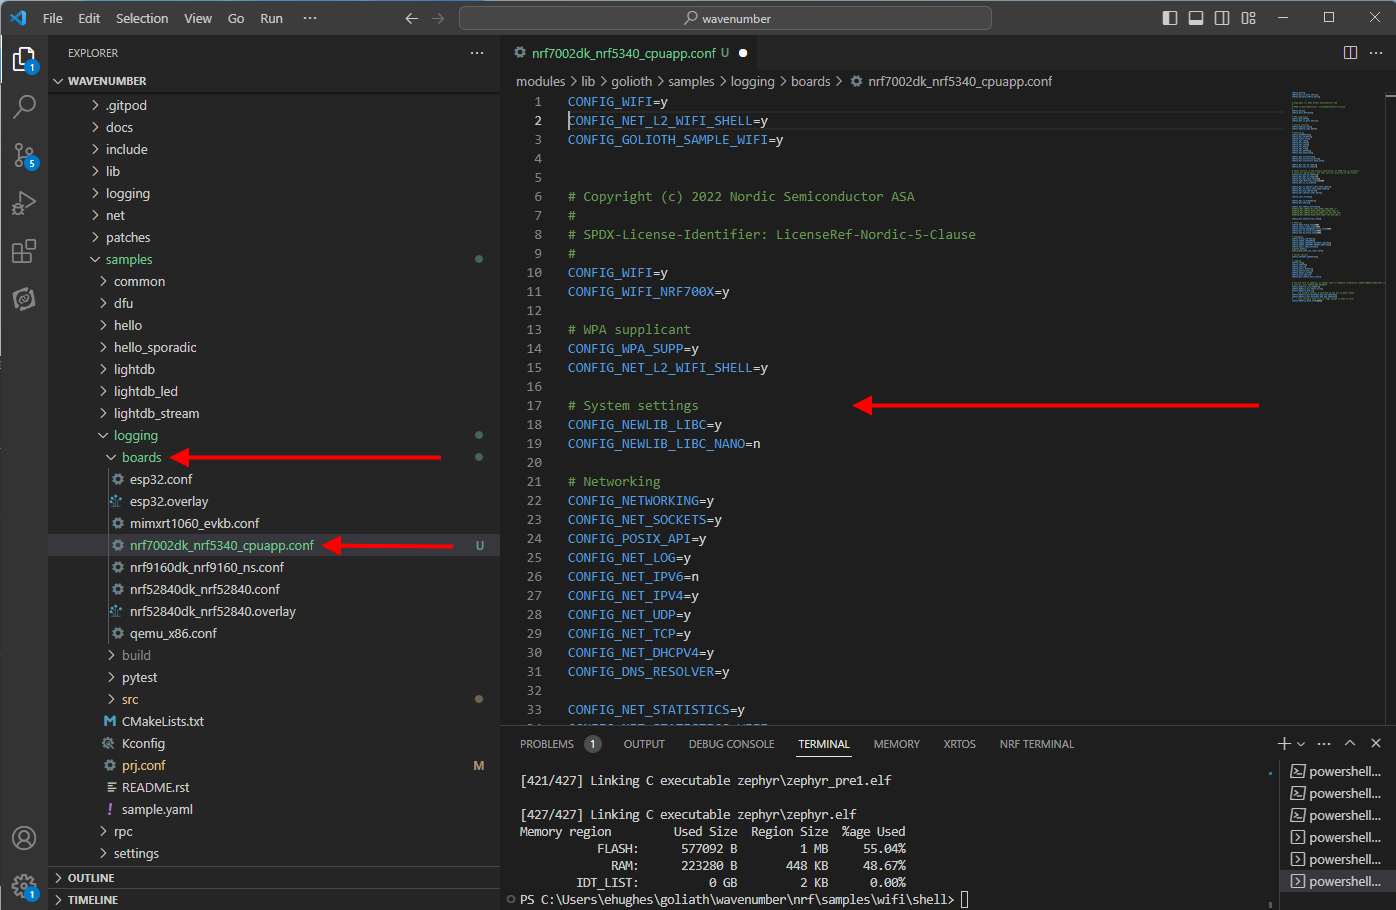
I started by using the esp32.conf as a template, renamed it to nRF7002dk_nrf5340_cpuapp.conf and then started hacking. Since I had just run the Wi-Fi shell example, I copied all the settings in the prj.conf from the shell application example. This approach is a bit overkill, but it is easy to remove unneeded settings once everything is functional.
I also had a hunch that TLS configuration might be an issue. Nordic has their own fork of mbedTLS, so I copied in the TLS settings from nrf9160dk_nrf9160ns.conf in the logging/boards folder
Working in a Nordic Specific TLS Configuration
Next I configured the application prj.conf with a device PSK_ID and PSK that I created via the Golioth control panel. FluffyBunny1 is now provisioned!
Adding in a Test PSK and ID
To get the Golioth Wi-Fi sample to auto-magically connect to my network at boot, the Wi-Fi SSID and password were added to the prj.conf as well. This is required because we haven’t pulled in the settings subsystem, which would allow me to configure things over UART.
Configuring the sample to auto connect to my Wi-Fi Network
One of the most frustrating “living on the edge” was trying to remember the password for my Wi-Fi network. Is it possible this task consumed the majority of my time on getting things booted? My frantic, scattered brain almost resorted to the “emergency” button on the route. Lucky for me, my spouse came to the rescue. Starting with the stock logging example, I personalized the main loop to be FluffyBunny1 friendly.
The FluffyBunny1 Logging Experiment
FluffyBunny1 is reporting!
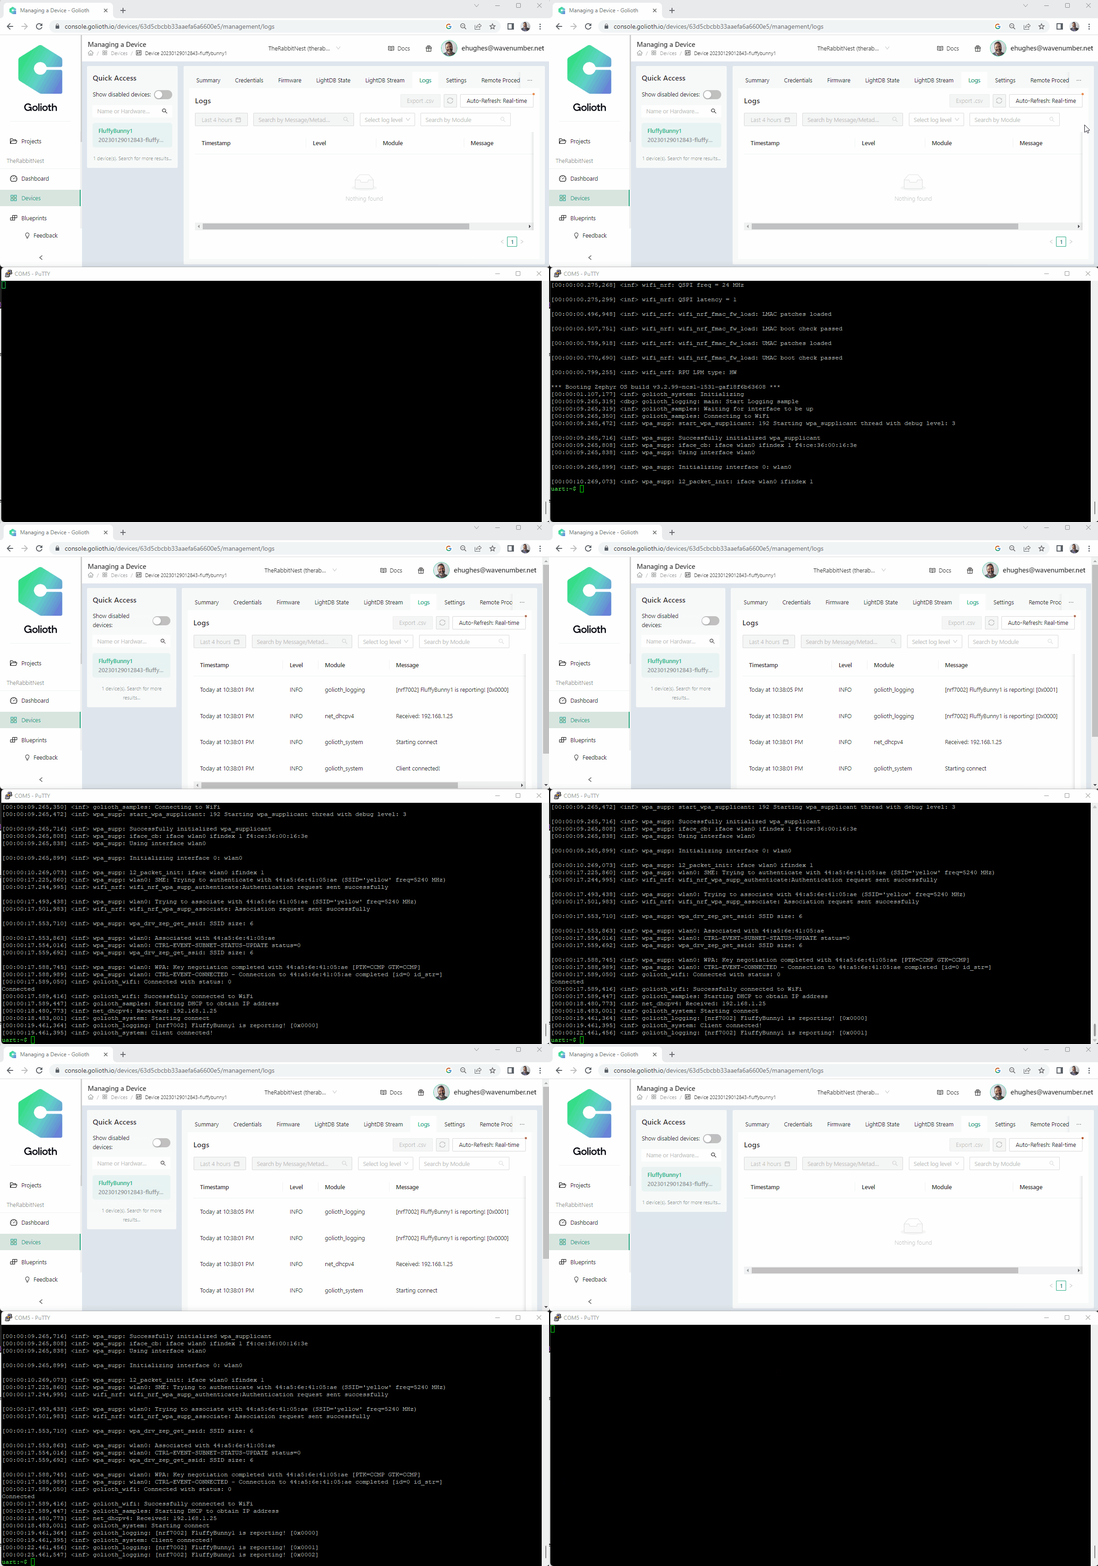
Great success! Secure communication to the cloud in minutes. Mind you, I had to do some hacking to get support for bleeding edge hardware, but getting this result was impressive.
Me being me, I couldn’t stop after seeing log messages flow to the Golioth backend.
Enabling Golioth RPC functionality
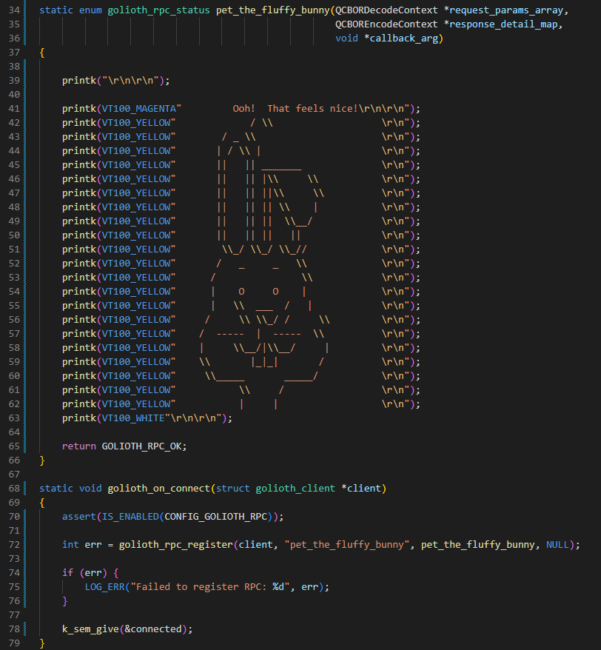
I had read about the ability to trigger a function on the device by using Remote Procedure Calls (RPCs) on Golioth and wanted to try extending this demo. I sprinkled in a bit of code to define an RPC callback and register it. It was surprisingly simple.
Code modifications to add a bit of RPC functionality
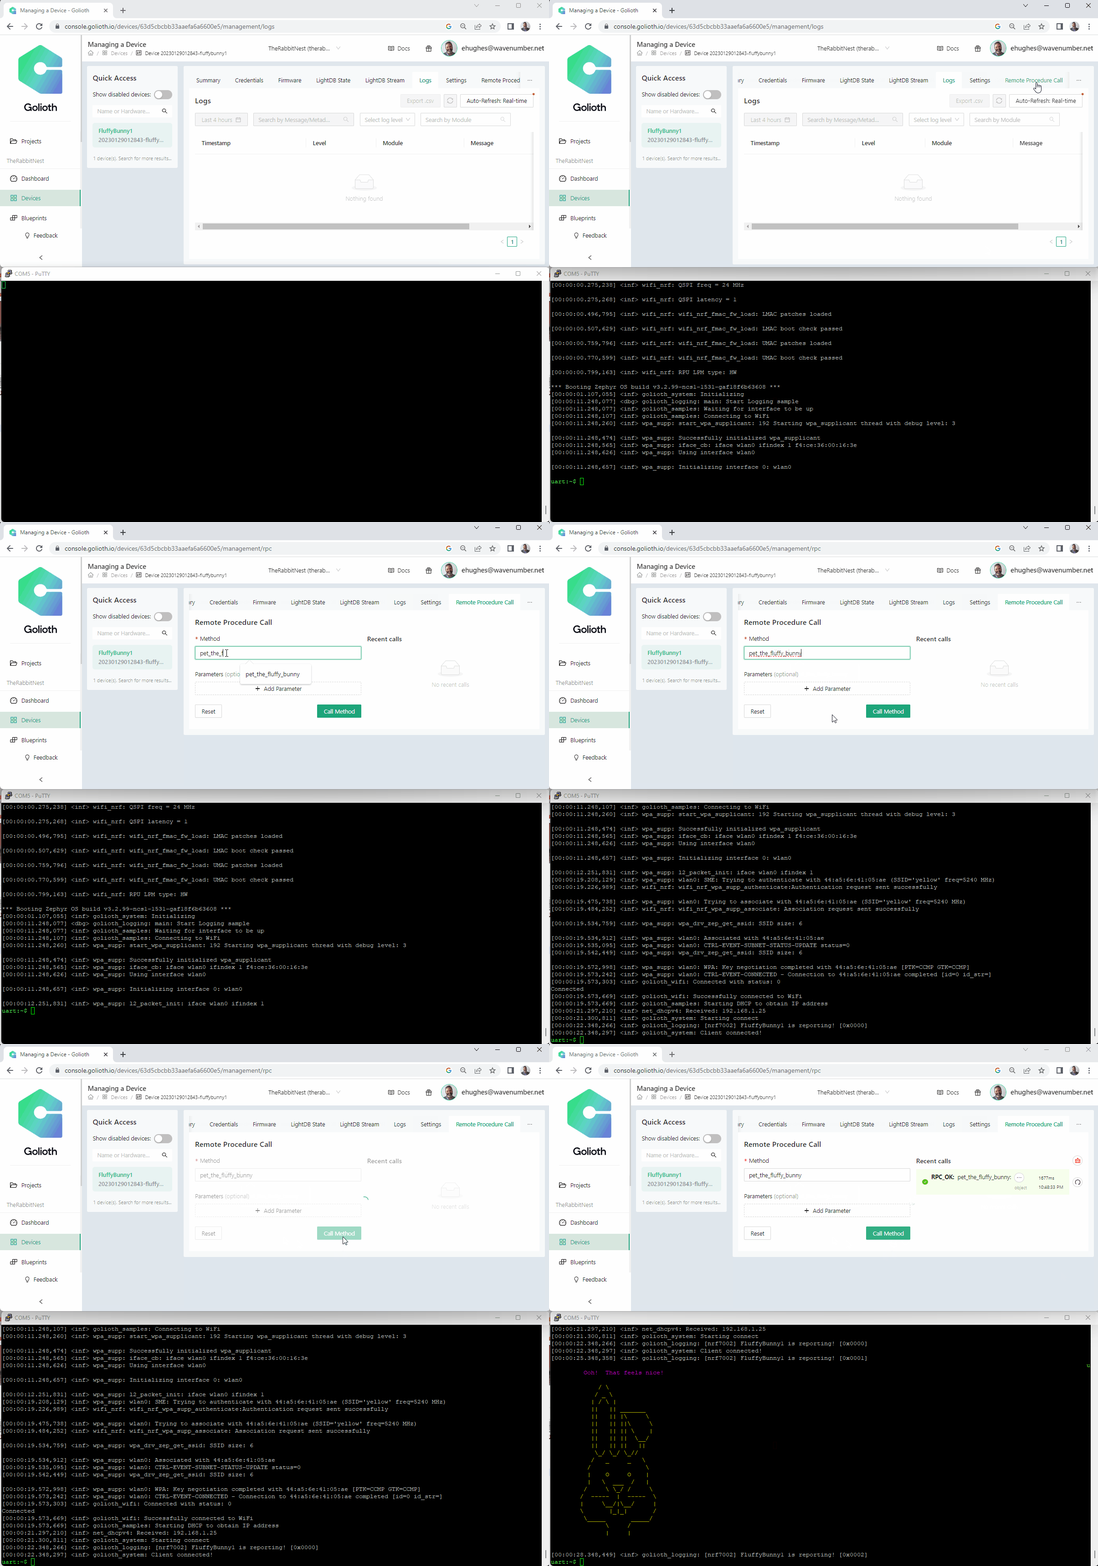
Adding in this function allowed us to “pet the fluffy bunny” directly from the control panel. Let’s look at how it happens on the console + the uart output.
Fluffy Bunny demo
Wrapping Up
My experience with Golioth and the nRF7002 was very smooth! I was quite impressed how quickly I achieve communication with the cloud backend. Even with the “bleeding edge” nature of the nRF7002, the Zephyr ecosystem simplified bring-up. Having Golioth essentially work “out of the box” on new hardware is a big plus.
I already have an idea for a new project using Golioth with custom sensors and the nRF7002. In a previous life I was involved with “raw” postgres and TimeScaleDB. After seeing Golioth LightDB Streams, I believe I have an approach to my newfound hobby: Bonsai monitoring.
I hope you can check out Golioth for your next connected project. The overall experience was Zen-like.




No comments yet! Start the discussion at forum.golioth.io