Nordic’s nRF9160 cellular modem includes a great peripheral called the Key Management Unit (KMU). This secure key storage mechanism lets you write keys to it which cannot be read back. However, they can still be used for DTLS authentication. In this video and blog post I’ll walk you through how to use the feature with the newest release of the Golioth Firmware SDK.
Overview of secure storage and TLS Tag authentication
With the v0.10.0 release of the Golioth Firmware SDK, credentials may be selected using the TLS secure tag. One example of hardware that embraces this is the Nordic nRF9160, which implements Zephyr’s TLS credential management API. Credentials (either x509 certificates or pre-shared keys) are stored on the device using a security tag. Pass that tag to the Golioth Firmware SDK and enable offloaded DTLS sockets in order to utilize those securely stored secrets.
Since these credentials are stored separately from firmware, they are persistent and you can store multiple different credentials. At runtime, pass the security tag as a parameter when creating the Golioth client and you’re all set.
How to store credentials on the nRF9160
Storing credentials on the nRF9160 is accomplished in two steps: first generate and prepare the credentials, then place them on the device using AT commands. (Don’t worry, there are helper tools to generate the AT commands for you.)
Generating Certificates
Golioth has long supported certificate authentication. You can follow the Certificate Authentication guide in our Docs. You will need to use the .pem version of the device certificate and key, and you’ll also need the root certificate from the CA that issued Golioth’s server certificate (we use LetsEncrypt.org).
- Generate the root certificate and device certificate by following the docs page.
- Download the CA certificate from Let’s Encrypt
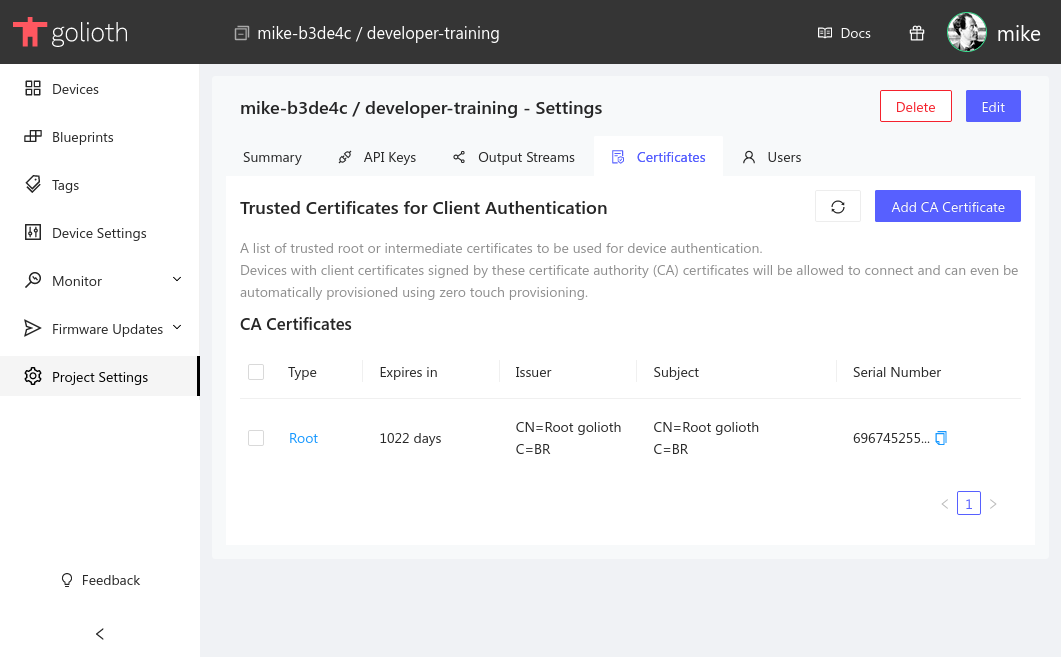
Now upload the public root certificate you generated (golioth.crt.pem) to Golioth so it may be used to authenticate your device. From the left sidebar choose Project Settings, select the Certificates tab, and click Add CA Certificate:
Generating PSK Credentials
You should not use PSK credentials for production purposes, certificates are far more secure. However, for demonstration purposes, here’s what you need to do to prepare your PSK:
- Use the Golioth console to add a new device.
- Copy the PSK-ID and PSK from your newly generated device.
- Use the following command to format your PSK as a HEX string—the format required by the nRF9160 (note this is only for the PSK, not for the PSK-ID).
echo "your-psk-here" | tr -d '\n' | xxd -ps -c 200
Loading Credentials onto the nRF9160
- Build and flash the Nordic
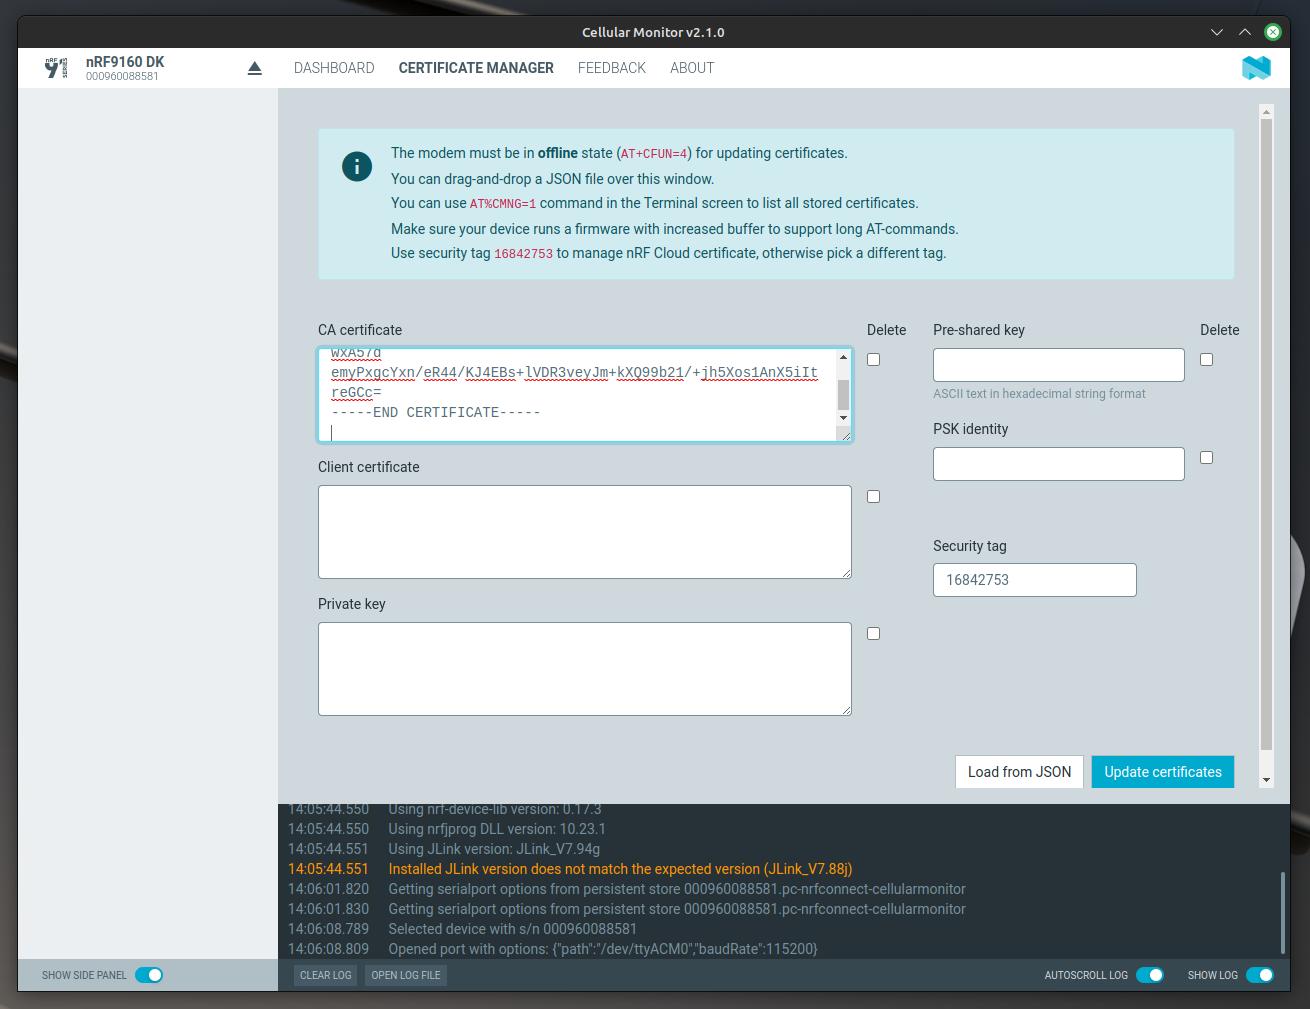
at_clientsample onto your device. - Use the Nordic nRF Connect for Desktop tools to write credentials to the device.
- Older versions of this tool will use the LTE Link Monitor, newer versions will use the Cellular Monitor.
- Choose the security tag you wish to use.
- Add your credentials to the interface and use the Update certificates button to write to the device. I found that I wasn’t able to write all three certificate artifacts at the same time and instead needed to enter them one at a time.
The credentials are stored using AT commands over a serial connection. You do not need to use the Nordic desktop tools if you don’t care to as the commands can be sent from any serial terminal connection.
Configure Golioth to locate credentials by tag
Now that our credentials are stored on the device, it is a trivial process to adapt the Golioth client to use them. In the video, I stored my certificates at security tag 24. I simply pass this to my application by adding the following Kconfig symbols to the prj.conf file:
CONFIG_GOLIOTH_AUTH_METHOD_CERT=y
CONFIG_GOLIOTH_SAMPLE_AUTH_TYPE_TAG=y
CONFIG_GOLIOTH_COAP_CLIENT_CREDENTIALS_TAG=24
(If you are testing PSK authentication instead of certificates, do not use the Kconfig symbol that sets CERT as the auth method. Without it, PSK will be selected by default.)
You must also remove one symbol from the boards/nrf9160dk_nrf9160_ns.conf file. This symbol tells the application to skip the offloaded DTLS sockets, however, that’s exactly the feature we want when using tag-based credential selection. Remove this line to re-enable socket offloading:
# Remove this line from nrf9160dk_nrf9160_ns.conf
CONFIG_NET_SOCKETS_TLS_PRIORITY=35
With that in place, compile the application and flash it to your nRF9160. It will now use the stored credentials to authenticate with Golioth.
Understanding the Golioth client config
The Golioth samples are configured to use a common library that configures the Golioth client on your behalf. However, the configuration process is very simple as I demonstrated it in the video.
Create a config struct that chooses TLS tags. Use the struct to pass the security number where the credentials are stored. Here’s what that would look like for my credential authentication example:
/* Config for credential tag authentication */
struct golioth_client_config client_config = {
    .credentials =
        {
            .auth_type = GOLIOTH_TLS_AUTH_TYPE_TAG,
            .tag = 24,
        },
};

client = golioth_client_create(&client_config);
Device Credentials with Golioth
The new APIs present in the Golioth Firmware SDK make it really easy to select credentials using tags. We’d love to hear how you plan to utilize this functionality. Show off your project on the Golioth Forum, or hit us up at the DevRel email!

No comments yet! Start the discussion at forum.golioth.io