I get to work with a lot of different hardware here at Golioth, but recently I’ve found my self gravitating to the NXP i.MX RT1060-EVKB evaluation board as my go-to development hardware. This brand new board is a variation on the RT1060-EVK, which (in addition to the extra ‘B’ in the new part number) adds an m.2 slot. But what catches my eye is the Ethernet. While I’ve previously written about using SPI-connected Ethernet modules, this board builds the connectivity right in. It’s stable, it’s fast, and has wonderful support in Zephyr.
The microcontroller that controls everything is the RT1062 which I first heard about three years back when the Teensy 4.0 was released. A 600 MHz powerhouse, it boasts 1024 kB of SRAM and is packed with peripherals. It’s an embarrassment of riches for my day-to-day firmware work, but makes sure I’ll never hit my head on the proverbial “development ceiling”.
Of course it’s not just the system clock that I’m happy about. This board has Ethernet built-in, so I’m not waiting for a WiFi connection (or really waiting for a cell connection) at boot. And it’s programmed via J-Link for a fast flash process and the RTT and debugging features that this programmer brings to the party.
Let’s take a look at how I get this board talking to Golioth, and what we might see in the near future.
An i.MX RT1060-EVKB demo
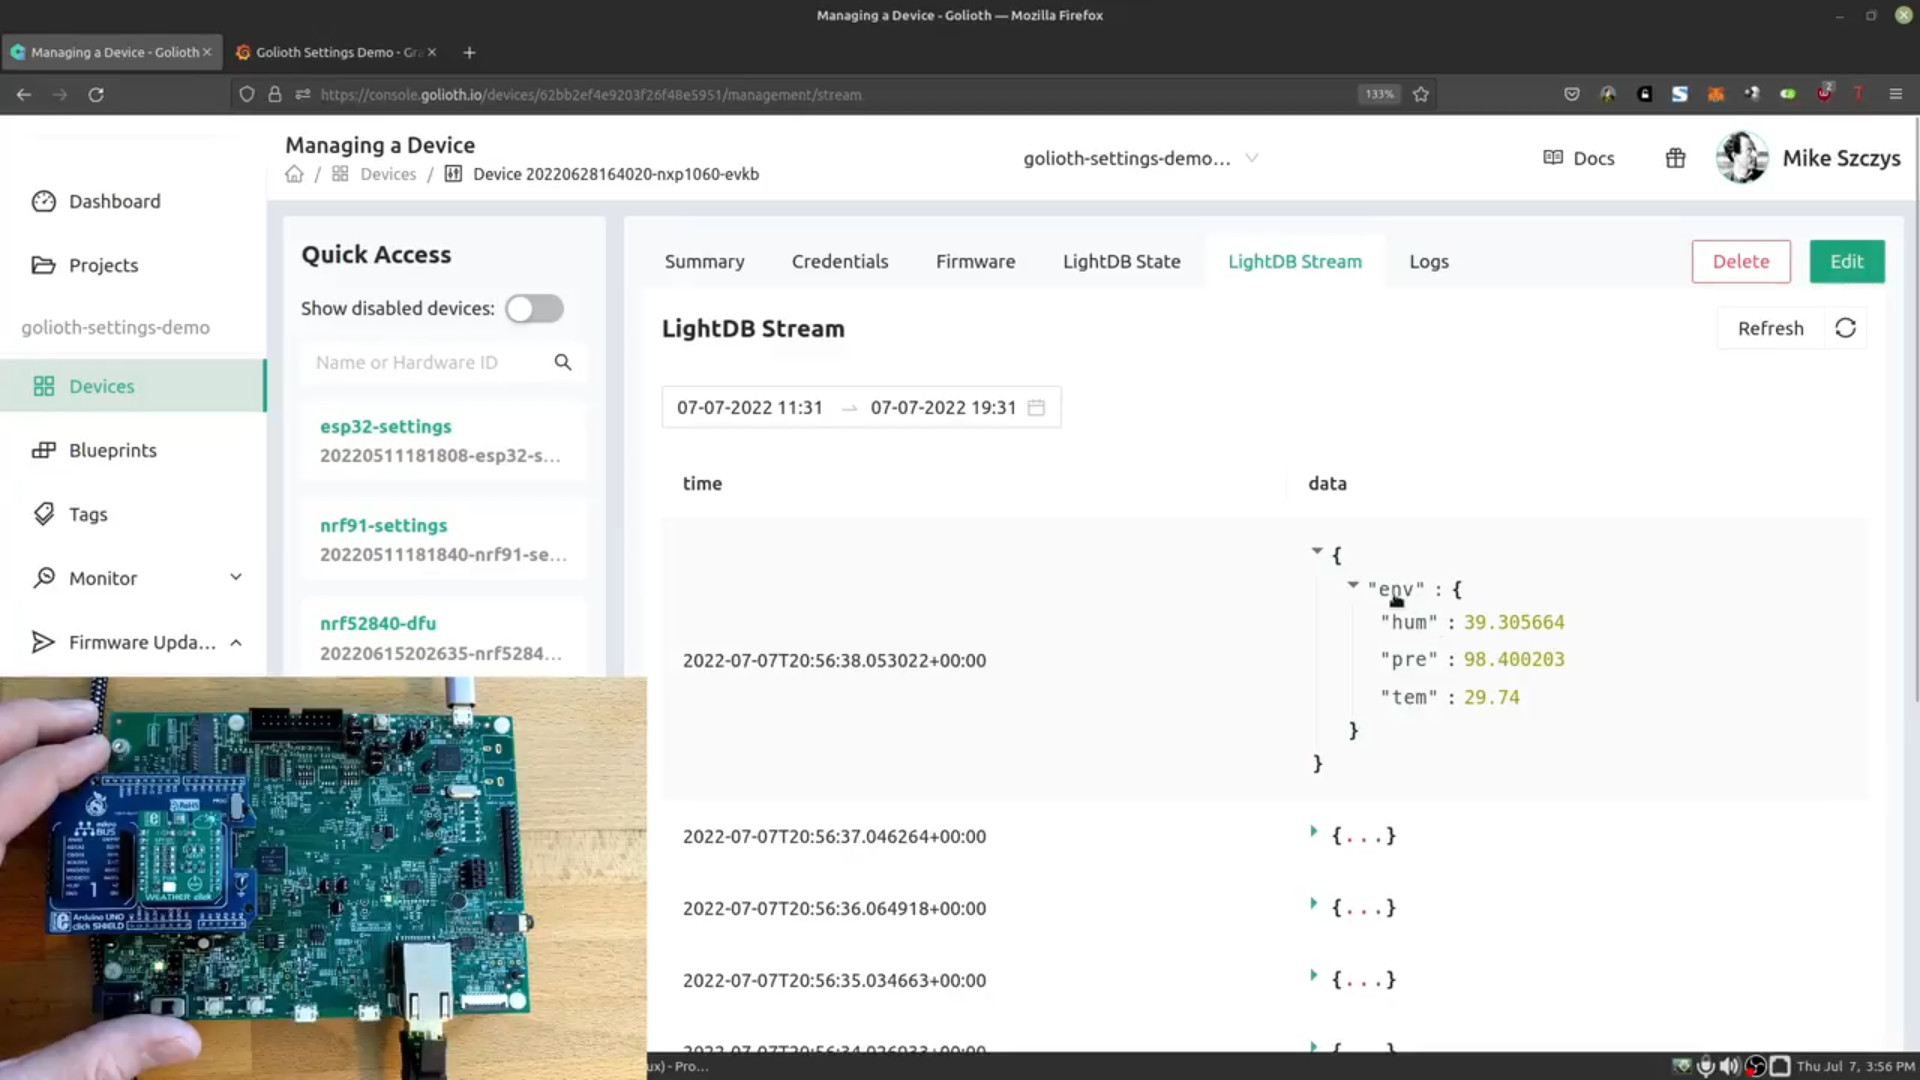
A couple of weeks ago I did a demo of the i.MX RT1060-EVKB board as part of NXP’s Zephyr webinar series. It gives you a great overview of the board and the ecosystem. I was even able to do a live demo of all the Golioth features like data management, command/control, remote logging, and OTA firmware updates. (Requires a free NXP registration to see the video.)
This board already has great support with the Golioth platform. My hope is to go further than that and add this to our list of Continuously Verified Boards. This would mean that we test and verify all official Golioth code samples with this board during every Golioth release. That’s a tall hill to climb, but it would be a snap if we used automated testing through a process called Hardware in the Loop; CI/CD that automatically runs compiled code on the hardware itself. This is already the case for our recently announced Golioth ESP-IDF SDK. Nick Miller is working on a post about how he pulled that off, so keep your eyes on the Golioth Blog over the next couple of weeks!
Get your tools ready
To build for this board you need a few tools, like the HAL library for NXP, LVGL, and the board files themselves.
Adding the NXP HAL and the LVGL library
Zephyr needs a hardware abstraction layer for NXP builds, and this board also depends on having the LVGL library installed. Add these to your west manifest:
- use the
west manifest --pathto help you locate which file to edit (modules/lib/golioth/west-zephyr.ymlin my case) - Add
hal_nxpandlvglto the name-allow list - Run
west update
With the edits in place, here’s what the relevant section of my west manifest looks like:
manifest:
  projects:
    - name: zephyr
      revision: v3.1.0
      url: https://github.com/zephyrproject-rtos/zephyr
      west-commands: scripts/west-commands.yml
      import:
        name-allowlist:
          - cmsis
          - hal_espressif
          - hal_nordic
          - mbedtls
          - net-tools
          - segger
          - tinycrypt
          - hal_nxp
          - lvgl
Cherry Pick the EVKB files (if needed)
This is a new board and the devicetree files for it were just added to Zephyr on Jun 5th. My Zephyr is still on v3.1.0 so it’s older than the commit that added support for the “evkb” board. I used git’s cherry-pick feature to add those files to my workspace. From the golioth-zephyr-workspace/zephyr directory run:
git pull
git cherry-pick 9a9aeae00b184cac308c1622676bb91c07dd465b
This will pull in just the commit that adds support for the new board.
Thar ‘b dragons
Here’s the thing about making manual changes to the Zephyr repo in your workspace: the west manifest doesn’t know you’ve done this. That means the next time you run west update, this cherry-picked commit will be lost.
Prep the hardware
Last, but not least, I used a J-Link programmer to flash firmware to this board. There’s just a bit of jumper setup necessary to make this all work. NXP has a guide to setting up an external J-Link programmer. I followed that page, using a USB cable on J1 for power (and a serial terminal connection when running apps).
Saying Hello
With that preamble behind me, I’m excited to get to the “Hello” part of things using the standard Golioth Hello sample. Running Golioth samples is fairly easy with this board, with just one puzzle piece that needs to be added for DHCP to acquire an IP address.
Use DHCP to get an IP address
I added a boards/mimxrt1060_evkb.conf file to create a configuration specific to this board. In this case, it selects the Ethernet and DHCP libraries.
CONFIG_NET_L2_ETHERNET=y
CONFIG_NET_DHCPV4=y
At the top of main.c I include the network interface library. Then in the main() function, we need to instantiate an interface and pass it to the DHCP function. This code requests an IP address from the network’s DHCP server.
#include <net/net_if.h>
struct net_if *iface;
LOG_INF("Run dhcpv4 client");
iface = net_if_get_default();
net_dhcpv4_start(iface);

client->on_message = golioth_on_message;
golioth_system_client_start();
Add credentials, then build and flash
The final step is to add your Golioth credentials before building and flashing the app. Add the credentials to the prj.conf file as outlined in the hello sample README. You can get your credentials by creating a new device on the Golioth Console.
CONFIG_GOLIOTH_SYSTEM_CLIENT_PSK_ID="my-psk-id"
CONFIG_GOLIOTH_SYSTEM_CLIENT_PSK="my-psk"
The build calls out the board name to specifically target our board and the newly added configuration. The flash command will automatically find the J-Link programmer and use it.
west build -b mimxrt1060_evkb samples/hello
west flash
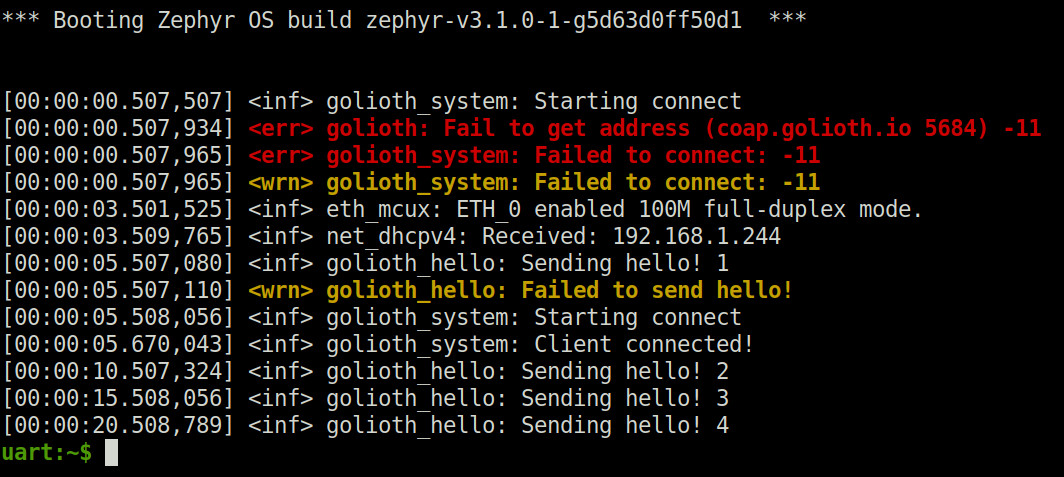
In my testing it only took about three seconds to get an IP address. From there, I was up and connected to Golioth after just another two seconds!
Off to the races
There really isn’t much to getting this up and running. Once I worked through this process I was able to test out all of the Golioth samples, including using the terminal shell to provision the board (ie: adding the Golioth credentials) and performing Over-the-Air (OTA) firmware updates.
As I mentioned earlier, the speed and reliability of this dev board keeps drawing me back. It’s not just the initial connection, but when testing out OTA, the 1024 byte block downloads seem to fly right by. I’m unsure if this is the Ethernet or the chip’s ability to quickly write to flash, but if you’re working with a 250 kB firmware file the difference over, say an ESP32, is obvious.
Give it a try using Golioth’s Dev Tier which includes up to 50 devices for your test fleet. The Golioth forum is a great place for questions on the process, and we’d love to hear about what you’re building over on the Golioth Discord server.
Keep your eye on this space. When Zephyr issues its next release we’ll roll forward the Golioth SDK to include the board files for the RT1060-EVKB, and my hope is that we’ll be able to include the DHCP call into our common samples code for a truly out-of-the-box build experience. We might even see a bit of that Hardware-in-the-Loop build automation I hinted at earlier. See you next time!

No comments yet! Start the discussion at forum.golioth.io