Golioth now supports Infineon parts via the ModusToolbox™. We added Golioth device management to the ecosystem a few weeks ago and the example code is available right now to run on Infineon’s line of microcontrollers talking to their Wi-Fi parts.
ModusToolbox™ (MTB) is a software support tool from Infineon Technologies. It includes partner SDKs alongside the company’s officially supported IDEs, drivers, and examples. You can pull in the Golioth example and all dependencies using the Eclipse IDE that is included in MTB, or via the command line tool.
Infineon’s PSoC™ 6 chips are feature rich 32-bit Arm microcontrollers. Paired with the Infineon 4343W, it’s a perfect platform for IoT device builders, and exactly the kind of constrained device that Golioth was built for.
Take advantage of Over-the-Air (OTA) firmware updates, time-series databases, state data management, remote logging, plus the command/control features like remote procedure call (RPC) and the device settings service. The API calls for each of these are demonstrated and well-commented in the golioth_main.c file.
Try the Golioth example using ModusToolbox™
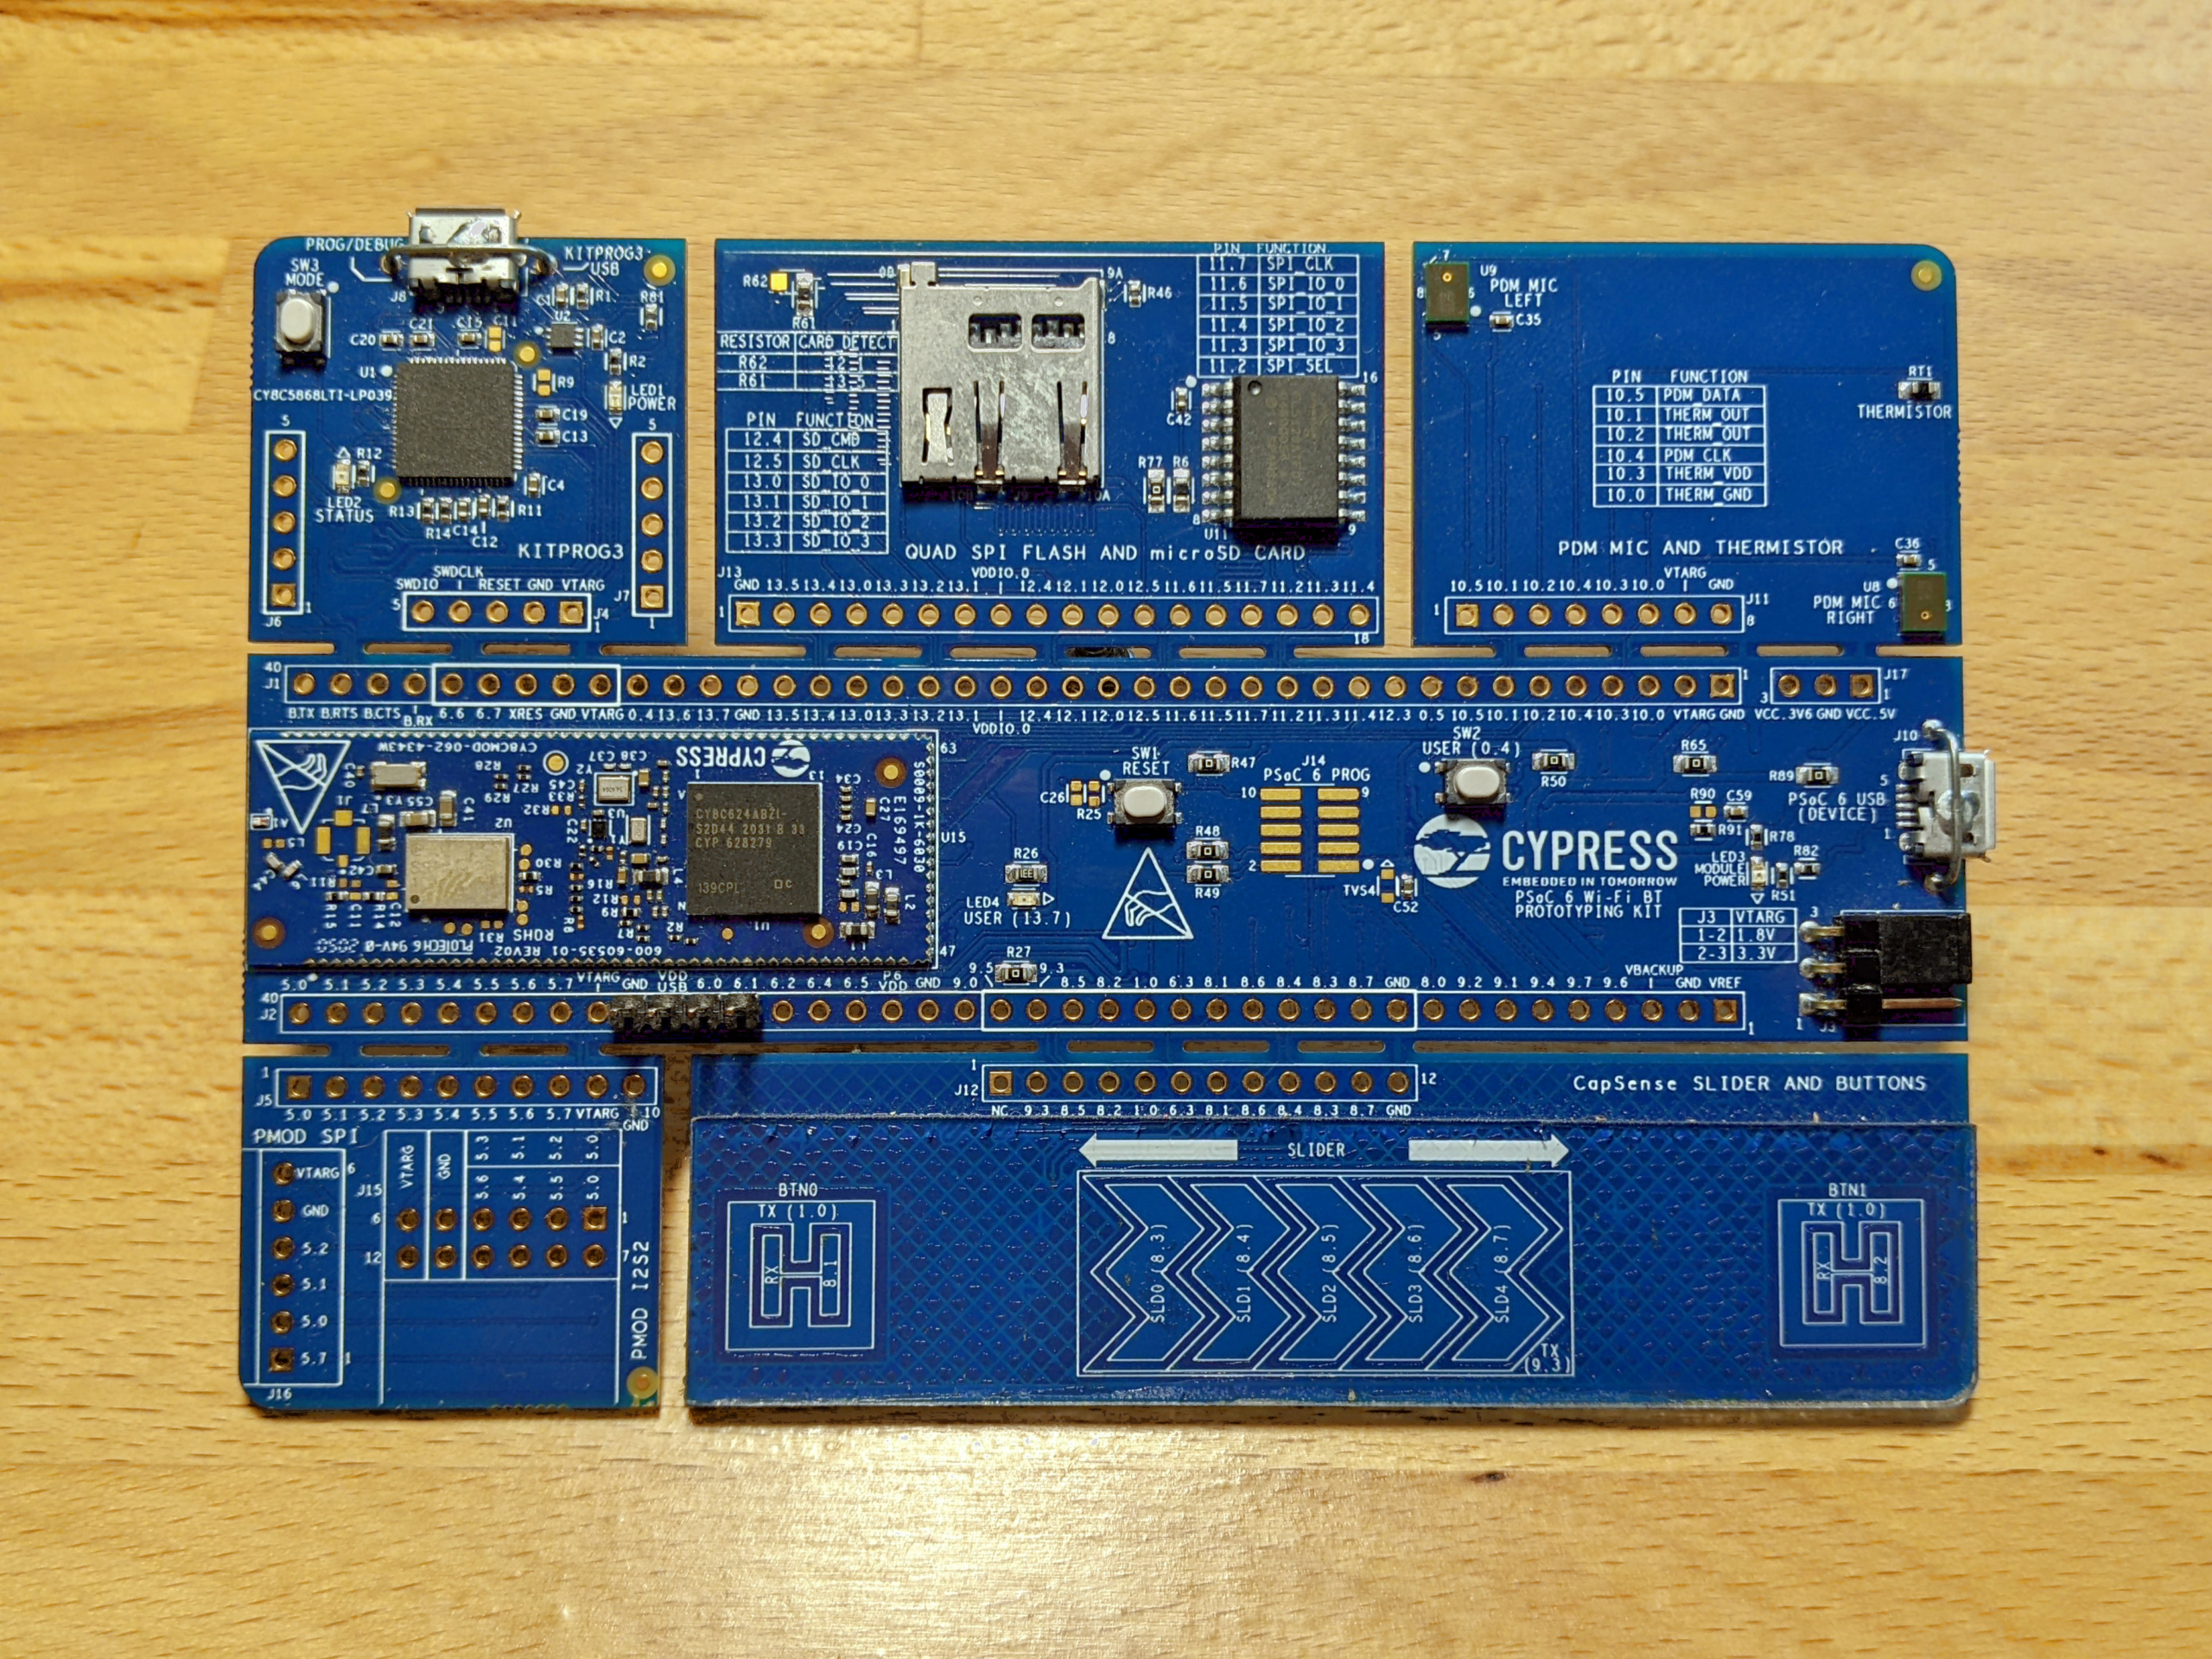
We run the Golioth example on the PSoC™ 6Wi-Fi BT Prototyping Kit (CY8CPROTO-062-4343W). Here’s how to try it for yourself:
1. Install Infineon’s ModusToolbox™
Begin by downloading and installing ModusToolbox™ for your system. Then run modustoolbox-eclipsewhich is located in the ide_3.0/eclipse/ subfolder.
2. Create a Golioth Example project
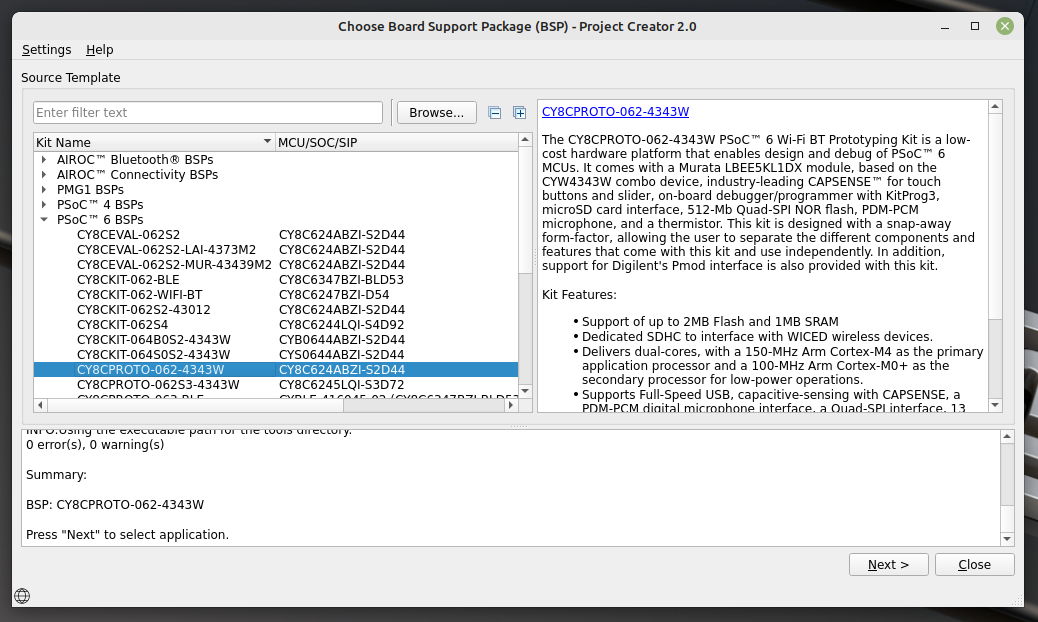
With the Eclipse IDE open, click on File→New→ModsToolbox Application. This will launch the project creator window.
Select the CY8CPROTO-062-4343W from the list of PSoC™ 6 boards and then click next.
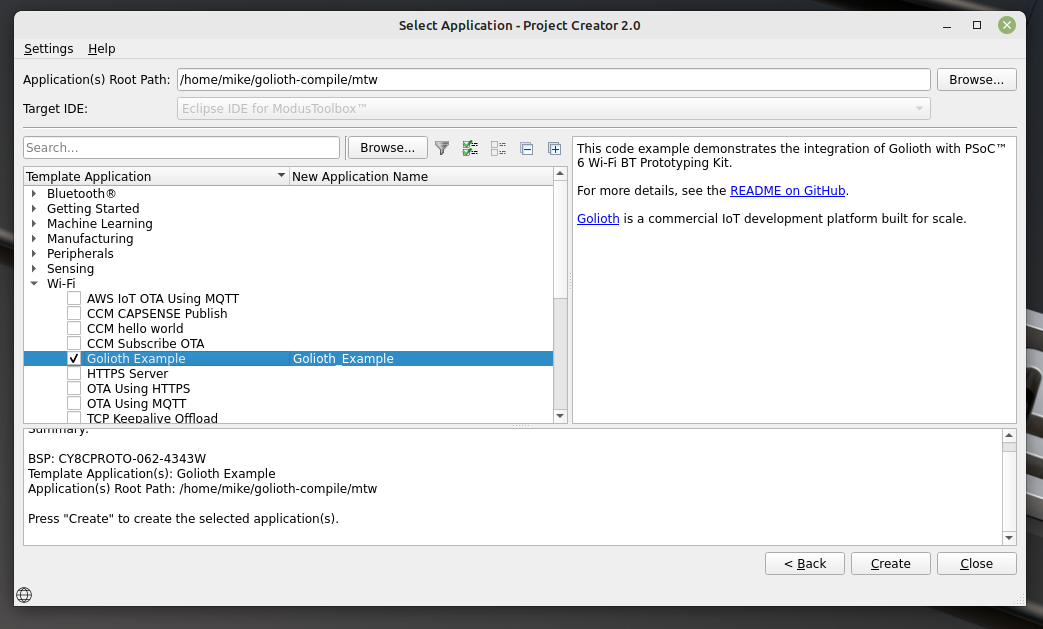
Choose the Golioth Example from the Wi-Fi list and click on the Create button. This will take a couple of minutes to clone the Golioth code and all dependencies.
3. Compile and Install MCUboot
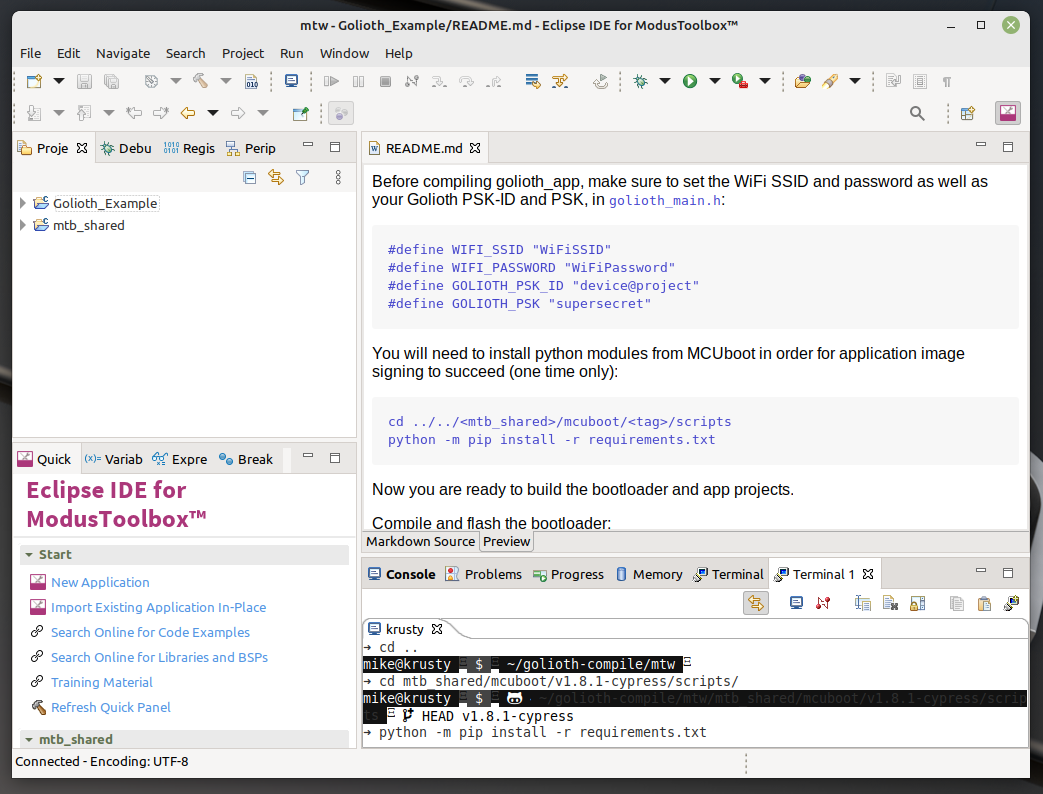
Golioth uses MCUboot as the secure bootloader for our Over-the-Air updates. Before flashing the app to the board, we need to compile and install MCUboot. I did this using the IDE’s built-in terminal.
First, we need to install the MCUboot dependencies.
cd ~/mtw/mtb_shared/mcuboot/v1.8.1-cypress/scripts/
python -m pip install -r requirements.txt
Now we can compile and flash MCUboot. Remember to plug a USB cable into the KITPROG3 connector on your PSoC™ 6 devboard before running the program command:
cd ~/mtw/Golioth_Example/bootloader_cm0p/
make build_proj -j8
make program_proj
4. Compile and flash the Golioth App
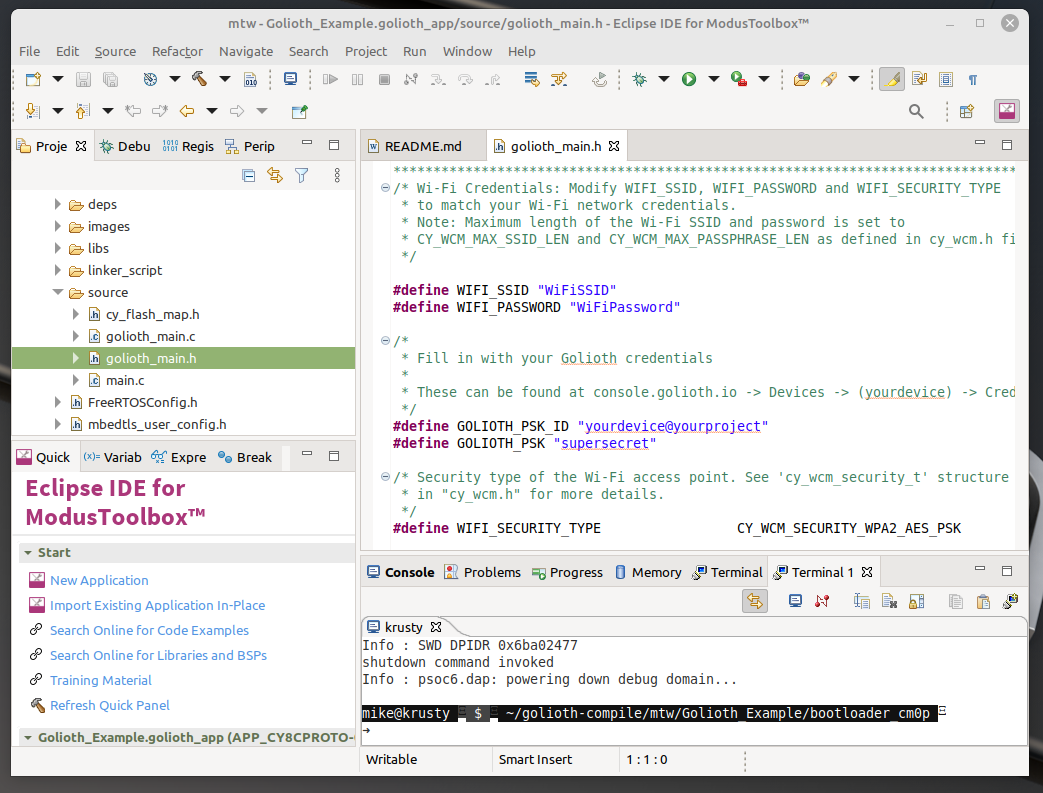
Before compiling the Golioth App we need to give it credentials to connect to Wi-Fi and also to authenticate with the Golioth server. These are set in the ~/mtw/Golioth_Example/golioth_app/source/golioth_main.hfile.
Use the Wi-Fi credentials for your local access point. Get device credentials from the Golioth Console. If you’ve haven’t yet set up an account, check out our Quickstart. (With Golioth’s Dev Tier your first 50 devices are free.)
Once you’ve saved your changes to the golioth_main.h file, use the terminal to compile and flash the app to your PSoC™ 6 board:
cd ~/mtw/Golioth_Example/golioth_app
make build_proj -j8
make program_proj
Taking the Golioth App for a test drive
[INF] MCUBoot Bootloader Started
[INF] External Memory initialized w/ SFDP.
[INF] boot_swap_type_multi: Primary image: magic=unset, swap_type=0x1, copy_don3
[INF] boot_swap_type_multi: Secondary image: magic=unset, swap_type=0x1, copy_d3
[INF] Swap type: none
[INF] User Application validated successfully
[INF] Starting User Application (wait)...
[INF] Start slot Address: 0x10018400
[INF] MCUBoot Bootloader finished
[INF] Deinitializing hardware...
External Memory initialized w/ SFDP.
=========================================================
[GoliothApp] Version: 1.0.0, CPU: CM4

=========================================================
[GoliothApp] Watchdog timer started by the bootloader is now turned off to mark.
[GoliothApp] User LED toggles at 1000 msec interval

WLAN MAC Address : 74:7A:90:D4:5F:04
WLAN Firmware    : wl0: Jul 18 2021 19:15:39 version 7.45.98.120 (56df937 CY) FWID 01-69db62cf
WLAN CLM         : API: 12.2 Data: 9.10.39 Compiler: 1.29.4 ClmImport: 1.36.3 Creation: 2021-07-18 19:03:20
WHD VERSION      : v2.5.0 : v2.5.0 : GCC 10.3 : 2022-09-23 13:14:02 +0800
Wi-Fi Connection Manager initialized.
Successfully connected to Wi-Fi network 'MyWiFiAP'.
IP Address Assigned: 192.168.1.153
Secure Sockets initialized
I (5515) golioth_main: Waiting to Golioth to connect...
I (5638) golioth_coap_client: Start CoAP session with host: coaps://coap.golioth.io
I (5643) libcoap: Setting PSK key

I (5649) golioth_coap_client: Entering CoAP I/O loop
I (5886) golioth_main: Golioth client connected
I (5996) golioth_fw_update: Current firmware version: 1.0.0
I (6060) golioth_fw_update: Waiting to receive OTA manifest
I (6258) golioth_fw_update: Received OTA manifest
I (6258) golioth_fw_update: Manifest does not contain different firmware version. Nothing to do.
I (6260) golioth_fw_update: Waiting to receive OTA manifest
I (6322) golioth_main: Synchronously got my_int = 42
I (6323) golioth_main: Entering endless loop
I (9006) golioth_main: Callback got my_int = 42
I (9286) golioth_main: Setting loop delay to 5 s
By monitoring the serial output from the device (that’s /dev/ttyACM0 on my system) we can see all the parts of the app at work. The board powers up and reports the firmware version before connecting to Wi-Fi. Once a Golioth connection is established it checks for firmware updates before it starts writing data to the cloud.
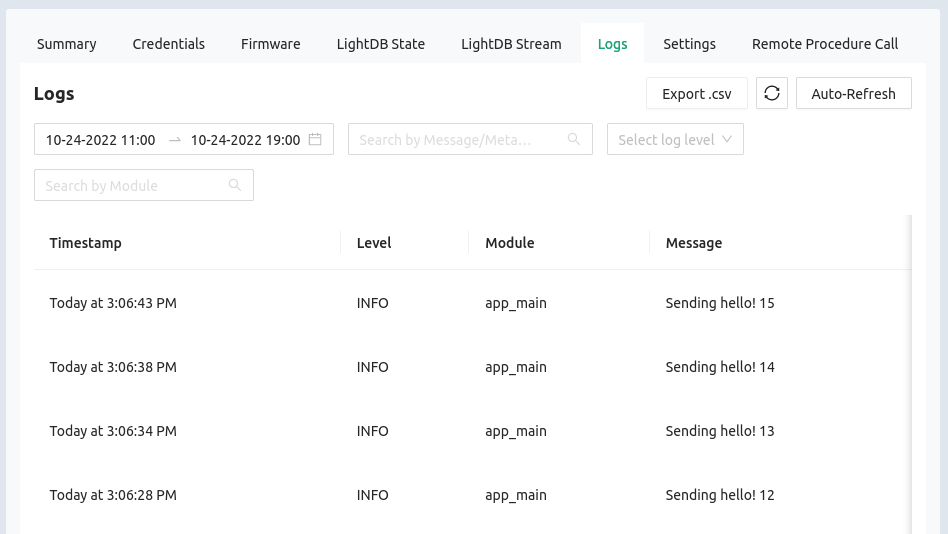
You can view device logs remotely through the Golioth console. Here we see “Sending hello!” messages arriving along with a counter.
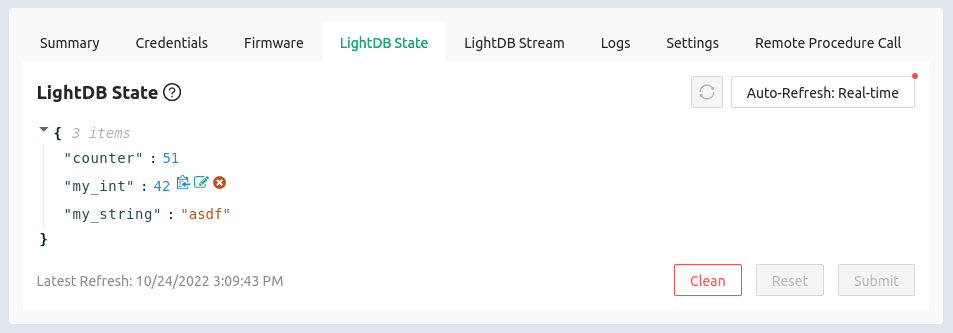
Viewing state data for this device, the counter variable is update at the same rate as the hello messages. In the Device Settings on the left sidebar of the console you can add LOOP_DELAY_S and remotely control how how many seconds the device pauses for between sending back these message. It’s a perfect way to control sensor reading frequency across your entire fleet.
Adding Golioth to existing Infineon PSoC™ 6 projects
The Golioth example that is part of ModusToolbox™ is a great blueprint for adding device management to your PSoC™ 6 projects. We’d love to hear what you’re build, and if you need some help we’re here to lend a hand. Show off your successes and post questions on the Golioth forum. Feel free to reach out to the Golioth Developer Relations team to set up a demo or discuss the needs of your IoT fleet.


No comments yet! Start the discussion at forum.golioth.io